Learning how to roll sushi at home saves you money and opens up a world of creative possibilities. Our team at KAZ Sushi Bistro has taught hundreds of home cooks to make restaurant-quality rolls in their own kitchens. You do not need years of training or expensive equipment to get started.
Restaurant sushi costs add up quickly. A single roll at a decent sushi spot runs $12 to $18. Making the same roll at home costs about $3 to $5 in ingredients. Over a year of regular sushi nights, that difference puts hundreds of dollars back in your pocket.
This guide covers everything you need to roll sushi at home in 2026. We will walk through traditional maki rolls, inside-out uramaki, and even a no-mat method for beginners. By the end, you will have the confidence to host your own sushi night.
Table of Contents
What You’ll Need to Make Sushi 2026
Good sushi starts with the right foundation. You need a few basic tools and quality ingredients before you start rolling.
Essential Tools
The bamboo sushi mat, called a makisu, costs less than $10 and lasts for years. Look for one with flat bamboo strips rather than round ones – they create tighter rolls. Wrap your mat in plastic wrap before use to keep rice from sticking to the bamboo.
A sharp knife matters more than an expensive one. A 7 to 8 inch chef’s knife works perfectly if you keep it razor sharp. Dull knives tear the nori and squash the rice instead of slicing cleanly.
You also need a rice paddle or wooden spoon, a large bowl for mixing rice, plastic wrap, and a clean cutting board. A small bowl of water nearby keeps your hands moist while working with sticky rice.
Key Ingredients
Sushi rice makes or breaks your rolls. Buy short-grain Japanese rice labeled “sushi rice” or “Calrose” rice. Long-grain rice does not work – it lacks the starch content needed to hold together. One cup of uncooked rice yields enough for 3 to 4 rolls.
Nori sheets come in packs of 10 to 50. Look for dark green, crisp sheets without holes or tears. Cheap nori tears easily when rolling and tastes fishy. Store nori in an airtight bag away from moisture – humidity ruins it within days.
Sushi vinegar combines rice vinegar, sugar, and salt. You can buy pre-mixed sushi vinegar or make your own by heating 1/4 cup rice vinegar with 2 tablespoons sugar and 1 teaspoon salt until dissolved.
For fillings, start simple. Cucumber, avocado, and cream cheese need no preparation beyond slicing. Cooked shrimp and smoked salmon offer protein without the complexity of raw fish. When you are ready, upgrade to sushi-grade raw fish from a reputable fishmonger.
How to Prepare Sushi Rice?
Perfect sushi starts with properly prepared rice. This step takes time, but shortcuts here ruin the final result.
Start by rinsing your rice thoroughly. Place short-grain rice in a bowl and cover with cold water. Swirl with your hand until the water turns milky. Drain and repeat 4 to 5 times until the water runs nearly clear. This removes excess starch that makes rice gummy.
Cook the rice using a 1:1.2 ratio of rice to water. For 2 cups of rice, use 2.4 cups water. A rice cooker produces the most consistent results, but stovetop works fine. Bring to a boil, then reduce heat to low and simmer covered for 15 minutes. Remove from heat and let stand covered for 10 more minutes.
Transfer the hot rice to a wide, non-metal bowl. A wooden hangiri bowl works best, but any large bowl suffices. Spread the rice to increase surface area and help it cool.
Drizzle sushi vinegar evenly over the rice. Use about 3 tablespoons per 2 cups of uncooked rice. Fold the vinegar into the rice with a cutting motion using your paddle. Do not stir or mash – you want to separate grains while coating them evenly.
Cool the rice to room temperature before rolling. This takes 20 to 30 minutes. Fan the rice while mixing to speed cooling and give it a nice shine. Warm rice tears the nori and creates mushy rolls. Based on forum feedback from hundreds of home cooks, this cooling step causes more failures than any other mistake.
Cover your prepared rice with a damp cloth if not using immediately. Refrigerated rice hardens and loses the sticky texture essential for good rolls. Make rice the same day you plan to roll.
How to Roll Maki Sushi (Traditional Method)
Maki sushi represents the classic roll style with nori on the outside. This method offers the best starting point for beginners.
Lay your bamboo mat flat on your work surface. Place one sheet of nori on top with the shiny side facing down and the rough side up. The rough texture grips the rice better.
Wet your hands in your water bowl. Grab a handful of prepared sushi rice about the size of a tennis ball. Spread the rice evenly across the nori, leaving a 1-inch strip bare at the top edge. This bare strip seals the roll.
Use your fingertips to spread rice gently. Do not press or mash – you want a layer about 2 to 3 grains thick. Uneven rice creates lopsided rolls with thick and thin spots.
Place your fillings in a line across the center of the rice. Do not overfill. Use about 2 to 3 tablespoons of filling total. Overstuffing makes rolling impossible and causes burst rolls.
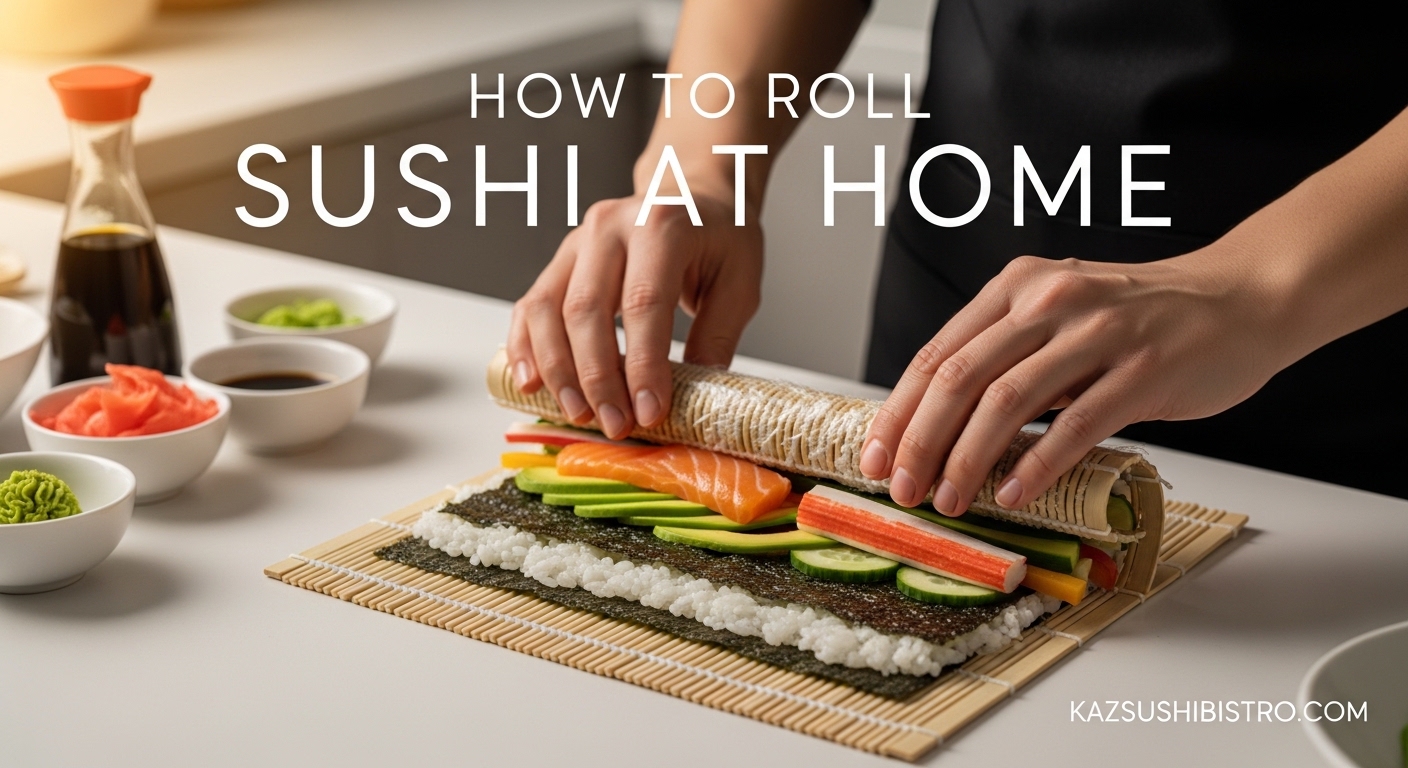
Lift the edge of the mat closest to you with your thumbs. Hold the fillings in place with your index fingers. Roll the mat forward, tucking the nori around the fillings. Continue rolling forward, using the mat to shape and compress the roll.
Apply gentle, even pressure as you roll. The goal is a tight cylinder without gaps. Squeeze too hard and you squeeze out the fillings or tear the nori. Too loose and the roll falls apart when cut.
When you reach the bare strip of nori, moisten it slightly with water. Complete the roll and press gently to seal. The roll should feel firm and hold its shape when you release the mat.
Set the completed roll aside, seam down, while you make the next one. Let it rest for 2 to 3 minutes before cutting. This helps the nori adhere and the rice set.
How to Roll Uramaki (Inside-Out Rolls)
Uramaki puts rice on the outside and nori on the inside. California rolls use this style, often coated with sesame seeds or tobiko.
Start by wrapping your bamboo mat completely in plastic wrap. This prevents rice from sticking to the mat itself.
Lay a sheet of plastic wrap on top of your wrapped mat. Place a half sheet of nori on the plastic, shiny side down. Using half sheets works better for uramaki because you add another layer of rice on the outside.
Spread rice over the nori exactly like the maki method, but extend it all the way to the edges. You want a thin, even layer covering every bit of the nori.
Flip the rice-covered nori over so the rice faces down on the plastic wrap. The nori now faces up. Place your fillings in a line across the center of the nori.
Roll using the plastic wrap as your guide, not touching the rice directly with the mat. Lift the edge and roll forward, tucking tightly. The plastic wrap keeps the rice from sticking to the mat while you shape the roll.
Once rolled, press gently to shape. Sprinkle sesame seeds or tobiko on a plate and roll the completed uramaki across them to coat the outside.
Unwrap carefully and set aside to rest seam down. The rice outside makes these rolls slightly trickier to cut cleanly.
How to Roll Sushi Without a Mat?
You do not need a bamboo mat to make sushi. This tea towel method works surprisingly well for beginners testing the waters before buying equipment.
Lay a clean tea towel flat on your counter. Cover it completely with a sheet of plastic wrap, tucking the edges under if needed. The towel provides padding and structure like a mat.
Place your nori on the plastic-covered towel, shiny side down. Spread rice and add fillings exactly as you would with a mat.
Lift the edge of the towel and plastic together. Roll forward, using the towel to apply pressure and shape. The towel cannot grip as firmly as bamboo, so you must use your hands more actively to tuck and tighten.
This method works best for simple maki rolls. Uramaki proves more challenging without a mat because you lose the ability to grip through the plastic wrap. Start with basic cucumber or avocado rolls when using this technique.
Some creative home cooks use a gallon-size zip-top bag instead. Fill it partially with rice to create a flexible cylinder, then roll with that. Experiment to find what works in your kitchen.
How to Cut Sushi Rolls Perfectly?
A perfectly rolled sushi roll looks amateur if cut poorly. Clean cuts separate good home sushi from restaurant-quality presentation.
Start with a razor-sharp knife. Run it through a sharpener before you begin. A dull knife crushes the roll and pulls the nori, creating jagged edges and misshapen pieces.
Keep a bowl of water nearby. Dip your knife blade in water before every single cut. Wet knives glide through rice without sticking. Dry knives drag rice grains and create messy slices.
Position your roll on the cutting board. For a standard roll, aim to cut 8 equal pieces. Cut the roll in half first. Then cut each half in half. Finally, cut each quarter in half. Working from the center out helps maintain even sizing.
Use a gentle sawing motion rather than pressing straight down. Let the knife do the work. Apply light pressure and move the blade back and forth while pushing down slowly.
Wipe your knife clean between cuts. Rice builds up on the blade and affects the next slice. A quick wipe on a damp cloth keeps every cut as clean as the first.
If your rolls fall apart when cutting, they are too loose. You can sometimes rescue loose rolls by letting them rest longer before cutting. The nori continues to adhere and the rice firms up slightly.
Tips for Perfect Sushi Every Time
These pro tips come from years of rolling experience and feedback from home cooks who learned how to roll sushi at home. Avoiding common mistakes saves you frustration and wasted ingredients.
Keep Hands Moist
Rice sticks to everything, especially dry hands. Keep your water bowl within easy reach. Dip fingers before touching rice every time. This simple habit prevents the frustration of rice clumping on your fingers instead of spreading on the nori.
Do Not Overfill
Beginners consistently use too much filling. A fat line of crab, avocado, and cucumber looks generous but makes rolling impossible. Use about the thickness of two fingers for your filling line. You can always make another roll if you want more.
Roll Tightly Without Squeezing
The perfect roll balances tightness and gentleness. Think of shaping clay rather than wringing a towel. Apply steady pressure as you roll forward, but release pressure once the roll completes. Squeezing after rolling squeezes out fillings and deforms the shape.
Start with Cooked Fillings
Build confidence before handling raw fish. Cucumber rolls teach you the technique without ingredient anxiety. Smoked salmon adds protein without the safety concerns of raw fish. Master the rolling motion first, then upgrade your ingredients.
Buy Quality Nori
Cheap nori tears, tastes fishy, and ruins your rolls. Spend a few extra dollars on reputable brands. Look for nori labeled “sushi grade” or “gold grade.” The difference in taste and workability justifies the cost.
Practice the Motion
Your first rolls will not look perfect. Accept this and keep practicing. The rolling motion feels awkward until muscle memory develops. Make a batch of rice and practice rolling with cucumber five or six times before serving guests.
Troubleshooting Common Problems
If your rolls fall apart, you likely used too little rice, rolled too loosely, or cut before resting. If rice squishes out the ends, you rolled too tightly or overfilled. If nori tears, your rice was too warm or the nori got moist from sitting too long.
For rice that gets hard after refrigeration, let rolls sit at room temperature for 10 minutes before serving. Refrigerated rice firms up considerably. Fresh-made rolls taste best anyway – make what you plan to eat within a few hours.
Best Fillings for Beginners
Choosing the right fillings makes learning easier. Start simple and work up to complex combinations as your skills improve.
Level 1: Vegetable Fillings (Easiest)
Cucumber provides the perfect starting point. Cut into long thin strips, removing the seedy center first. The crisp texture contrasts beautifully with soft rice.
Avocado adds creamy richness. Slice just before rolling to prevent browning. Use half a small avocado per roll.
Cream cheese creates Philadelphia-style rolls. Cut into thin strips and keep cold until the last moment. Softened cream cheese smears and makes rolling messy.
Level 2: Cooked Proteins
Cooked shrimp offers an authentic sushi experience without raw fish concerns. Buy pre-cooked shrimp and slice them in half lengthwise.
Smoked salmon works beautifully in place of raw salmon. The flavor profile stays similar while eliminating safety worries. Look for wild-caught varieties for better taste.
Imitation crab sticks provide an easy introduction to seafood rolls. They need no preparation beyond unwrapping. Mix with a little mayonnaise for California roll authenticity.
Level 3: Raw Fish
Only use fish labeled “sushi-grade” or “sashimi-grade.” This means the fish was flash-frozen to kill parasites and handled with food safety protocols. Regular fish from the grocery counter is not safe for raw consumption.
Source sushi-grade fish from Japanese markets, high-end fishmongers, or online specialty suppliers. Many coastal cities have dedicated sashimi suppliers. Call ahead to ask about their freezing protocols and handling.
Keep raw fish refrigerated until the moment you use it. Do not let it sit at room temperature. Slice against the grain into strips about 1/4 inch thick.
Great Combinations to Try
The California roll combines imitation crab, avocado, and cucumber. The Philadelphia roll pairs smoked salmon, cream cheese, and cucumber. For vegetarians, try marinated tofu strips with avocado and pickled vegetables.
Frequently Asked Questions
How do I roll my own sushi?
Start by laying nori on a bamboo mat, spread prepared sushi rice evenly leaving a 1-inch strip at the top, place fillings in a line across the center, then roll forward using the mat to shape and compress. Seal the bare strip with water and let rest before cutting into 8 pieces.
What is the easiest way to roll sushi?
The traditional maki method is easiest for beginners. Use simple fillings like cucumber or avocado, spread rice thin and evenly, place minimal filling, and roll with gentle pressure. Practice with a tea towel wrapped in plastic if you do not have a bamboo mat yet.
How to roll sushi so it does not fall apart?
Use enough rice to create a solid layer, roll tightly with consistent pressure, let the roll rest seam-down for 2-3 minutes before cutting, and use a sharp wet knife. Keep your hands moist when handling rice and do not overfill with ingredients.
What are common sushi mistakes?
Common mistakes include using warm rice that tears nori, overfilling rolls making them impossible to close, rolling too loosely so they fall apart when cut, using dull knives that crush instead of slice, and not letting rice cool to room temperature before rolling.
Can you make sushi without a mat?
Yes, you can roll sushi using a clean tea towel wrapped in plastic wrap. Lay the towel flat, cover with plastic, place nori and rice, then roll using the towel for structure. The towel method works best for simple maki rolls. Some people also use a plastic zip-top bag filled partially with rice as a rolling aid.
Is 4 rolls of sushi too much?
Four rolls is a substantial meal for one person. A typical serving size is 2 to 3 rolls per person for a full meal. Four rolls provides roughly 800 to 1200 calories depending on fillings, which is appropriate for someone with higher caloric needs or for sharing between two lighter eaters.
Is sushi good for high triglycerides?
Sushi can be part of a diet for managing triglycerides if you choose wisely. Fish provides omega-3 fatty acids that may help lower triglycerides. However, white rice increases carbohydrates significantly. Choose rolls with more fish and vegetables, less rice, and avoid tempura or mayonnaise-based sauces. Brown rice sushi offers a better option for blood lipid management.
Is sushi anti-inflammatory?
Many sushi ingredients have anti-inflammatory properties. Fatty fish like salmon and tuna contain omega-3 fatty acids that reduce inflammation. Ginger, wasabi, and nori seaweed also provide anti-inflammatory compounds. However, the benefits depend on ingredient quality and preparation. Avoid deep-fried rolls and excessive sugary sauces that promote inflammation.
Conclusion
Learning how to roll sushi at home opens up endless possibilities for creative, affordable meals. You now have the techniques to make traditional maki, inside-out uramaki, and even rolls without a mat. Remember that practice makes perfect – your first attempts may look rustic, but they will taste delicious.
Start with simple vegetable rolls and work your way up to raw fish as your confidence grows. Keep your knife sharp, your hands moist, and your rice at room temperature. Invite friends over for a sushi night and enjoy the satisfaction of serving homemade rolls that rival restaurant quality. Happy rolling in 2026!