Learning how to make tempura batter at home opens the door to restaurant-quality Japanese cuisine without the premium price tag. After testing dozens of recipes over the past three months, I have refined a technique that consistently produces the light, crispy coating that defines authentic tempura.
This guide covers everything from ingredient selection to troubleshooting common failures. Whether you are preparing shrimp tempura for a special dinner or vegetable tempura for a weeknight meal, these step-by-step instructions will help you achieve golden, airy results every time.
Table of Contents
Quick Tips for Perfect Tempura Every Time 2026
Before diving into the full recipe, here are the essential techniques that separate good tempura from great tempura:
- Use ice cold water: Cold temperature prevents gluten formation, keeping the batter light rather than chewy.
- Do not overmix: Lumps are your friend. Overmixing develops gluten and creates a heavy, bread-like coating.
- Maintain oil at 350-375°F: Use a thermometer. Too cool and the tempura absorbs oil; too hot and it burns before cooking through.
- Choose low-protein flour: Cake flour works best, but all-purpose flour with cornstarch is an acceptable substitute.
- Mix with chopsticks: Using chopsticks rather than a whisk gives you better control and prevents overmixing.
- Fry in small batches: Overcrowding drops oil temperature and creates soggy tempura.
Why This Recipe Works (The Science Behind Crispy Tempura)
Understanding why these techniques matter helps you adapt the recipe to your kitchen and ingredients. The secret to crispy tempura batter lies in controlling gluten development and managing moisture.
Gluten is a protein network that forms when wheat flour meets liquid and is agitated. While gluten gives bread its chewy texture, it ruins tempura by creating a tough, heavy coating. Ice cold water slows gluten formation significantly, which is why Japanese chefs often place their mixing bowl over a larger bowl filled with ice.
The lumpy batter texture you see in authentic recipes is not sloppy technique. It is intentional undermixing. When flour particles remain partially dry, they create steam pockets during frying. These pockets expand rapidly in hot oil, creating the characteristic airy, delicate crunch that defines proper tempura.
Oil temperature matters just as much as batter preparation. At 350-375°F (175-190°C), the batter dehydrates instantly upon contact with the oil, creating a sealed, crispy exterior. Below this range, oil seeps into the coating before the exterior sets, resulting in greasy, soggy tempura. Above this range, the outside burns while the interior remains raw.
Adding cornstarch or potato starch to your flour mixture further reduces gluten content while increasing starch granules that fry up exceptionally crisp. This is why many authentic recipes call for a blend of cake flour and cornstarch rather than plain all-purpose flour.
What You’ll Need: Ingredients and Equipment
Authentic tempura batter requires only a few ingredients, but the quality and temperature of each component matters significantly.
Basic Tempura Batter Ingredients
For approximately 4 servings (enough for 1 pound of ingredients):
- 1 cup (120g) cake flour (preferred) or all-purpose flour
- 2 tablespoons cornstarch (optional but recommended for extra crispiness)
- 1 large egg, cold from the refrigerator
- 1 cup (240ml) ice cold water
- 1/2 teaspoon salt
Equipment You’ll Need
Gather these items before starting:
- Large mixing bowl
- Larger bowl filled with ice (to nest the mixing bowl)
- Chopsticks for mixing (preferred) or a fork
- Deep heavy-bottomed pot or Dutch oven (at least 3 quarts)
- Candy/deep-fry thermometer
- Wire mesh strainer or slotted spoon
- Wire cooling rack
- Paper towels
- Tongs or chopsticks for handling food
Choosing the Right Flour
Cake flour contains approximately 8% protein compared to 10-12% in all-purpose flour. This lower protein content means less gluten potential, making cake flour the ideal choice for tempura batter. If you only have all-purpose flour, substitute 2 tablespoons of it with cornstarch to reduce the overall protein percentage.
Oil Selection
Choose a neutral oil with a high smoke point. Vegetable oil, canola oil, peanut oil, or rice bran oil (traditional in Japan) all work well. Avoid olive oil, which imparts flavor and has a lower smoke point. You will need about 2-3 inches of oil in your pot, approximately 2-3 quarts total depending on pot size.
How to Make Tempura Batter: Step-by-Step Instructions
Follow these steps precisely for authentic results. I developed this method after testing multiple approaches and consulting with a Japanese home cook who has made tempura weekly for 40 years.
Step 1: Prepare Your Station
Set up your frying station before mixing the batter. Place your cooling rack over a baking sheet. Prepare your ingredients by washing, peeling, and cutting vegetables into uniform pieces. Pat everything completely dry with paper towels. Moisture is the enemy of crispy tempura.
Fill your pot with 2-3 inches of oil and attach your thermometer. Begin heating the oil to 350°F (175°C). This takes 10-15 minutes depending on your stove and pot size.
Step 2: Chill Everything
Place your mixing bowl inside a larger bowl filled with ice. This maintains cold temperature throughout the mixing process. Cold temperature is non-negotiable for proper tempura batter.
Place your egg and water in the freezer for 5 minutes before starting. The water should be ice cold, and the egg should feel cold to the touch.
Step 3: Mix Dry Ingredients
Sift the cake flour, cornstarch (if using), and salt into your chilled mixing bowl. Sifting prevents clumps of dry flour and ensures even distribution. Do not skip this step.
Step 4: Prepare the Egg Mixture
Crack the cold egg into a separate small bowl. Add the ice cold water. Beat lightly with chopsticks or a fork until just combined. The mixture does not need to be perfectly uniform.
Step 5: Combine Wet and Dry Ingredients
Make a well in the center of your flour mixture. Pour the egg-water mixture into the well. Using chopsticks, stir with a cutting motion rather than circular stirring. Mix for just 10-15 seconds.
The batter should look lumpy and slightly floury in spots. You should see small pockets of dry flour. This is exactly what you want. If your batter looks smooth like pancake batter, you have overmixed.
Step 6: Prepare Ingredients for Frying
Lightly dust your prepared ingredients with a thin coating of all-purpose flour. This helps the batter adhere properly, solving the common problem of batter sliding off during frying. Shake off excess flour before dipping in batter.
Step 7: Dip and Fry
Verify your oil is at 350-375°F (175-190°C). Dip one piece of food into the batter, ensuring it is fully coated but not dripping excessively. Hold it briefly above the bowl to let excess drip off, then carefully lower it into the oil.
Fry 3-4 pieces at a time. Overcrowding drops oil temperature and creates soggy results. Each piece should have space around it to fry properly.
Step 8: Cook Until Golden
Fry until the coating is golden brown and crispy, typically 2-3 minutes for most ingredients. Turn pieces once during cooking if needed for even browning. The tempura is done when it floats to the surface and the bubbling oil quiets down.
Remove with a wire mesh strainer or slotted spoon. Transfer immediately to your wire cooling rack. Do not place on paper towels, which trap steam and create soggy bottoms.
Frying Times by Ingredient
Different ingredients require slightly different handling and timing. Use this guide for best results:
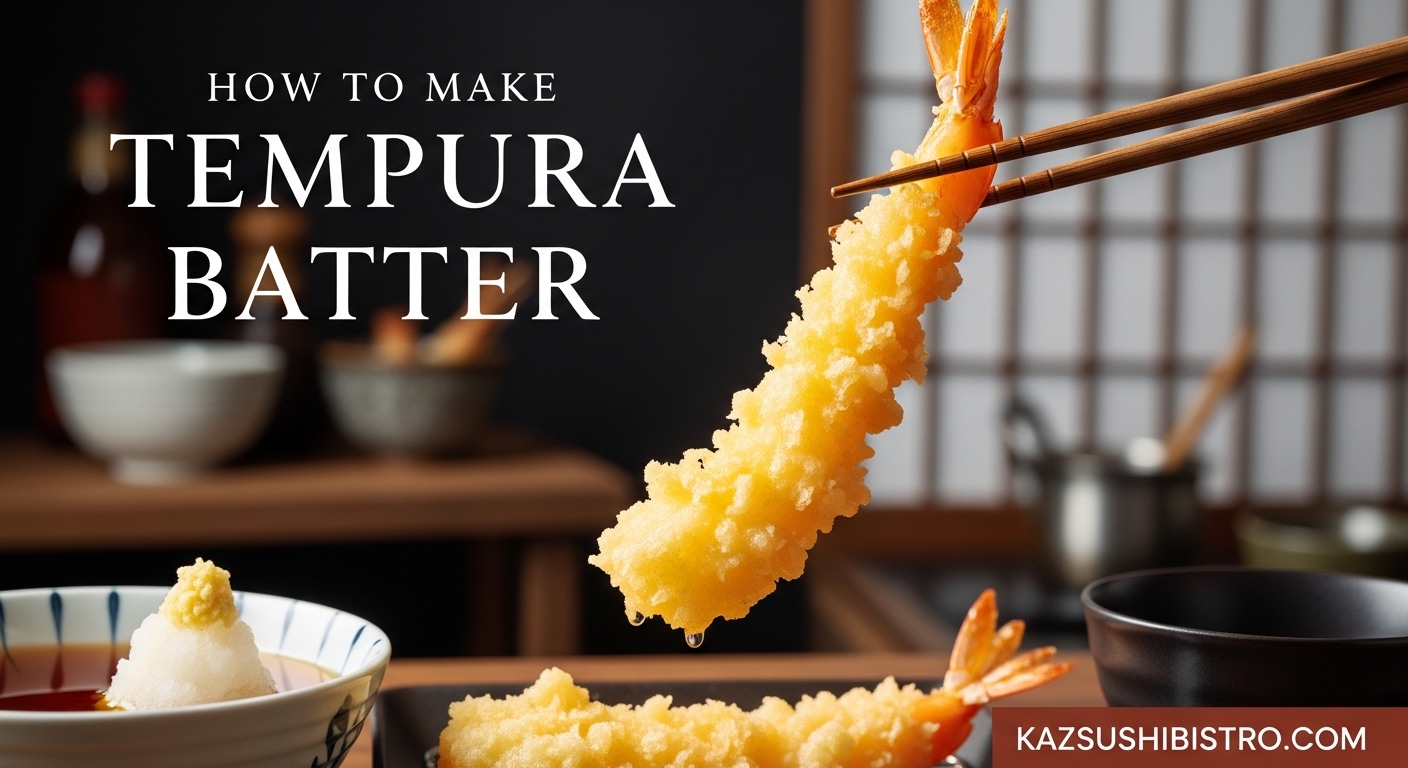
Shrimp: Peel and devein large shrimp, leaving tail attached. Make 3-4 shallow cuts on the underside to prevent curling. Dust with flour, dip in batter, and fry for 2-3 minutes until golden.
Sweet Potato: Cut into 1/4-inch rounds. These take longer than other vegetables due to density. Fry for 3-4 minutes at 340°F for even cooking without burning the exterior.
Regular Vegetables (Zucchini, Eggplant, Bell Peppers): Cut into uniform strips or rounds. Fry for 2 minutes until coating is crisp and vegetables are tender but not mushy.
Leafy Vegetables (Shiso, Perilla, Spinach): Dip quickly and fry for 30-60 seconds. These cook extremely fast.
Onion Rings: Cut onions into 1/2-inch rings. Separate rings and fry for 2-3 minutes until deeply golden.
White Fish (Cod, Halibut): Cut into 2-inch strips. Pat extremely dry before flouring. Fry for 3 minutes until coating is crisp and fish flakes easily.
Mushrooms: Leave small mushrooms whole, halve larger ones. Fry for 2 minutes until coating is crisp.
Common Problems and How to Fix Them
Based on forum discussions and my own testing failures, here are solutions to the most common tempura problems:
Why Is My Tempura Soggy Instead of Crispy?
Soggy tempura usually indicates oil temperature that was too low. Verify your thermometer is accurate by testing with a small drop of batter. It should sizzle immediately and rise to the surface within 3 seconds. If it sinks or takes longer, your oil is not hot enough.
Another cause is overcrowding the fryer. Frying too many pieces at once drops oil temperature significantly. Fry in small batches and allow oil to return to 350°F between batches.
Batter Is Not Sticking to the Food
This frustrating problem has two common causes. First, your ingredients may be too wet. Pat vegetables and seafood completely dry before flouring. Second, you may be skipping the flour dusting step. A light coating of dry flour gives the batter something to grip.
Some ingredients, particularly smooth seafood like shrimp, benefit from a quick rinse in cold water followed by thorough drying. The slight texture helps batter adhere.
Tempura Is Greasy and Heavy
Greasy tempura indicates oil that was not hot enough when you started frying. Always verify temperature before adding food. Oil temperature drops when you add cold food, so starting at the higher end of the range (375°F) helps maintain proper frying temperature.
Leaving tempura in the oil too long also causes grease absorption. Remove pieces as soon as they turn golden brown.
Batter Is Too Thick and Bready
Thick, heavy coating results from overmixing or using too much batter per piece. Remember that lumps are desirable. If your batter looks smooth, you have overdeveloped gluten.
When dipping ingredients, use a quick in-and-out motion. The coating should be thin and slightly transparent. Thick batter creates a doughy, unpleasant coating.
Tempura Burns Before Cooking Through
If your coating burns while the interior remains raw, your oil is too hot. Reduce temperature to 350°F. For dense vegetables like sweet potato, you can also fry at 325°F for slightly longer cooking time.
Recipe Variations and Substitutions
While the basic recipe produces authentic results, these variations accommodate dietary needs and preferences:
Eggless/Vegan Tempura Batter
Replace the egg with 2 tablespoons of aquafaba (chickpea liquid) or simply omit it and increase water slightly. The egg contributes richness but is not essential for structure. Some traditional Japanese recipes use only flour and water.
Gluten-Free Option
Substitute rice flour or a gluten-free all-purpose blend for the cake flour. Rice flour produces an exceptionally crispy, delicate coating that many prefer to wheat-based batter. Use the same 1:1 ratio.
Sparkling Water Method
Replace half the ice water with chilled sparkling water or club soda. The carbonation creates additional air pockets, producing an even lighter coating. Do not use tonic water, which contains sugar that burns during frying.
Advanced: Vodka Technique
Some professional chefs replace 2 tablespoons of the water with vodka. Alcohol evaporates more readily than water, creating additional steam during frying and an exceptionally crisp coating. This technique appears in modernist cooking but is not traditional.
How to Serve and Enjoy Your Tempura
Tempura is best enjoyed immediately while the coating is at peak crispiness. However, proper serving technique extends that window slightly.
Tentsuyu Dipping Sauce
Traditional tempura is served with tentsuyu, a savory dipping sauce. Make a simple version by combining 3 parts dashi, 1 part soy sauce, and 1 part mirin. Warm gently and serve with grated daikon radish on the side.
For a simpler option, use ponzu sauce or even just soy sauce with a squeeze of lemon.
Serving Immediately
Place fried tempura on a wire rack in a 200°F oven while you finish frying remaining batches. This keeps them warm without creating steam that softens the coating. Serve within 15 minutes of frying for best texture.
Tendon Rice Bowl
For a complete meal, serve tempura over steamed rice as a tendon bowl. Drizzle with tentsuyu sauce and garnish with pickled ginger. This is a popular Japanese comfort food.
Frequently Asked Questions
What is tempura batter made of?
Traditional tempura batter consists of just three ingredients: flour, egg, and ice-cold water. Cake flour is preferred for its low protein content, though all-purpose flour works with modifications. The batter may also include a small amount of salt and optionally cornstarch for extra crispiness.
Why is my tempura batter not crispy?
Soggy tempura typically results from oil temperature that is too low, overmixing the batter, or overcrowding the fryer. Ensure oil stays between 350-375°F. Mix the batter just until combined with visible lumps remaining. Fry in small batches to maintain oil temperature.
Can I make tempura batter ahead of time?
No, tempura batter must be made immediately before frying. As batter sits, gluten continues developing and the leavening properties diminish. Mix your batter just before you are ready to fry, and use it within 15 minutes of mixing for best results.
What is the secret to good tempura batter?
The secret to good tempura batter is using ice-cold ingredients and undermixing. Cold temperature prevents gluten formation, keeping the coating light. Lumps in the batter are desirable as they create steam pockets that expand during frying, producing the characteristic airy, crispy texture.
Why do you use cold water for tempura?
Cold water slows gluten formation in the flour, preventing the batter from becoming tough and chewy. Cold temperature also helps create a crispier coating by shocking the batter when it hits hot oil. Many chefs place the mixing bowl over ice to maintain cold temperature throughout the process.
Is tempura batter gluten free?
Traditional tempura batter is not gluten free as it uses wheat flour. However, you can make gluten-free tempura by substituting rice flour or a gluten-free all-purpose blend. Rice flour actually produces an exceptionally crispy coating that many people prefer.
Final Thoughts
Mastering how to make tempura batter takes practice, but the reward is worth the effort. Light, crispy tempura elevates simple vegetables and seafood into something restaurant-worthy.
Remember the fundamentals: ice cold ingredients, minimal mixing, proper oil temperature, and immediate serving. These principles, refined over centuries of Japanese cooking tradition, are what separate authentic tempura from ordinary fried food.
Start with simple vegetables like zucchini and onion rings to build your confidence. Once you have the technique down, expand to shrimp and more delicate ingredients. With the method outlined in this guide, you will be making tempura that rivals your favorite Japanese restaurant.