Learning how to make teriyaki sauce from scratch will change your weeknight dinners forever. Store-bought bottles sit in your pantry with unpronounceable preservatives and way too much sodium. My homemade version uses simple pantry staples and takes just 10-15 minutes to prepare.
I’ve been making this sauce weekly for the past three years, and my family swears it tastes better than any restaurant version we’ve tried. The balance of sweet and savory hits perfectly every time, and you control exactly what goes into it.
This recipe yields about one cup of sauce, enough for marinating two pounds of chicken or glazing four salmon fillets. Let me show you exactly how to make teriyaki sauce from scratch with ingredients you probably already have.
Table of Contents
What Is Teriyaki Sauce?
Teriyaki refers to a Japanese cooking method where foods are grilled or broiled with a glossy glaze. The word itself combines teri (shine or luster) and yaki (grilled or broiled). The sauce creates that signature sheen on your proteins.
Traditional Japanese teriyaki uses a base called tare, made from soy sauce, mirin, and sake. American-style teriyaki sauce evolved to include sweeter elements like brown sugar and honey, creating the thick, sticky glaze most of us recognize from takeout menus.
The sauce works equally well as a marinade, a finishing glaze, or a dipping sauce for everything from chicken wings to roasted vegetables.
Ingredients You’ll Need 2026
Every ingredient in this recipe serves a specific purpose. Understanding what each component does helps you make smart substitutions when needed.
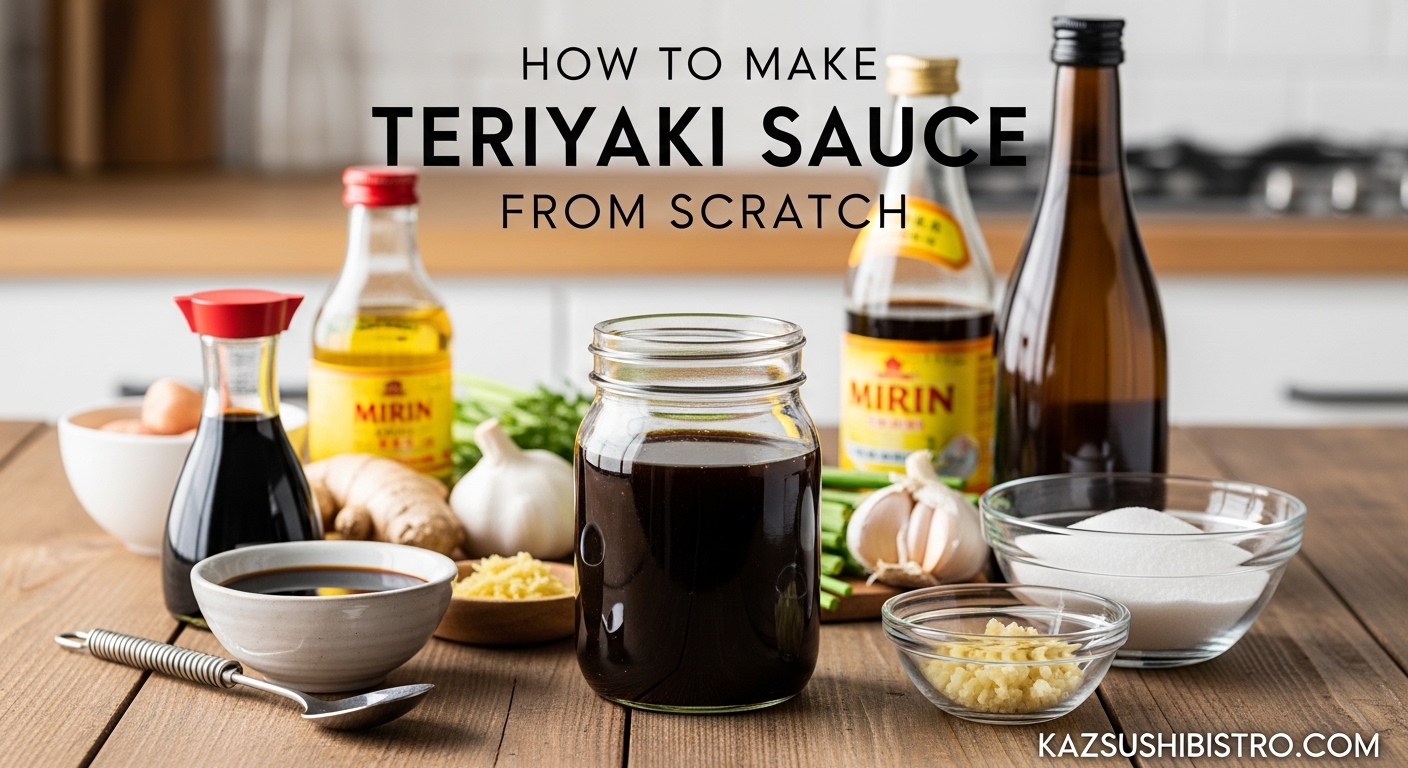
Base Ingredients
Low-sodium soy sauce (half cup): The salty, umami foundation of the sauce. I strongly recommend low-sodium versions to control saltiness. Regular soy sauce can make the finished sauce overpoweringly salty.
Brown sugar (quarter cup): Adds sweetness and helps create that glossy finish. Light or dark brown sugar both work, though dark adds a deeper molasses flavor.
Honey (two tablespoons): Provides additional sweetness with floral notes. Honey also helps the sauce thicken naturally.
Aromatics and Flavor Enhancers
Fresh garlic (three cloves, minced): Fresh garlic delivers far more punch than powder. Mince it finely so it distributes evenly throughout the sauce.
Fresh ginger (one tablespoon, grated): This makes the sauce truly special. After testing both, I can confirm fresh ginger makes the flavor pop in a way ground ginger simply cannot match.
Sesame oil (one teaspoon): Just a small amount adds authentic nutty depth. Toasted sesame oil works best.
Thickening Agent
Cornstarch (one tablespoon): Creates the glossy, thick texture that distinguishes great teriyaki sauce. Mixed with cold water, it forms a slurry that thickens the sauce without clumping.
Cold water (quarter cup): Essential for creating the cornstarch slurry. Never use hot water here.
Common Substitutions
For gluten-free diets, swap soy sauce for tamari or coconut aminos. Coconut sugar works in place of brown sugar. Maple syrup can replace honey for vegan versions. Rice vinegar mixed with a pinch of sugar substitutes nicely for mirin if you want a more traditional Japanese flavor profile.
How to Make Teriyaki Sauce from Scratch
Follow these steps exactly for perfect results every time. Total time from start to finish is 10-15 minutes.
Step 1: Combine the Base Ingredients
Pour the soy sauce, brown sugar, honey, minced garlic, grated ginger, and sesame oil into a small saucepan. Whisk everything together over medium heat until the sugar completely dissolves. This takes about two minutes.
You’ll know the sugar has dissolved when the liquid looks uniform and no granules remain visible on the bottom of the pan.
Step 2: Make the Cornstarch Slurry
While the base mixture heats, whisk the cornstarch and cold water together in a separate small bowl. Stir until completely smooth with no lumps.
The water must be cold. Hot water causes cornstarch to clump immediately, creating a lumpy sauce instead of a smooth glaze. This is the most common mistake I see in forum discussions about teriyaki sauce failures.
Step 3: Thicken the Sauce
Once your base mixture reaches a gentle simmer, slowly pour the cornstarch slurry into the saucepan. Whisk continuously while adding it.
Continue cooking and whisking for five to seven minutes until the sauce thickens to a glaze consistency. The sauce should coat the back of a spoon without running off immediately.
Remove from heat when the sauce looks slightly thinner than your desired final consistency. It will thicken more as it cools.
Step 4: Cool and Store
Let the sauce cool for ten minutes before using. This resting period allows the flavors to meld and the texture to set properly.
If you notice any garlic or ginger pieces, strain the sauce through a fine-mesh sieve for a perfectly smooth finish. I usually skip this step because I enjoy the texture, but straining creates that restaurant-quality appearance.
Ways to Use Your Homemade Teriyaki Sauce
This versatile sauce works beautifully in multiple applications across your cooking repertoire.
As a Marinade
Marinate chicken thighs or breasts for two to eight hours before grilling or baking. The sauce penetrates deeply, creating flavorful meat that stays juicy during cooking. For salmon, marinate for just thirty minutes to one hour to prevent the acid from breaking down the delicate fish texture.
Beef strips for stir-fry benefit from one to two hours of marination. Tofu absorbs the flavors well after thirty minutes, though longer soaking creates more intense taste.
As a Glaze
Brush the sauce onto proteins during the final five minutes of cooking. This creates that sticky, caramelized exterior everyone loves. Apply two to three coats, allowing each layer to set before adding the next.
Works wonderfully on grilled chicken wings, baked salmon fillets, or pan-seared pork chops.
As a Stir-Fry Sauce
Add two to three tablespoons to your wok along with cooked vegetables and protein. Toss everything together over high heat for one to two minutes until evenly coated and slightly caramelized.
Excellent with broccoli, bell peppers, snap peas, carrots, and any combination of vegetables you prefer.
As a Dipping Sauce
Serve room temperature or slightly warmed alongside potstickers, spring rolls, or grilled meat skewers. The thick consistency clings perfectly to dipped items.
For a thinner dipping consistency, whisk in a teaspoon of warm water.
As a Rice Bowl Topping
Drizzle over steamed rice topped with grilled protein and vegetables. Creates an instant rice bowl comparable to your favorite Japanese restaurant.
Pro Tips and Troubleshooting
After making this sauce hundreds of times, I’ve encountered nearly every possible issue. Here are solutions to the most common problems.
Why Your Sauce Might Be Too Salty
Using regular soy sauce instead of low-sodium is the culprit ninety percent of the time. If your sauce tastes too salty, dilute it with two to three tablespoons of water and a teaspoon of additional honey. Some users on cooking forums report adding up to half a cup of water with extra cornstarch to rescue overly salty batches.
Different soy sauce brands vary significantly in sodium content. Kikkoman and Yamasa tend to be saltier than San-J or Eden Organic. Taste your specific brand before committing to the full half cup.
When Your Sauce Won’t Thicken
Insufficient cooking time is the usual cause. The cornstarch needs five to seven minutes of simmering to activate fully. Turn up the heat slightly and continue whisking.
Check that your cornstarch slurry used cold water. Hot water creates clumps that prevent proper thickening. If you see lumps, strain the sauce and return it to the pan with a fresh slurry made correctly.
Old cornstarch loses thickening power. If your container has sat open for over a year, replace it.
When Your Sauce Gets Too Thick
Remember that sauce thickens significantly as it cools. Remove it from heat when it still looks slightly runnier than you want. If it ends up too thick after cooling, gently reheat with one to two tablespoons of water whisked in.
Refrigerated sauce often becomes gel-like. This is normal. Simply reheat gently with a splash of water to restore the original consistency.
Preventing Bitter Flavors
Certain soy sauce brands, particularly some Chinese varieties, create bitter notes when heated. Stick to Japanese-style soy sauces like Kikkoman for best results. Avoid over-toasting your sesame oil, as burnt sesame oil tastes acrid.
Make It Your Own
The beauty of homemade sauce lies in customization. Prefer sweeter sauce? Add an extra tablespoon of honey. Like more kick? Increase the ginger to two tablespoons. Want garlic-forward flavor? Double the garlic cloves.
My family’s favorite version includes a pinch of red pepper flakes for subtle heat that builds with each bite.
Storage and Make-Ahead Instructions
One batch of this sauce covers multiple meals, making it perfect for meal prep.
Refrigeration
Store cooled sauce in an airtight container in the refrigerator for up to one week. Glass jars work best because they don’t retain odors or stains. The sauce will thicken considerably when cold, becoming almost jelly-like.
Reheat gently in a saucepan over low heat with one to two tablespoons of water to restore pourable consistency. Microwave reheating works too; use thirty-second intervals, stirring between each.
Freezer Storage
This sauce freezes beautifully for three to six months. Pour cooled sauce into freezer-safe containers or ice cube trays for portion control. Leave headspace in containers because the sauce expands slightly when frozen.
Thaw overnight in the refrigerator or use the defrost setting on your microwave. Stir well after thawing because some separation may occur.
Make-Ahead Strategy
Double or triple the recipe during weekend meal prep. Portion into half-cup containers for easy grab-and-use during busy weeknights. Having this sauce ready in the fridge makes thirty-minute dinners achievable any night of the week.
I typically make a double batch every Sunday. By Thursday, we’ve usually used it all on various proteins and stir-fries.
Delicious Recipe Variations
Once you master the basic recipe, experiment with these tasty modifications.
Spicy Teriyaki
Add one to two teaspoons of sriracha, sambal oelek, or chili paste to the base ingredients. Start with less and taste before adding more. The heat balances beautifully against the sweetness.
Citrus Teriyaki
Replace two tablespoons of soy sauce with fresh orange juice. Add a teaspoon of orange zest along with the ginger for bright, fresh flavor. Works especially well with salmon and shrimp.
Honey-Garlic Teriyaki
Double both the honey and garlic for an intensely aromatic sauce. Reduce the brown sugar by half to compensate for the extra honey sweetness. This variation creates incredible caramelization on grilled meats.
Pineapple Teriyaki
Substitute quarter cup of pineapple juice for part of the soy sauce. The enzymes in pineapple also help tenderize meat during marination. Perfect for Hawaiian-inspired chicken or pork.
Gluten-Free Version
Use tamari or coconut aminos instead of soy sauce. Both provide similar umami depth without wheat. Coconut aminos adds a slightly sweeter, less salty profile, so you may want to reduce the brown sugar slightly.
Low-Sodium Version
Use coconut aminos instead of soy sauce and reduce or eliminate the added salt. Coconut aminos contains significantly less sodium while maintaining savory satisfaction.
Frequently Asked Questions
What are the ingredients of a teriyaki sauce?
Traditional teriyaki sauce contains soy sauce, brown sugar, honey, garlic, ginger, and sesame oil. Cornstarch mixed with cold water thickens the sauce into a glossy glaze. Each ingredient contributes to the signature sweet and savory balance that defines teriyaki flavor.
Is it worth making your own teriyaki sauce?
Yes, homemade teriyaki sauce is absolutely worth the small effort. You avoid preservatives and excess sodium found in bottled versions. The fresh taste of ginger and garlic cannot be matched by store-bought alternatives. Plus, the entire process takes only 10-15 minutes using pantry staples you likely already own.
Is teriyaki low in histamine?
Teriyaki sauce is generally not considered low in histamine. Soy sauce, a primary ingredient, is typically high in histamine due to the fermentation process. Individuals with histamine intolerance may experience reactions. Consider using coconut aminos as a lower-histamine alternative, though individual tolerance varies.
What can I use if I don’t have teriyaki sauce?
You can create a quick substitute by mixing equal parts soy sauce and brown sugar with a splash of rice vinegar. Add a pinch of garlic powder and ground ginger for similar flavor. Hoisin sauce thinned with soy sauce also works. For glazing, a mixture of soy sauce and honey alone provides decent results.
Why is my homemade teriyaki sauce not thickening?
The most common causes are insufficient cooking time or incorrect slurry preparation. Cornstarch needs 5-7 minutes of simmering to activate fully. Ensure you mixed cornstarch with cold water, not hot, as hot water causes clumping. Old cornstarch loses thickening power, so replace any container over one year old.
Does cornstarch or flour thicken teriyaki sauce?
Cornstarch is the preferred thickener for teriyaki sauce. It creates a clear, glossy finish and thickens quickly. Flour can work but creates a cloudier appearance and requires longer cooking to eliminate the raw flour taste. If substituting flour for cornstarch, use double the amount and cook for several minutes longer.
Conclusion
Learning how to make teriyaki sauce from scratch opens up endless possibilities in your kitchen. This simple recipe delivers restaurant-quality flavor without preservatives or excessive sodium. The fifteen-minute investment pays off every time you open your refrigerator to find this golden glaze ready for dinner.
Start with the basic recipe, then experiment with the variations to find your family’s perfect version. The troubleshooting tips ensure success even when things don’t go exactly as planned.
Gather your ingredients tonight and experience the difference homemade makes. Your stir-fries, grilled proteins, and rice bowls will never taste better.