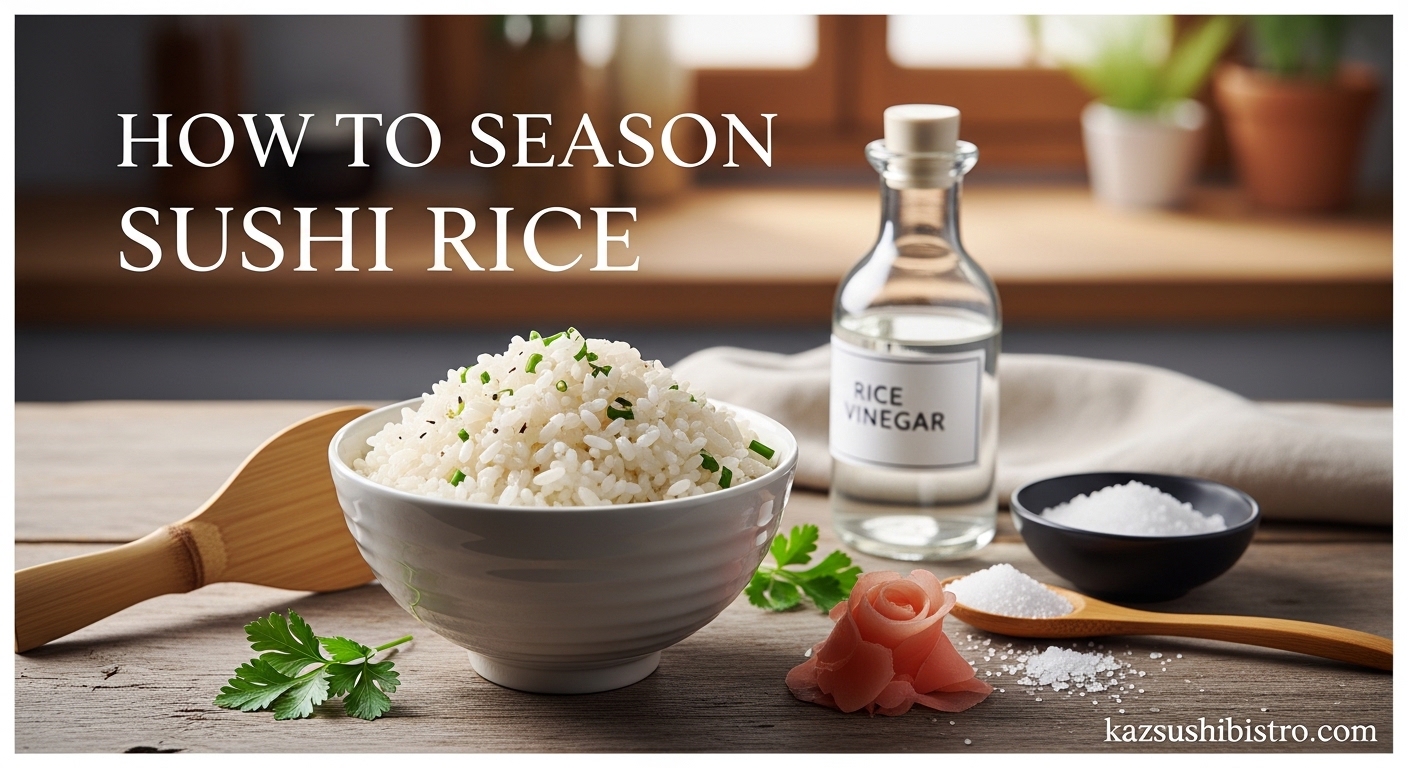
You season sushi rice with a mixture of rice vinegar, sugar, and salt. This classic combination creates the signature tangy-sweet flavor that makes sushi rice distinct from plain steamed rice. The ratio is typically 3 tablespoons rice vinegar, 2 tablespoons sugar, and 1 teaspoon salt for every 2 cups of uncooked short-grain rice.
Learning how to season sushi rice properly transforms your homemade sushi from amateur to restaurant-quality. The technique matters just as much as the ingredients. In this guide, I will walk you through every step I have refined over years of making sushi at home.
By the end, you will know exactly how to achieve that perfect glossy sheen and delicate balance of flavors that defines authentic sushi rice.
Table of Contents
What Is Sushi Rice?
Sushi rice, called sushimeshi in Japanese, is short-grain rice seasoned with a vinegar-based mixture after cooking. The term specifically refers to the seasoned rice, not the raw grain. Plain Japanese short-grain rice becomes sushi rice only after the seasoning process.
The rice variety matters tremendously. Authentic sushi rice starts with uruchimai, a type of Japonica rice characterized by high amylopectin starch content. This starch composition creates the sticky texture essential for shaping nigiri and rolls.
Without proper seasoning, you simply have plain rice. The vinegar mixture does more than add flavor. It helps separate the grains slightly, prevents clumping, and gives the rice that characteristic sheen you see at sushi restaurants.
Ingredients You’ll Need 2026
Gathering the right ingredients before you start makes the seasoning process smooth and stress-free. Quality matters here. Better ingredients yield noticeably better results.
The Essential Trio
Rice vinegar forms the foundation of your seasoning. Use unseasoned rice vinegar for full control over the flavor balance. Seasoned rice vinegar contains added sugar and salt, but making your own mixture gives better results.
Granulated sugar balances the acidity of the vinegar. Standard white sugar dissolves quickly and works perfectly. Some cooks prefer evaporated cane sugar for a slightly deeper flavor.
Sea salt provides the savory counterpoint. Fine sea salt dissolves more easily than coarse varieties. Kosher salt works as a substitute but use slightly less since the flakes are larger.
Measurements for 2 Cups of Rice
Here is the exact ratio I use for seasoning 2 cups of uncooked short-grain rice:
3 tablespoons unseasoned rice vinegar
2 tablespoons granulated sugar
1 teaspoon fine sea salt
This ratio scales linearly. For 4 cups of rice, double everything. For 1 cup, cut everything in half.
Optional Umami Booster
Kombu, dried kelp, adds depth and umami to your rice. Place a 2-inch square piece in the rice cooker or pot while cooking. Remove it before seasoning. This technique comes straight from Japanese home cooks and makes a noticeable difference.
Mirin, a sweet rice wine, can replace part of the sugar for a more complex sweetness. Substitute 1 tablespoon of the sugar with 2 tablespoons of mirin if you want to experiment with traditional variations.
How to Cook Sushi Rice
Before you can season sushi rice, you need perfectly cooked rice. The cooking method affects how well the seasoning absorbs and distributes. Choose the method that works best for your kitchen setup.
Rice Cooker Method
A rice cooker produces the most consistent results with minimal effort. This is how I cook sushi rice at home 2026.
First, measure 2 cups of short-grain Japanese rice using the rice cooker cup, not a standard US measuring cup. Rice cooker cups are approximately 180ml while US cups are 240ml. This distinction trips up many beginners.
Rinse the rice thoroughly. Place it in the cooker pot and add cold water. Swirl gently with your hand, then drain. Repeat 3 to 4 times until the water runs mostly clear rather than milky.
Add 2 cups of water (using the rice cooker measurement lines, not a separate cup). Let the rice soak for 30 minutes before cooking. This resting period allows even hydration.
Press cook and let the rice cooker complete its cycle. When finished, let the rice steam for 10 minutes without opening the lid. Fluff gently with a rice paddle before proceeding to seasoning.
Stovetop Method
Cooking sushi rice on the stovetop requires more attention but produces excellent results. You need a heavy-bottomed pot with a tight-fitting lid.
After rinsing 2 cups of rice, drain completely in a fine mesh strainer for 15 minutes. This removes excess surface water that would make your rice mushy.
Transfer the drained rice to a pot. Add 2.5 cups of water. Bring to a boil over high heat uncovered.
Once boiling, reduce heat to the lowest setting. Cover tightly and simmer for 15 minutes. Do not lift the lid during cooking.
Remove from heat and let stand covered for 10 minutes. This steaming phase completes the cooking process and ensures tender grains throughout.
How to Season Sushi Rice
Now comes the critical part. How to season sushi rice properly depends on timing, technique, and temperature control. Work quickly while the rice is hot.
Step 1: Prepare the Seasoning Mixture
Combine your rice vinegar, sugar, and salt in a small saucepan. Heat over medium-low heat, stirring constantly, just until the sugar and salt dissolve completely.
Do not let the mixture boil. Boiling changes the flavor profile and reduces the vinegar’s brightness. You want it warm enough to dissolve the solids, nothing more.
Set aside to cool slightly while your rice finishes cooking. The mixture should be at room temperature or slightly warm when you add it to the rice.
Step 2: Transfer Rice to a Wide Container
Move your hot cooked rice to a large, shallow container. A traditional hangiri or sushi oke works best, but any wide, non-metallic bowl will do. Wood absorbs excess moisture and helps achieve the right texture.
Spread the rice gently to increase surface area. This helps the seasoning distribute evenly and allows heat to escape efficiently.
Step 3: Add the Seasoning
Drizzle the vinegar mixture evenly over the hot rice. Use a circular pouring motion to distribute it across the surface rather than dumping it in one spot.
Work while the rice is still hot. Hot rice absorbs seasoning better and the heat helps evaporate excess moisture. Room temperature rice will not achieve the same glossy finish.
Step 4: Use the Cutting Motion
Here is where technique matters most. Use a shamoji, or rice paddle, held horizontally. Slice through the rice at a shallow angle, lifting and turning sections.
Think of cutting and folding rather than stirring. Stirring crushes the grains and makes the rice mushy. Each cut should separate a layer of rice, allowing the seasoning to coat new surfaces.
Continue this cutting motion across the entire surface. Work methodically from one side to the other, then rotate the bowl and repeat.
Step 5: Fan Cooling
While you cut and fold, have someone fan the rice vigorously. If cooking alone, use an electric fan positioned nearby or even a hair dryer on the cool setting.
The fan serves multiple purposes. It cools the rice quickly to stop further cooking. It helps evaporate excess vinegar moisture. Most importantly, it gives the rice that signature glossy sheen.
Continue cutting, folding, and fanning for 5 to 7 minutes. The rice should feel slightly warm to the touch, not hot, when finished.
Step 6: Rest and Cover
Gather the rice into a mound in your container. Cover with a damp, wrung-out kitchen towel. This prevents drying while allowing the rice to reach room temperature.
Let the seasoned rice rest for 10 to 15 minutes. This resting period allows the flavors to meld and the texture to stabilize.
Your sushi rice is now ready to use for nigiri, maki rolls, onigiri, or any Japanese dish requiring seasoned rice.
Tips and Troubleshooting
Even experienced cooks encounter issues with sushi rice. Here are solutions to the most common problems I have faced and heard about from forum discussions.
Problem: Rice Too Sticky or Gummy
Over-washing rice removes too much starch, but under-washing leaves excess starch that creates gumminess. Rinse until water runs mostly clear, not crystal clear.
Too much water during cooking also causes stickiness. Use the exact ratio specified for your cooking method.
If your rice is already gummy, the fan cooling technique helps. The air circulation separates grains and reduces excess surface moisture.
Problem: Rice Too Dry
Insufficient water during cooking is the usual culprit. Short-grain rice needs more water than long-grain varieties. Stick to the recommended ratios.
Over-fanning can also dry out rice. Cool the rice until just warm, not completely cold. Five to seven minutes of fanning usually suffices.
To rescue dry rice, you can add a teaspoon of water mixed with a few drops of vinegar, then gently fold it in.
Problem: Too Vinegary Taste
Start with less vinegar next time. Some brands of rice vinegar are stronger than others. Reduce by 1 tablespoon and taste test.
Adding more sugar can balance excess vinegar, but this changes the overall seasoning ratio. It is better to adjust the vinegar amount before seasoning.
A pinch of extra salt sometimes helps balance vinegar sharpness in already-seasoned rice.
Problem: Rice Falls Apart When Rolling
Under-seasoned rice lacks the stickiness needed to hold together. Make sure you are using the full amount of vinegar mixture.
Over-cooled rice becomes harder to shape. Work with rice that is still slightly warm or at room temperature. Refrigerated rice will not hold together properly.
Not rinsing rice adequately leaves surface starch that makes grains slip past each other rather than sticking together properly.
Problem: Seasoning Does Not Distribute Evenly
Pouring all the vinegar in one spot creates concentrated areas. Always drizzle in a circular pattern across the entire surface.
Insufficient cutting and folding leaves pockets of unseasoned rice. Take your time with the cutting motion. Work systematically across the whole batch.
Using a container that is too small prevents proper mixing. Your bowl should hold the rice in a layer no more than 2 inches deep.
Storage Instructions
Seasoned sushi rice is best used the same day you make it. Store at room temperature covered with a damp towel for up to 4 hours.
Do not refrigerate seasoned sushi rice intended for sushi. Cold temperatures change the texture and make the grains hard.
If you must refrigerate leftovers, use them for fried rice or rice bowls where texture matters less. Reheat gently with a sprinkle of water.
Make-Ahead Tips
Cook the rice up to 2 hours ahead and keep it warm in the rice cooker. Season just before you plan to use it.
Prepare the vinegar mixture up to a week in advance. Store in a sealed container at room temperature. Warm slightly before using to help it distribute through the rice.
For large gatherings, cook rice in batches rather than making one huge pot. Freshly seasoned small batches always beat a single large batch that has been sitting.
Frequently Asked Questions
What do you season sushi rice with?
How to season 2 cups of rice for sushi?
Do you season sushi rice hot or cold?
Can you use seasoned rice vinegar instead of making your own mixture?
Can you use jasmine rice for sushi?
How long does sushi rice last?
Conclusion
Learning how to season sushi rice opens the door to authentic Japanese cooking at home. The process is straightforward once you understand the fundamentals. Quality short-grain rice, the right vinegar-to-sugar-to-salt ratio, and proper technique make all the difference.
Remember the key principles. Season hot rice using a cutting motion. Fan vigorously while mixing for that perfect glossy finish. Work quickly but methodically.
With practice, you will develop a feel for the texture and flavor balance that defines excellent sushi rice. Your homemade nigiri, maki rolls, and onigiri will rival what you find at your favorite restaurant. Start with the basic recipe and adjust to your taste preferences over time.