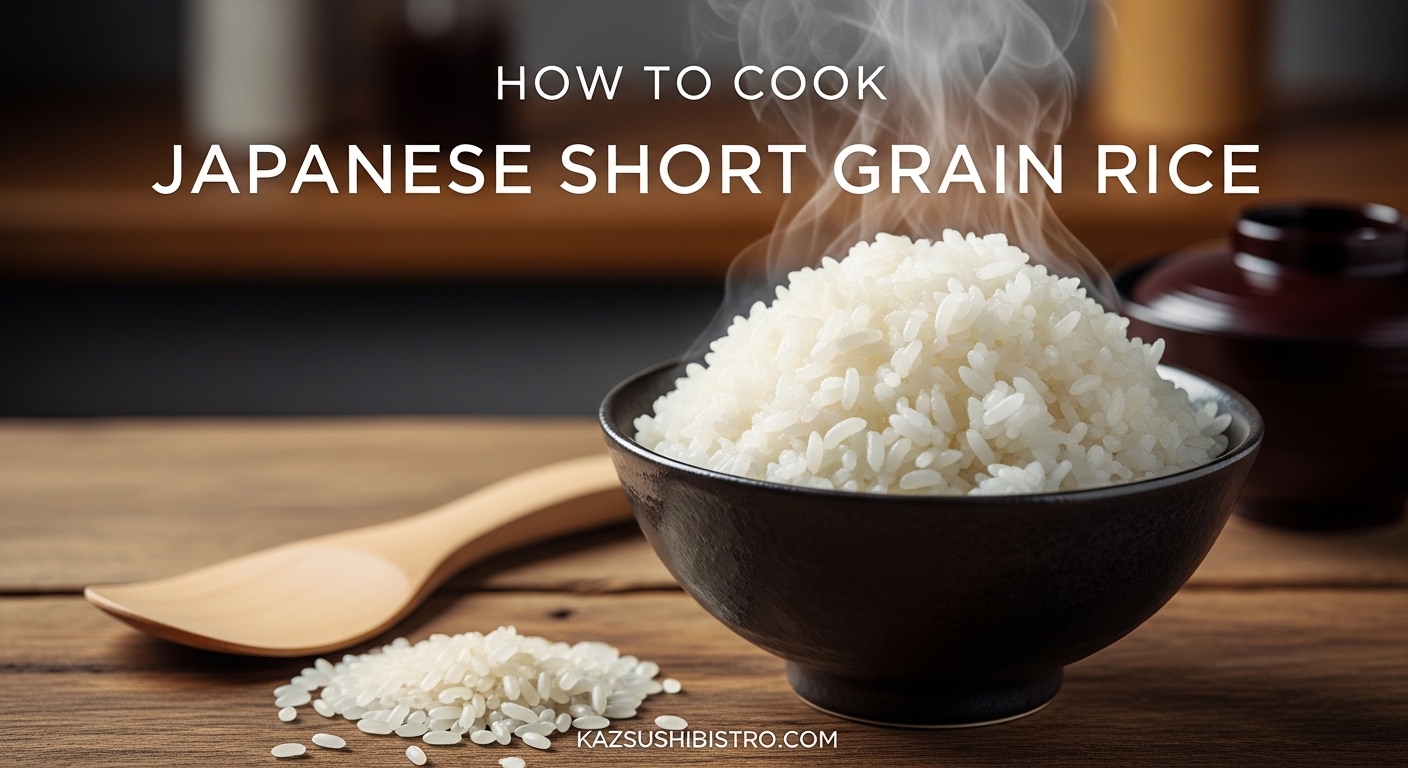
Cooking Japanese short grain rice properly requires four essential steps: rinse the rice until water runs clear, soak for 30 minutes, cook for 12-13 minutes on low heat, then steam off-heat for 10 minutes before fluffing. This method produces the characteristic sticky, tender, and glossy texture that defines authentic Japanese rice. I spent months perfecting this technique in my home kitchen, testing different ratios and methods until I could consistently recreate restaurant-quality results without a rice cooker.
In this guide, I will walk you through exactly how to cook Japanese short grain rice on your stovetop. You will learn the precise water ratios, the science behind rinsing and soaking, and the common mistakes that lead to mushy or undercooked rice.
Whether you are preparing rice for sushi, onigiri, or a simple donburi bowl, mastering this fundamental technique will transform your Japanese home cooking.
Table of Contents
What is Japanese Short-Grain Rice?
Japanese short-grain rice, also known as japonica rice or uruchimai, is a distinct variety characterized by its short, plump, and rounded grains. Unlike long-grain varieties that cook up fluffy and separate, short-grain rice contains higher levels of amylopectin starch, which creates the signature sticky, clingy texture essential to Japanese cuisine.
The grain structure absorbs water differently than other rice types. When cooked properly, each grain becomes tender and slightly translucent while maintaining enough integrity to hold together when pressed. This unique texture makes it perfect for eating with chopsticks and forming into shapes like sushi rolls and rice balls.
Many people confuse short-grain rice with sushi rice. While sushi rice is indeed short-grain, not all short-grain rice is labeled as sushi rice. The term “sushi rice” typically refers to short-grain rice that has been seasoned with vinegar, sugar, and salt after cooking. For everyday meals, plain steamed short-grain rice (gohan) is the standard accompaniment to Japanese dishes.
Rice-to-Water Ratio: The Golden Rule 2026
The ideal rice-to-water ratio for Japanese short-grain rice falls between 1:1.1 and 1:1.2. This means for every cup of rice, you need slightly more than one cup of water. I find that 1:1.15 works perfectly for most brands, producing rice that is moist and tender without being mushy.
Precision matters significantly here. Too much water creates gummy, overcooked rice with no texture. Too little water leaves you with hard centers and a chalky bite. The exact ratio can vary slightly depending on your pot, your stove, and the specific rice brand you are using.
Here are the standard measurements I use:
- 1 cup rice: 1.15 cups water (approximately 180g rice to 270ml water)
- 2 cups rice: 2.3 cups water
- 3 cups rice: 3.45 cups water
If you want maximum consistency, use a kitchen scale. One Japanese rice cooker cup (180ml) equals approximately 150 grams of uncooked rice. Weighing eliminates the variability of how firmly you pack the cup or how level your scoop is.
You may have heard about the finger method for measuring water. While some experienced cooks swear by this technique, I do not recommend it for beginners. The finger method involves resting your fingertip on top of the rice and adding water until it reaches your first knuckle. This works only if you are using the exact same pot and rice amount every time. For reliable results, stick to measured ratios.
Equipment You’ll Need
You do not need expensive equipment to cook perfect Japanese rice. A basic heavy-bottomed pot and a few simple tools will serve you well. The key is choosing equipment that distributes heat evenly and allows you to monitor the cooking process without disturbing the rice.
Heavy-bottomed pot: A thick-bottomed pot prevents hot spots that burn the rice. I use a 3-quart Staub cocotte, but any enameled Dutch oven, cast iron pot, or thick stainless steel pot works. Avoid thin aluminum pots that heat unevenly. The pot should have a tight-fitting lid that seals in steam.
Glass lid (preferred): A clear glass lid lets you see when the water has been absorbed without lifting the cover. Every time you open the lid, you release steam and disrupt the cooking temperature. Being able to watch through the glass is a significant advantage.
Fine-mesh sieve: You need a sieve with holes small enough that rice grains do not slip through during rinsing. A standard colander is too coarse. Look for a mesh size that holds even the smallest grains.
Rice paddle (shamoji): This flat wooden or plastic paddle is designed specifically for fluffing rice without crushing the grains. The broad surface lets you fold the rice gently. While a regular spoon works in a pinch, a shamoji makes the job easier and prevents mashing.
Measuring tools: Use a standard measuring cup for the rice and a liquid measuring cup for water. Alternatively, invest in a Japanese rice cooker cup (180ml) if you plan to cook rice regularly. Remember that Japanese rice cups are smaller than American standard cups.
How to Cook Japanese Short Grain Rice: Step-by-Step Instructions
This is the method I use several times per week. Follow these steps exactly, and you will achieve restaurant-quality results consistently. The total active time is about 15 minutes, though you need to account for soaking and steaming time.
Step 1: Measure Your Rice
Start by measuring the amount of rice you need. One cup of uncooked rice yields approximately two cups of cooked rice, which serves two people as a main side dish. For a family of four, measure two cups.
Transfer the measured rice to your fine-mesh sieve or directly into your pot if you prefer. I recommend the sieve method because it makes rinsing significantly easier and prevents losing grains down the drain.
Step 2: Rinse Until the Water Runs Clear
Rinsing removes excess surface starch that causes rice to become gummy. Place the rice in your sieve and run cool water over it, using your hand to gently agitate the grains. The water will turn milky white as the starch washes away.
Continue rinsing and agitating for about 30 seconds, then drain. Repeat this process three to four times until the water running through the rice is nearly clear. The first two rinses will be quite cloudy. By the third or fourth rinse, you should see only slight cloudiness.
Do not skip this step. Unrinsed rice produces a thick, glue-like texture that no amount of precise cooking can fix. Some modern rice brands come labeled “no wash” or “musenmai,” but for traditional short-grain rice, rinsing is essential.
Step 3: Soak the Rice
Transfer your rinsed rice to your cooking pot and add the measured water. Let the rice soak at room temperature for at least 30 minutes. This step is non-negotiable if you want properly cooked rice.
Soaking allows the rice grains to absorb water evenly from the outside in. Without soaking, the exterior overcooks while the center remains chalky and hard. Soaked rice cooks more evenly and achieves that characteristic tender-yet-chewy texture.
If you have time, extend the soak to one hour for even better results. Some cooks soak for two to three hours, particularly for older rice that has been sitting in storage. However, do not soak overnight at room temperature, as this can cause fermentation and off-flavors.
After soaking, you will notice the rice appears whiter and more opaque. The grains have plumped slightly. Check your water level and add a splash more if needed, as the rice will have absorbed some liquid during the soak.
Step 4: Cook on the Stove
Place your pot on the stove over medium-high heat with the lid on. Bring the water to a boil. This typically takes five to eight minutes depending on your pot and heat level.
Once you hear bubbling or see steam escaping around the lid edges, reduce the heat to the lowest possible setting. Simmer gently for exactly 12 minutes. Do not lift the lid during this time. The steam circulating inside is doing the actual cooking work.
If you have a glass lid, you can watch for visual cues. The surface will show active bubbling initially, then the bubbling will subside as the water is absorbed. By the 12-minute mark, you should see small steam holes (craters) forming on the surface of the rice.
The timing assumes standard short-grain rice soaked for 30 minutes. If you soaked longer, reduce cooking time by one to two minutes. If you skipped soaking entirely (which I do not recommend), you may need to add three to four minutes.
Step 5: Steam and Fluff
After the 12-minute simmer, remove the pot from heat completely. Keep the lid tightly sealed and let the rice steam for 10 minutes. This resting period is where the magic happens.
During steaming, the residual heat continues cooking the rice gently while the moisture redistributes evenly throughout the grains. The center finishes cooking without the exterior becoming mushy. This step transforms good rice into great rice.
When the 10 minutes are up, remove the lid. Use your rice paddle to fluff the rice by folding it gently from the bottom up. Work in a slicing motion rather than stirring to avoid breaking the grains. The rice should release easily from the pot bottom with no sticking if you used a heavy pot.
Serve immediately for the best texture. Properly cooked Japanese rice holds its quality for about 30 minutes after fluffing, then gradually begins to dry and harden.
Stovetop vs Rice Cooker: Which is Better?
Rice cookers offer convenience and consistency, but the stovetop method gives you more control and often produces better texture once you master it. I own both and choose based on the situation.
Rice cooker advantages: Set-it-and-forget-it operation, consistent results regardless of who is cooking, and built-in warming functions that keep rice perfect for hours. Modern fuzzy logic rice cookers adjust temperature and timing automatically based on the rice type.
Stovetop advantages: Better control over the final texture, ability to adjust for different rice ages and brands, and often a slightly firmer, more defined grain that many people prefer. The stovetop method also develops a subtle toasty flavor on the bottom layer that rice cookers cannot replicate.
If you cook rice daily, a quality rice cooker is worth the investment. For occasional rice cooking or when you want maximum control over the outcome, the stovetop method is superior. The texture difference is subtle but noticeable to discerning palates.
One tip if you switch between methods: rice cookers typically use slightly less water than stovetop cooking because they lose less moisture to evaporation. If adapting a stovetop recipe to a rice cooker, reduce water by about 10 percent.
Cooking Tips and Common Mistakes to Avoid
After cooking hundreds of batches of Japanese rice, I have identified the specific errors that ruin results. Avoid these mistakes and you will consistently achieve that restaurant-quality glossy sheen.
Mistake 1: Not rinsing thoroughly. One quick rinse is not enough. The water needs to run nearly clear, which takes three to four rinses for most brands. Insufficient rinsing leaves surface starch that makes rice gummy and clumpy.
Mistake 2: Skipping the soak. I know it is tempting to rush, but the 30-minute soak is essential for even cooking. Unsoaked rice has hard, chalky centers even when the exterior is perfectly cooked.
Mistake 3: Opening the lid during cooking. Every time you lift the lid, you release steam and drop the temperature. This extends cooking time and creates uneven results. Trust the process and keep that lid on.
Mistake 4: Cooking on too high heat after boiling. Once the water reaches a boil, you must drop to the lowest possible simmer. High heat causes the bottom layer to burn while the top remains undercooked.
Mistake 5: Skipping the steaming phase. The 10-minute off-heat rest is not optional. This is when the rice finishes cooking through and develops its characteristic glossy appearance. Fluffing immediately after removing from heat produces drier, less tender rice.
Mistake 6: Using the wrong water ratio. The 1:1.1 to 1:1.2 ratio is specific to Japanese short-grain rice. Using the ratios for long-grain or basmati rice will give you completely wrong results.
For achieving the best texture, use room temperature water for soaking and cooking. Cold water straight from the tap works fine, but extremely cold water can slightly extend the soaking time needed. The rice does not care about water temperature during cooking as long as it is not hot enough to start the cooking process prematurely.
Age of rice matters too. New crop rice (shinmai), harvested in the current year, requires slightly less water because it has higher moisture content naturally. Rice that is one to two years old needs the full water ratio or even a touch more. Check your bag for harvest dates if available.
Troubleshooting Guide: Fixing Failed Rice
Even experienced cooks have off days. Here is how to identify and address the most common rice problems based on what forum users and cooking community members report most frequently.
Problem: Mushy rice with no texture. This usually means too much water or insufficient rinsing. Next time, reduce your water ratio by 10 percent and rinse more thoroughly. Unfortunately, mushy rice cannot be fixed after cooking. Use it for rice porridge (okayu) or fried rice instead.
Problem: Hard, chalky center (undercooked). The rice needed more soaking time or more water. Extend your soak to one hour next time, or increase your water ratio slightly. If you catch this immediately after cooking, you can add a few tablespoons of water and steam for another 5-10 minutes to salvage the batch.
Problem: Burnt bottom layer. Your heat was too high during the simmering phase, or your pot is too thin. Always use the lowest possible heat setting after the initial boil. If only the very bottom is burnt, you can often salvage the upper layers by transferring them to a new container immediately.
Problem: Dry, crumbly texture. Not enough water or insufficient steaming time. Increase your water ratio and make sure you complete the full 10-minute steam phase. Also verify your lid seals tightly, as steam escaping during cooking removes needed moisture.
Problem: Inconsistent batches. This typically comes from inconsistent measuring. Switch to weight-based measurements using a kitchen scale. Also ensure you are using the same pot each time, as different pots have different evaporation rates.
Problem: Rice tastes bland. Japanese rice should taste subtly sweet and nutty on its own. If it tastes flat, your rice may be very old or of lower quality. Try a different brand, specifically one labeled as new crop or from a reputable Japanese producer.
How to Store and Reheat Japanese Rice
Properly storing cooked rice is essential for food safety and quality. Japanese rice behaves differently than long-grain varieties when stored.
Refrigeration: Cool rice completely within one hour of cooking, then transfer to an airtight container. Refrigerated rice keeps for one to two days maximum. It will harden considerably in the cold, which is actually desirable for fried rice but less pleasant for eating plain.
Freezing (preferred method): Divide rice into single-serving portions while still warm. Wrap each portion tightly in plastic wrap, then place in a freezer bag. Frozen rice maintains quality for up to one month. The texture remains surprisingly good when reheated properly.
Reheating methods: For refrigerated rice, sprinkle with one teaspoon of water per serving and microwave covered for one to two minutes. The steam revives the texture. For frozen rice, microwave directly from frozen for two to three minutes, or steam in a pot for five minutes.
Never leave cooked rice at room temperature for more than two hours. Bacillus cereus bacteria can grow on rice and cause food poisoning. When in doubt, refrigerate promptly.
Recommended Japanese Rice Brands
The brand and variety of rice significantly impacts your results. Here are the most widely available quality options and what distinguishes them.
Koshihikari: The gold standard of Japanese rice, grown in multiple regions of Japan and now California as well. Known for its sweet flavor, glossy appearance, and perfect sticky texture. Look for “Niigata Koshihikari” for the most prized domestic Japanese version, or California-grown for excellent quality at lower cost.
Tamaki Gold: A premium California-grown short-grain rice that rivals Japanese imports. Consistently high quality with excellent texture and flavor. Widely available at Asian markets and increasingly at mainstream grocers.
Tamanishiki: Another California-grown favorite with a loyal following. Slightly firmer texture than Koshihikari when cooked, with excellent gloss. Often less expensive than Tamaki Gold while maintaining high quality.
Hitomebore: A newer Japanese variety gaining popularity for its slightly larger grains and sweet taste. Excellent for those who find traditional short-grain too sticky. Available as both Japanese import and California-grown versions.
Yumepirika: A Hokkaido-grown premium variety with exceptional sweetness and a slightly chewy texture. Among the most expensive imported options, but worth trying for special occasions.
Calrose: The most widely available and affordable option, grown primarily in California. While not as premium as the above varieties, good-quality Calrose produces perfectly acceptable rice for everyday meals. Look for newer crop rice for best results.
When buying, check for “new crop” or “shinmai” labels if available. New harvest rice has higher moisture content and cooks up more tender and fragrant than rice that has been stored for a year or more.
FAQs
How do you cook Japanese short grain rice?
Rinse the rice 3-4 times until water runs clear. Soak for 30 minutes. Bring to a boil, then simmer covered on low heat for 12-13 minutes. Remove from heat and steam for 10 minutes. Fluff and serve.
Do you have to soak Japanese short grain rice?
Yes, soaking is essential for 30 minutes minimum. Soaking allows water to penetrate the grains evenly, ensuring the center cooks properly without the exterior becoming mushy. Skipping the soak results in chalky, undercooked centers.
What is the water ratio for short grain rice?
Use a 1:1.1 to 1:1.2 ratio of rice to water. For 1 cup of rice, use 1.15 cups of water. For best results, measure by weight: 150g rice to 170-180ml water.
How long to cook Japanese rice on stove?
After soaking, bring to a boil (5-8 minutes), then simmer on low for 12-13 minutes. Remove from heat and steam for 10 minutes without opening the lid. Total time from boil to finish is approximately 22-23 minutes.
Why is my Japanese rice mushy?
Mushy rice results from too much water or insufficient rinsing. Reduce your water ratio by 10 percent and rinse until water runs nearly clear. Also ensure you are not overcooking during the simmering phase.
Can you cook Japanese rice in a regular pot?
Yes, a heavy-bottomed pot works excellently. Use a Dutch oven, enameled cast iron, or thick stainless steel pot with a tight-fitting lid. Avoid thin aluminum pots that heat unevenly and burn the bottom layer.
Do I need to rinse Japanese rice?
Yes, rinsing is mandatory for traditional Japanese short-grain rice. Rinse 3-4 times until water runs nearly clear to remove excess surface starch. Skip rinsing only if the package specifically states the rice is pre-washed (musenmai).
Can I soak rice overnight in the fridge?
Soaking overnight at room temperature can cause fermentation. If you need to soak longer than 2 hours, refrigerate the rice in its soaking water for up to 8 hours. Bring to room temperature before cooking, or add 1-2 minutes to cooking time.
Conclusion
Mastering how to cook Japanese short grain rice transforms your ability to prepare authentic Japanese meals at home. The process requires attention to detail: rinsing thoroughly, soaking patiently, measuring precisely, and respecting the cooking and steaming phases.
Start with quality rice like Koshihikari or Tamaki Gold. Use a heavy-bottomed pot with a tight lid. Follow the 1:1.15 water ratio and never skip the 30-minute soak or 10-minute steam.
Your first few batches may not be perfect. Rice cooking is a skill that improves with practice and observation. Pay attention to how your specific stove and pot behave, and adjust timing slightly as needed.
Once you consistently produce glossy, tender, perfectly sticky rice, you will have unlocked the foundation of Japanese home cooking. From there, sushi rolls, onigiri, donburi bowls, and countless other dishes become accessible projects. The investment in learning this technique pays dividends every time you sit down to a bowl of perfectly steamed gohan.