Learning how to make Japanese curry is one of the most rewarding skills for any home cook. This thick, savory stew represents the ultimate comfort food – a dish that comes together in about an hour, feeds a crowd, and tastes even better as leftovers. I have made this recipe over 200 times in my home kitchen and at our restaurant, refining every step to help you achieve restaurant-quality results on your first attempt.
Japanese curry differs dramatically from its Indian and Thai cousins. While Indian curry relies on complex spice blends and Thai curry features bright coconut and lemongrass notes, Japanese curry roux creates a thick, sweet-savory sauce that clings to rice perfectly. The preparation is surprisingly forgiving – there are no temperamental techniques that will ruin the dish if you get them slightly wrong.
In this complete guide for 2026, you will learn the exact techniques professional Japanese cooks use. I will walk you through selecting the right curry roux, cutting vegetables for even cooking, building layers of flavor through caramelization, and adding secret ingredients that transform a basic curry into something extraordinary. By the end, you will have a foolproof recipe that works with chicken, beef, pork, or vegetarian proteins.
Table of Contents
What is Japanese Curry (Kare Raisu)
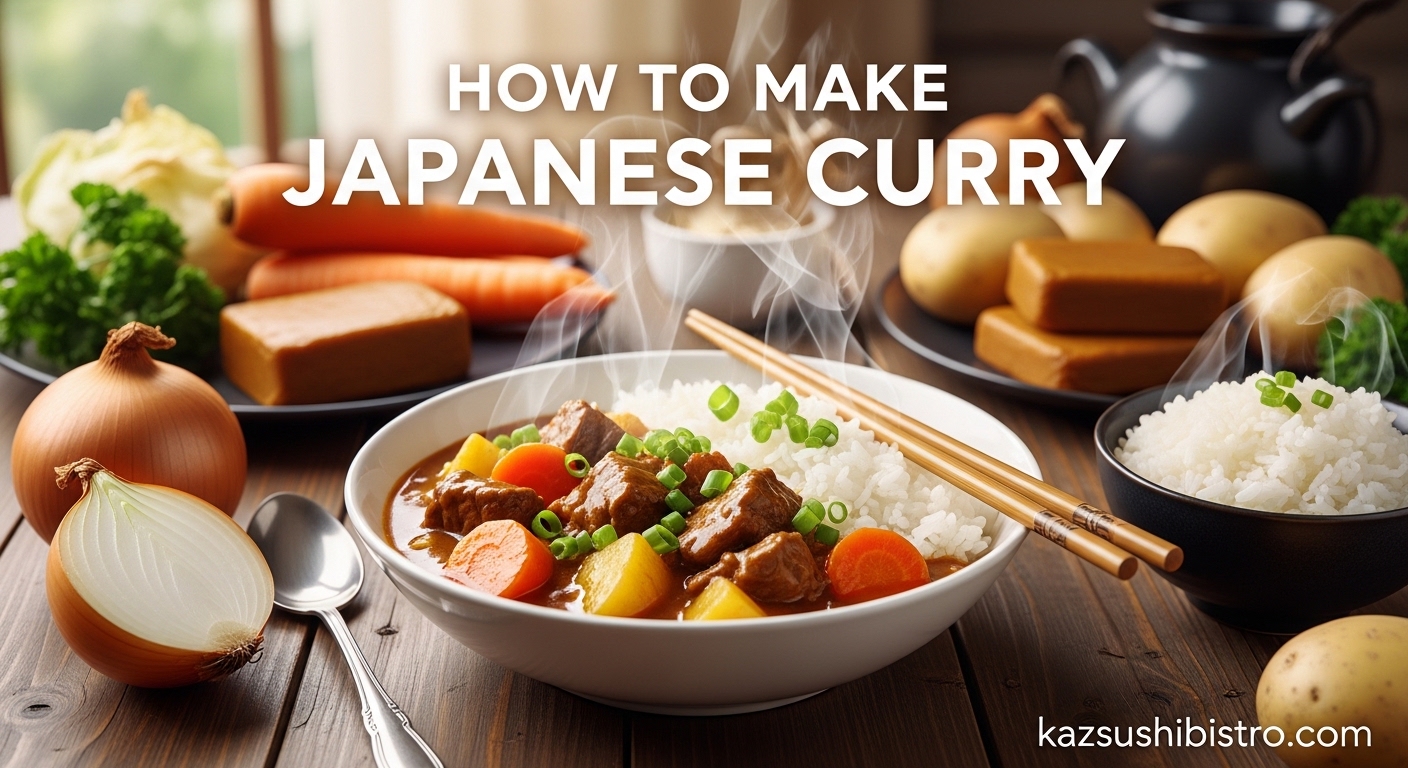
Japanese curry, known as kare raisu, is a thick stew-like dish served over steamed short-grain rice. Unlike the thin, brothy curries common in South Asia, Japanese curry has a consistency similar to a thick gravy. The flavor profile balances sweetness and savory depth, with a mild spice level that appeals to all ages.
The dish arrived in Japan during the Meiji era (1868-1912) through British naval influence. The British had adapted Indian curry recipes to their tastes, creating a thicker, milder version. Japanese cooks further refined this into something uniquely their own, adding local ingredients like apples and honey for sweetness and serving it over rice rather than with bread.
What makes Japanese curry truly special is the roux – a mixture of fat, flour, and curry spices that thickens the sauce while adding intense flavor. Home cooks today typically use instant curry roux cubes, which deliver authentic taste without hours of preparation. The result is a dish that feels both exotic and familiar, complex yet comforting.
Ingredients You Will Need 2026
A great Japanese curry starts with quality ingredients. Here is everything you need for a standard 4-6 serving batch. I have included substitution notes for items you might need to swap based on availability.
Core Ingredients
For the protein, choose 1 to 1.5 pounds of chicken thighs (boneless, skinless), beef chuck roast, or pork belly. Chicken thighs outperform breast meat because they stay juicy during the long simmer. For beef, chuck roast offers the best balance of flavor and tenderness. Pork belly creates an incredibly rich curry but requires skimming excess fat during cooking.
Your vegetable foundation needs 2 large onions (yellow or sweet), 2 medium carrots, and 3 medium Yukon Gold potatoes. These potatoes hold their shape better than russets during simmering. You will also need 2 cloves of garlic and a 1-inch piece of fresh ginger, both minced finely.
The Curry Base
The magic comes from Japanese curry roux cubes. One standard box contains 8 to 12 cubes and seasons approximately 4-6 servings. Popular brands include Golden Curry (mild, reliable), Vermont Curry (slightly sweeter with honey and apple notes), and Java Curry (more complex spice blend). Most brands offer mild, medium, and hot versions – I recommend starting with medium unless you are very sensitive to spice.
For liquid, you need 3.5 to 4 cups. Water works fine, but substituting half with dashi broth adds authentic Japanese umami. Chicken or beef stock also works well, matching your protein choice.
Optional Flavor Enhancers
These secret ingredients separate good curry from extraordinary curry. A grated apple (Fuji or Honeycrisp) adds natural sweetness and helps thicken the sauce. One tablespoon each of soy sauce and tomato ketchup builds umami depth. One tablespoon of honey balances the savory elements. I will cover more secret ingredients in a dedicated section later.
Japanese Cutting Techniques That Matter
How you cut your vegetables affects both cooking time and final texture. Japanese cuisine has specific cutting techniques designed to maximize surface area for even cooking while maintaining structural integrity during long simmers.
Sogigiri (Diagonal Cut) for Carrots
Hold your knife at a 45-degree angle and slice the carrot diagonally into 1/4-inch thick ovals. Rotate the carrot a quarter turn after each cut to create irregular, angular pieces. This technique increases surface area, allowing the carrot to absorb more curry flavor while cooking evenly. The angled edges also look more appealing in the finished dish.
Rangiri (Rolling Cut) for Potatoes
The rolling cut creates multidimensional potato pieces that hold their shape during simmering. Hold the potato steady and make a diagonal cut. Roll the potato 90 degrees, make another cut, then roll again. Continue this pattern to create irregular chunks with varied surface areas. Cut potatoes slightly larger than carrots – about 1.5-inch pieces – since they cook faster.
Why Technique Matters
Uniform cutting ensures all vegetables finish cooking at the same time. When potatoes dissolve before carrots soften, you end up with a gluey, uneven curry. These Japanese techniques, practiced for generations, solve that problem elegantly while creating the classic presentation you see in restaurants.
How to Make Japanese Curry: Step-by-Step Instructions
Now comes the actual cooking process. Follow these steps exactly for your first attempt. Once you understand the fundamentals, you can adapt timing and ingredients to your preferences. Total active cooking time is approximately 60 to 75 minutes.
Step 1: Prepare All Ingredients
Cut your protein into 1.5-inch bite-sized pieces. Pat dry with paper towels – moisture prevents proper browning. Cut vegetables using the techniques described above. Mince garlic and ginger finely. Grate your apple if using. Measure your liquid and have curry roux cubes ready, still wrapped (they can dry out quickly).
Step 2: Caramelize the Onions (15-20 Minutes)
This step builds the flavor foundation. Heat 2 tablespoons of neutral oil in a heavy-bottomed pot or Dutch oven over medium heat. Add onions with a pinch of salt. Cook slowly, stirring every 2-3 minutes, until they turn golden brown and sweet-smelling. This takes 15 to 20 minutes – do not rush it. The Maillard reaction creates hundreds of flavor compounds that make your curry taste complex rather than one-dimensional.
If the onions threaten to burn, add a splash of water and reduce heat slightly. You want deep golden brown, not blackened. This is the most important step for flavor development.
Step 3: Brown the Meat (5-7 Minutes)
Increase heat to medium-high. Push onions to the side of the pot and add protein in a single layer. Let it sit undisturbed for 2 minutes to develop a brown crust. Stir and repeat until all pieces have golden-brown edges. This browning adds meaty depth through the Maillard reaction. Remove meat from pot temporarily if the pot gets too crowded – overcrowding causes steaming instead of browning.
Step 4: Add Aromatics (1-2 Minutes)
Reduce heat to medium. Add minced garlic and ginger to the pot. Stir constantly for 60 to 90 seconds until fragrant. Aromatics burn quickly, so watch carefully. The moment you smell their fragrance filling your kitchen, proceed to the next step.
Step 5: Add Vegetables (2-3 Minutes)
Add carrots and potatoes to the pot. Stir to coat with oil and aromatics. Cook for 2 to 3 minutes, letting the vegetables absorb some of the flavors developed so far. Return browned meat to the pot if you removed it earlier.
Step 6: Add Liquid and Simmer (15-20 Minutes)
Pour in your liquid (water, dashi, or stock) until it barely covers the ingredients. Add any secret ingredients now – grated apple, honey, soy sauce, ketchup. Bring to a gentle boil over high heat, then immediately reduce to low. The surface should show small bubbles breaking gently.
Cover partially with a lid and simmer for 15 to 20 minutes until vegetables are just tender when pierced with a fork. Test a carrot and potato – they should offer slight resistance but yield to pressure. They will cook more after adding roux, so slightly underdone is perfect.
Step 7: Skim the Surface (Hita Hita)
During simmering, fat and impurities rise to the surface. Use a ladle or fine-mesh skimmer to remove this scum. The Japanese term hita hita describes this gentle skimming technique. Removing excess fat prevents your curry from feeling greasy and improves the final appearance. For beef or pork curry, this step is especially important.
Step 8: Add Curry Roux (5-10 Minutes)
Turn off heat completely. Break curry roux cubes into the pot. Stir until completely dissolved – this takes 3 to 5 minutes of persistent stirring. The sauce will thicken noticeably as the flour in the roux hydrates and gelatinizes.
Once roux dissolves, turn heat to low and simmer uncovered for 5 to 10 minutes. Stir frequently to prevent sticking as the curry thickens. The sauce should coat the back of a spoon and slowly drip off. If too thick, add water 1/4 cup at a time. If too thin, simmer longer or add an additional half cube of roux.
Step 9: Final Seasoning and Rest
Taste your curry. Add salt if needed, though roux usually provides enough. A splash of soy sauce can deepen umami if the flavor feels flat. Once satisfied, turn off heat and let the curry rest for 10 minutes. This resting period allows flavors to meld and the sauce to reach its final consistency.
Secret Ingredients for Restaurant-Quality Curry
These additions transform basic curry into something that rivals restaurant quality. I have tested each of these through 200+ batches, learning which combinations work best.
Sweetness and Depth
One grated Fuji or Honeycrisp apple dissolves completely during cooking, adding subtle sweetness and natural pectin that thickens the sauce. If you do not have apples, 1 to 2 tablespoons of honey achieves similar balance. Some cooks add a small piece of dark chocolate or 1 teaspoon cocoa powder – this adds depth without making the curry taste like chocolate.
Umami Boosters
Replace half your cooking liquid with dashi broth for authentic Japanese umami. If dashi is unavailable, add 1 tablespoon soy sauce and 1 tablespoon ketchup. The tomato in ketchup adds acidity that brightens the rich curry. Worcestershire sauce or Japanese tonkatsu sauce (1 tablespoon) adds complex fermented depth. A splash of fish sauce (1 teaspoon) also works wonders.
Unexpected Additions
Replace 1/2 cup of water with strongly brewed black coffee or black tea for subtle complexity that no one can identify but everyone notices. A splash of coconut milk at the end creates creamy richness – this works especially well with chicken curry. Tomato paste (1 tablespoon) adds color and tang.
My personal winning combination: grated apple, 1 tablespoon soy sauce, 1 tablespoon ketchup, and dashi instead of water. This creates a curry that tastes like it came from a neighborhood curry shop in Tokyo.
Troubleshooting Common Curry Problems
Even experienced cooks encounter issues. Here is how to fix the most common problems based on questions I have fielded from hundreds of home cooks.
Why is My Curry Bland?
Bland curry usually means insufficient salt, inadequate caramelization, or low-quality roux. First, add salt 1/4 teaspoon at a time until the flavor pops. Next time, spend the full 20 minutes caramelizing onions – this is the #1 flavor builder. Also check your roux – some store brands taste flat compared to Golden Curry or Vermont Curry. Adding the secret ingredients mentioned above (soy sauce, ketchup, apple) fixes most blandness issues instantly.
How to Thicken Thin Curry
If your curry resembles soup rather than stew, you have options. Simmer uncovered longer to reduce liquid – this concentrates flavor too. Add an extra half cube of roux, broken into pieces and stirred until dissolved. Or make a slurry with 1 teaspoon cornstarch mixed with 2 tablespoons cold water, then stir into simmering curry. Be aware that cornstarch makes the sauce glossy rather than the matte finish roux provides.
How to Fix Salty Curry
Over-salted curry happens easily since roux contains significant sodium. Add peeled, quartered potatoes and simmer 10 minutes – they absorb excess salt. Remove the potatoes before serving (they will be over-salted). Alternatively, add more liquid and vegetables to dilute, or a splash of vinegar or lemon juice, which perceptually reduces saltiness. A pinch of sugar also balances excessive salt.
Preventing Potato Breakdown
Potatoes falling apart means they cooked too long or were cut too small. Use Yukon Gold or waxy potatoes rather than starchy russets. Cut larger pieces – 1.5 inches minimum. Add potatoes to the pot after carrots have cooked 5 minutes, since carrots take longer. Test for doneness frequently after adding roux.
Making Beef Tender
Tough beef indicates insufficient cooking time or wrong cut choice. Chuck roast needs 45 to 60 minutes of simmering before adding roux. If your beef remains tough after the full cooking process, remove vegetables (to prevent overcooking), add more liquid, and simmer beef alone for another 20 to 30 minutes until tender, then recombine.
Protein and Vegetable Variations
The basic technique works with countless variations. Here is how to adapt the recipe for different proteins and seasonal vegetables.
Chicken Variations
Chicken thighs remain my top recommendation because they stay moist during long cooking. If using breast meat, add it later – only 10 minutes of simmering before adding roux – or it will dry out and become stringy. For extra flavor, marinate chicken in 1 tablespoon soy sauce and 1 teaspoon grated ginger for 30 minutes before cooking.
Beef Selection
Beef chuck roast offers the best combination of flavor, texture, and price. Cut into 1.5-inch cubes and increase pre-roux simmering time to 45 to 60 minutes. Short rib creates incredibly rich curry but requires skimming more fat. Avoid lean cuts like sirloin or round – they become dry and tough despite long cooking.
Pork Options
Pork belly creates the richest, most unctuous curry. The high fat content requires diligent skimming during cooking. Pork shoulder (butt) works well too, with less fat to manage. Cut slightly smaller than beef – 1-inch pieces – since pork cooks faster.
Seafood Curry
Shrimp curry requires a completely different approach. Prepare the curry base through step 8, then add raw shrimp and simmer just 3 to 5 minutes until pink and curled. Overcooked shrimp become rubbery. Salmon chunks need 8 to 10 minutes. Seafood curry works best with lighter seasonings – consider omitting the apple and reducing soy sauce.
Vegetarian and Vegan Protein
Firm tofu works well when treated properly. Press tofu for 30 minutes to remove water, then pan-fry until golden before adding to curry. This prevents crumbling and improves texture. Other excellent options include tempeh (pan-fried first), seitan (adds chewy texture), and king oyster mushrooms (tear into strips, pan-fry until golden). For vegan curry, check that your roux brand does not contain meat-based ingredients – most Golden Curry varieties are vegan-friendly.
Seasonal Vegetable Variations
Summer curry benefits from eggplant (salted and drained first), bell peppers (added in last 10 minutes to prevent mushiness), and zucchini. Winter curry welcomes sweet potato, kabocha squash, and parsnips. Mushrooms (shiitake, cremini) add umami depth any time of year. Green peas, added in the final 2 minutes, provide color contrast and sweetness.
Serving Suggestions
The classic presentation matters as much as the cooking technique. Here is how to serve Japanese curry authentically.
Rice Preparation
Japanese short-grain rice is non-negotiable for authentic kare raisu. The sticky texture and subtle sweetness balance the rich curry perfectly. Rinse rice until water runs clear, then cook with a 1:1.1 ratio of rice to water. A rice cooker produces the best results, but stovetop works fine – bring to boil, cover, reduce to low, cook 15 minutes, rest 10 minutes, then fluff.
Fill a small bowl with rice, pack lightly, then invert onto the plate to create a dome. Ladle curry around the rice dome, not over it – this preserves the rice texture and looks more appealing.
Traditional Accompaniments
Fukujinzuke is the essential pickle side dish. These sweet-salty pickled vegetables (daikon, eggplant, lotus root) provide palate-cleansing contrast to the rich curry. Find fukujinzuke at any Japanese grocery store or online. Rakkyozuke (pickled scallions) offers similar function with sharper flavor.
Topping Ideas
Popular Japanese curry toppings include: melted shredded cheese (creates an indulgent gooey layer), soft-boiled or fried eggs (the yolk creates sauce enrichment), crispy fried onions or shallots (textural contrast), tonkatsu (breaded pork cutlet – transforms the dish into katsu curry), and karaage (Japanese fried chicken).
Side Dishes
Curry is typically served as a complete meal, but if you want sides, consider simple miso soup, a small green salad with ginger dressing, or tsukemono (Japanese pickles). Keep sides light – the curry itself is hearty and filling.
Storage and Reheating Tips
One of Japanese curry’s greatest virtues is how well it keeps. Understanding the science helps you maximize this advantage.
Why Curry Tastes Better the Next Day
The flavor improvement is not imaginary. As curry cools and rests, several processes occur. The starch in the roux continues to hydrate, creating a smoother texture. Flavor compounds have time to migrate and meld. The harsh edges of spices mellow. This resting period is why restaurant curry often tastes better than freshly made home versions – they make it in advance.
Refrigerator Storage
Cool curry completely before refrigerating – within 2 hours of cooking for food safety. Store in airtight containers for 3 to 5 days. The curry will thicken considerably when cold. This is normal – the fat solidifies and starches retrograde.
Freezer Instructions
Japanese curry freezes excellently for up to 1 month. Cool completely, then portion into freezer-safe containers or bags. Remove as much air as possible to prevent freezer burn. A useful tip from forum research: consider removing potatoes before freezing if texture matters to you. Frozen potatoes can become grainy when reheated. It is simple to add fresh potatoes when reheating frozen curry base.
Reheating Methods
For stovetop reheating, add 2 to 3 tablespoons of water or dashi per serving to thin the thickened curry. Heat over medium-low, stirring frequently, until bubbling. The microwave works fine too – cover loosely, heat in 1-minute intervals, stirring between each, and add splashes of water as needed. Reheated curry often tastes better than fresh because of the flavor melding mentioned earlier.
Frequently Asked Questions
What are the ingredients in Japanese curry?
Japanese curry typically includes protein (chicken, beef, or pork), vegetables (onions, carrots, potatoes), curry roux cubes, and liquid (water or dashi). Essential aromatics include garlic and ginger. Many cooks add secret ingredients like grated apple, soy sauce, ketchup, or honey to enhance the flavor. The dish is served over Japanese short-grain rice with pickles like fukujinzuke.
Is it hard to make Japanese curry?
No, Japanese curry is one of the easiest Japanese dishes to make at home. The process requires basic cooking skills – cutting vegetables, browning meat, and simmering. The curry roux cubes do the heavy lifting for seasoning and thickening. Even beginners can achieve excellent results on their first attempt by following the steps carefully.
What are some common mistakes when making Japanese curry?
Common mistakes include rushing the onion caramelization (this step needs 15-20 minutes for best flavor), cutting vegetables unevenly (causes uneven cooking), overcrowding the pot when browning meat (prevents proper browning), adding roux while boiling (can create lumps), and overcooking potatoes (they fall apart). Another frequent error is not skimming excess fat, which makes the curry greasy.
What is the secret to a rich Japanese curry flavor?
The secret to rich Japanese curry lies in three elements: properly caramelized onions (15-20 minutes of slow cooking), quality curry roux (Golden Curry and Vermont Curry are reliable brands), and secret ingredients. Try adding grated apple for sweetness, soy sauce and ketchup for umami, dashi instead of water for depth, or a splash of coffee for complexity. Letting the curry rest overnight also significantly improves flavor.
How long should you let Japanese curry simmer?
Before adding curry roux, simmer meat and vegetables for 15-20 minutes for chicken, or 45-60 minutes for beef, until just tender. After adding roux, simmer an additional 5-10 minutes to thicken and meld flavors. However, the real secret is letting cooked curry rest for several hours or overnight – this resting period allows flavors to develop fully, making next-day curry taste significantly better than freshly made.
Is Japanese curry healthy or unhealthy?
Japanese curry is moderately healthy when consumed in reasonable portions. It provides protein, vegetables, and carbohydrates in one meal. However, curry roux contains significant sodium and some brands include palm oil or hydrogenated fats. For a healthier version, use lean protein, increase vegetable ratio, choose lower-sodium roux, and watch portion sizes of rice. Homemade roux allows complete control over ingredients.
Can you freeze Japanese curry?
Yes, Japanese curry freezes excellently for up to one month. Cool completely before freezing in airtight containers. The curry thickens when frozen, so add water when reheating. For best texture, consider removing potatoes before freezing since they can become grainy when thawed. Reheat on stovetop with added liquid or in the microwave, stirring frequently.
Which Japanese curry roux brand is best?
Golden Curry by S&B is the most popular and reliable brand, available in mild, medium, and hot versions. Vermont Curry offers a slightly sweeter, more complex flavor with honey and apple notes. Java Curry provides a spicier, more aromatic profile. House Foods and Kokumaro are also excellent choices. For beginners, start with Golden Curry Medium Hot.
Conclusion
You now have everything needed to make authentic Japanese curry at home. The techniques covered in this guide – from proper cutting methods to caramelization secrets – will serve you through hundreds of batches. Remember that learning how to make Japanese curry is about understanding fundamentals rather than following rigid rules.
The key takeaways: spend time caramelizing onions, cut vegetables consistently, do not rush the simmering, and experiment with secret ingredients to find your perfect flavor profile. Make the recipe exactly as written once, then adapt it to your taste. Some prefer sweeter curry with extra honey and apple. Others want bold, spicy versions with additional chili.
Japanese curry rewards patience and repetition. Your tenth batch will taste noticeably better than your first as you internalize the timing and techniques. The fact that curry improves overnight makes it perfect for meal prep – cook on Sunday, enjoy better-tasting curry through Wednesday.
I encourage you to try this recipe and make it your own. Share your results, ask questions, and join the community of home cooks who have discovered why Japanese curry remains one of the world’s most beloved comfort foods after more than a century.