Learning how to make onigiri opens up a world of portable, satisfying meals that have sustained the Japanese for centuries. These humble rice balls, also called omusubi or nigirimeshi, are the ultimate handheld food. You can fill them with anything from salted salmon to pickled plum, wrap them in crisp nori, and take them anywhere without utensils or mess.
In this guide, I will walk you through every step of making restaurant-quality onigiri at home. I have shaped thousands of these at our sushi bistro over the past decade. The techniques here come from real kitchen experience, not theory. You will learn the exact rice-to-water ratio that creates perfect stickiness, three different shaping methods depending on your skill level, and how to troubleshoot when things go wrong.
By the end, you will be able to make onigiri that holds its shape, tastes authentic, and stores well for tomorrow’s lunch. Whether you want quick weekday meals, bento box additions, or picnic food, this skill belongs in your cooking repertoire.
Table of Contents
Quick Answer: How to Make Onigiri in 5 Steps
For those who want the condensed version before diving deep, here is the core process:
1. Cook short-grain rice with a 1:1.1 rice-to-water ratio until tender and sticky.
2. Wet your hands with water, then rub them with salt to prevent sticking and season the rice.
3. Place a portion of warm rice (about 1/2 cup) in one palm and make a small indentation.
4. Add your filling, then fold rice over it and compress gently into a triangle.
5. Wrap with nori just before eating, or use the storage technique for packed lunches.
What is Onigiri?
Onigiri are Japanese rice balls made from steamed short-grain rice shaped into triangles, cylinders, or spheres. The word literally means “to hold or grip rice” (nigiru), referring to the hand-shaping process. You may also hear them called omusubi, which emphasizes the tying or binding of rice, or nigirimeshi in older texts.
These portable rice parcels date back over 2,000 years in Japan. Archaeologists have found rice balls preserved in ashes from the Yayoi period (300 BC to 300 AD). Warriors carried them as field rations during the medieval era. Today, you will find onigiri in every Japanese convenience store (konbini), supermarket, and home kitchen. They remain the single most common item in bento boxes.
Onigiri vs Sushi: What is the Difference?
Many people confuse onigiri with sushi, but they are fundamentally different foods. Onigiri uses plain steamed rice, sometimes lightly salted, with fillings tucked inside. Sushi uses vinegared rice (sumeshi) and typically features raw fish or other toppings on top, not fillings inside.
The texture differs too. Onigiri rice should be tender and cohesive, while sushi rice has a distinct snap from the vinegar seasoning. Onigiri is everyday food. You eat it at room temperature, on the go, without dipping sauce or chopsticks. Sushi is more formal, typically served fresh at specific temperatures with soy sauce and wasabi.
Ingredients for Making Onigiri 2026
Great onigiri starts with three simple components: the right rice, proper seasoning, and quality fillings. Here is everything you need.
The Rice: Your Foundation
Short-grain rice is non-negotiable for proper onigiri. This variety contains higher starch content than long-grain types, creating the sticky texture that holds the ball together. Look for these specific varieties:
Koshihikari: The gold standard from Japan. It cooks up glossy, sweet, and perfectly sticky. Available at most Asian markets and increasingly at mainstream grocers.
Calrose: A medium-grain rice grown in California that works well as a substitute. It is more affordable and widely available in the United States.
Sushi rice: Technically acceptable since it is short-grain, but avoid pre-seasoned packages with vinegar. You want plain, unseasoned rice for onigiri.
Do not use jasmine rice, basmati, or long-grain varieties. They lack the starch content to bind together. Your rice balls will crumble the moment you pick them up.
Water Ratio and Cooking
The perfect rice-to-water ratio for onigiri is 1:1.1. That means for every cup of rice, use 1.1 cups of water. This slight excess creates the tender, moist texture you want without making the rice mushy.
Rinse your rice thoroughly before cooking. Place the rice in a bowl, cover with cold water, and swish gently with your hand. Drain and repeat 3-4 times until the water runs mostly clear. This removes excess surface starch that can make rice gummy.
Cook according to your rice cooker’s instructions, or use the stovetop method: bring to a boil, cover, reduce to low, and simmer 18-20 minutes. Let it rest 10 minutes off heat before fluffing.
Salt and Nori
Salt serves two purposes in onigiri: seasoning and preservation. Traditional recipes use coarse sea salt (moshio) for the best flavor. You will need about 1/4 teaspoon per rice ball, applied to your hands rather than mixed into the rice.
Nori is the roasted seaweed sheet that wraps your onigiri. Buy pre-toasted nori sheets (yaki-nori) cut to size for onigiri, or buy full sheets and cut them yourself. Store nori in an airtight container away from moisture. It goes from crisp to soggy quickly when exposed to humid air.
Fillings: Traditional and Modern
The center of your onigiri holds the flavor surprise. Classic Japanese fillings include:
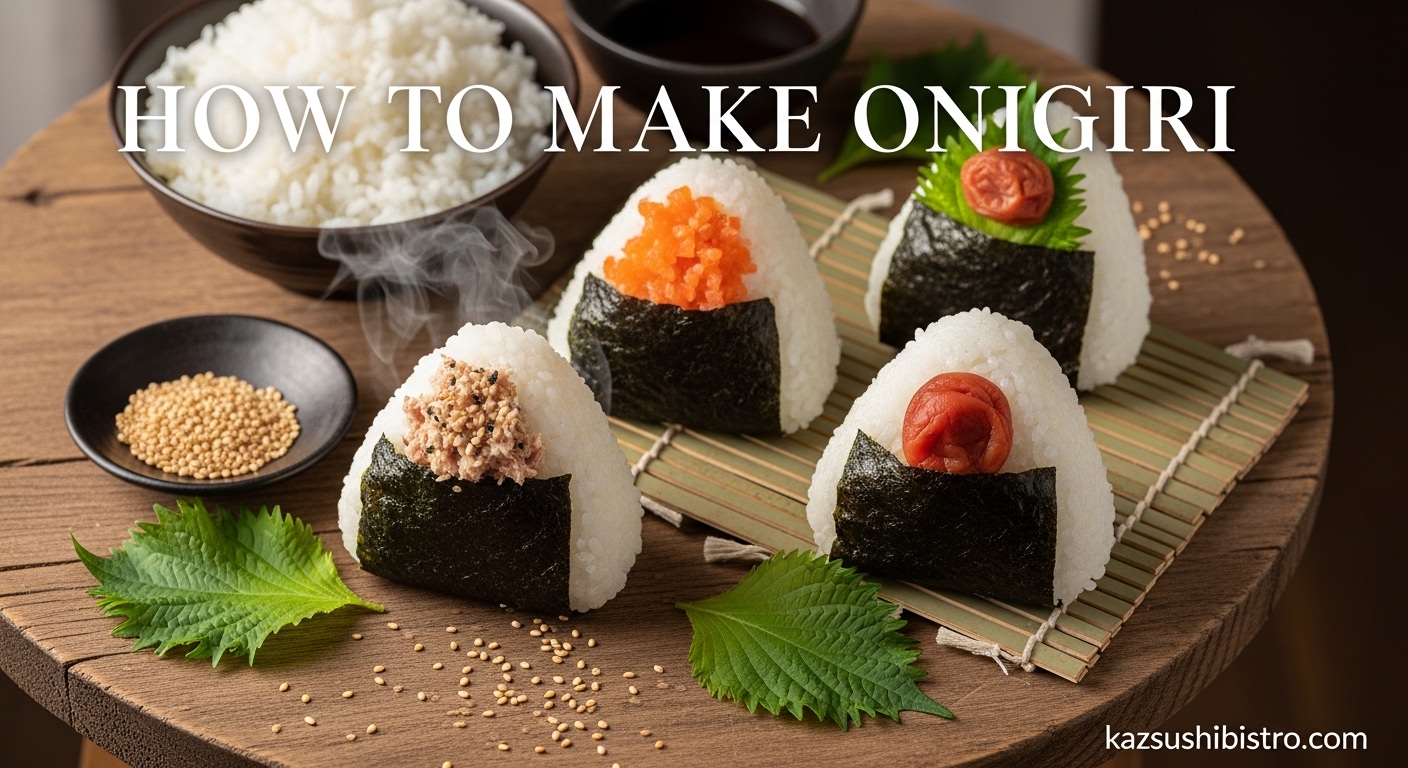
Umeboshi (pickled plum): The quintessential filling. Salty, sour, and intensely pink. Remove the pit and use half a plum per rice ball.
Shake (salted salmon): Flaked cooked salmon seasoned with salt. Rich and satisfying.
Okaka (bonito flakes with soy sauce): Katsuobushi moistened with soy sauce creates an umami bomb. Mix just before using to keep it from getting soggy.
Mentaiko or tarako (cod roe): Spicy or plain salted cod roe, popular in southern Japan.
Tuna mayo: A modern favorite. Mix canned tuna with Japanese mayonnaise (Kewpie) and a dash of soy sauce.
Furikake: Dry rice seasoning mix sprinkled throughout rather than placed as a center filling.
How to Make Onigiri Step-by-Step
Now we get to the actual process. I will walk you through making perfect onigiri from raw rice to finished product. Each step matters for the final result.
Step 1: Prepare Your Rice
Measure 2 cups short-grain rice (yields about 8 onigiri). Rinse thoroughly in cold water until water runs clear. Drain in a fine-mesh strainer for 15-30 minutes. This resting period improves texture significantly.
Transfer drained rice to your rice cooker or a heavy-bottomed pot. Add 2.2 cups water (following our 1:1.1 ratio). Cook according to rice cooker instructions, or bring to a boil, cover, reduce to low heat, and cook 18 minutes. Let rest 10 minutes before opening.
Once cooked, fluff gently with a rice paddle. Do not smash or over-stir. You want individual grains that still stick together. Let the rice cool slightly until you can handle it comfortably. The ideal shaping temperature is warm, not hot. Too hot and it burns your hands. Too cool and it will not adhere properly.
Step 2: Set Up Your Shaping Station
Before touching the rice, prepare your workspace. You need:
A small bowl of water for wetting hands. A small dish of coarse salt. Your fillings portioned and ready. A plate or tray for finished onigiri. Nori sheets cut into rectangles (about 4×3 inches) if wrapping immediately.
Timing matters here. Once rice cools completely, it becomes harder to shape. Work while the rice is still warm but manageable. If rice sits too long, you can briefly microwave it to restore pliability.
Step 3: Season Your Hands
This is the secret technique most beginners miss. Dip your dominant hand in water, then rub a pinch of salt between both palms. The water prevents rice from sticking. The salt seasons the exterior and helps preserve the rice.
Your hands should feel damp and slightly gritty from salt. Re-dip and re-salt between every 2-3 onigiri. If rice starts sticking, you have waited too long. Wash and re-season your hands.
Step 4: Portion and Shape the Rice
Take about 1/2 cup of warm rice into your salted hand. Spread it into a flat layer across your palm. Make a small indentation in the center with your thumb. This is where your filling goes.
Place 1-2 teaspoons of filling in the indentation. Do not overfill. Too much filling prevents the rice from sealing around it, and your onigiri will leak or fall apart.
Fold the rice over the filling using your fingers and palm. Press gently to enclose the filling completely. Now comes the shaping.
Step 5: Form the Triangle
The classic triangular shape is not just aesthetic. The flat sides stack efficiently in bento boxes and the points make onigiri easy to hold and bite.
Hold the rice ball in your left hand with fingers cupped. Use your right hand to press and shape. Rotate the rice ball 90 degrees and press again. Repeat 4-6 times, rotating each time, until you have a firm triangle with defined edges.
Press firmly but not aggressively. You want the rice grains to adhere without being crushed into mush. The surface should show individual grains, not a smooth paste.
Step 6: Wrap with Nori
For immediate eating, wrap your onigiri while still slightly warm. Place the triangle on one end of your nori rectangle and roll to encase the sides. The nori should cover the two flat sides while leaving the pointed ends exposed.
For packed lunches or storage, use the separation method detailed in the storage section below. This keeps nori crisp until eating time.
Onigiri Shaping Methods
Hand-shaping takes practice. Here are three methods ranked by difficulty and results.
Method 1: Traditional Hand Shaping
This is the authentic technique used in Japanese homes for generations. It requires practice but gives the best texture and the satisfaction of traditional craftsmanship.
Keep your hands wet and salted. Use a cupping motion with your non-dominant hand while your dominant hand presses and rotates. The triangle emerges from consistent pressure at 90-degree angles. Each press should be firm but brief. Lingering pressure makes the rice too dense.
Beginners often make rice balls too loose or too tight. The perfect onigiri holds together when lifted but yields slightly when bitten. Practice with unfilled onigiri first to get the pressure right.
Method 2: Plastic Wrap Method (Beginner-Friendly)
If hand-shaping frustrates you, use plastic wrap (cling film) as a barrier. Lay a sheet of plastic wrap on your counter. Place rice on top, add filling, then gather the plastic around the rice. Twist the plastic to compress the rice into a ball or triangle shape.
This method eliminates sticking entirely. The plastic creates a smooth surface and consistent pressure. Once shaped, unwrap and transfer to nori. You can also leave wrapped for storage and unwrap just before eating.
The downside: plastic wrap creates a denser, more uniform texture. Hand-shaped onigiri has character and slightly varied density that many find preferable.
Method 3: Onigiri Mold
Plastic onigiri molds are inexpensive tools that create perfect shapes every time. They consist of two parts: a base and a press. Fill the base with rice, add filling to the center indentation, add more rice on top, then press down with the lid.
Molds work best for beginners and anyone making large batches. They create consistent sizing and professional appearance. Most molds make traditional triangles, but you can find versions for cylinders, animals, and characters.
When using a mold, still wet your hands before handling rice. The rice should not stick to the mold if you do not overfill. Tap the mold gently to release the shaped onigiri onto your nori.
Best Onigiri Fillings
The filling defines your onigiri’s personality. Traditional Japanese fillings lean toward salty, preserved ingredients that kept well before refrigeration. Modern fillings offer more variety.
Traditional Fillings
Umeboshi (pickled plum): Use one small umeboshi per onigiri. Remove the pit first. The sour, salty burst cuts through the mild rice. The pink color against white rice is visually striking.
Shake (salted salmon): Cook salmon fillet with a generous salt coating. Flake and remove skin and bones. Season with additional salt if needed. Rich and protein-dense.
Okaka (seasoned bonito): Mix katsuobushi (dried bonito flakes) with soy sauce just before using. The flakes absorb moisture and create a savory, slightly fishy center. Use 1 teaspoon per onigiri.
Shio kombu (salted kelp): Thin strips of seasoned kelp make a vegetarian-friendly traditional filling. Salty, slightly sweet, and chewy.
Mentaiko (spicy cod roe): Popular in Fukuoka and spreading nationwide. The roe sacs are marinated in chili and salt. Cut into small pieces for filling.
Modern and Fusion Fillings
Tuna mayo: Mix canned tuna with Kewpie mayonnaise and a dash of soy sauce or wasabi. Creamy and mild, this is especially popular with children.
Karaage (fried chicken): Small pieces of Japanese fried chicken make a substantial filling. Best eaten same day to keep the crispy coating.
Teriyaki chicken or beef: Shredded meat glazed with teriyaki sauce. Sweet and savory.
Ebi fry (fried shrimp): Whole breaded shrimp tucked inside rice. A treat rather than everyday food.
Kimchi: Spicy Korean fermented cabbage adds heat and crunch. Drain well before using to avoid soggy rice.
Vegetarian and Vegan Fillings
Furikake: Mix furikake seasoning throughout the rice rather than as a center filling. Options include nori, sesame, wasabi, and ume flavors.
Takana (pickled mustard greens): Chop finely and squeeze out excess moisture. Tangy and refreshing.
Kanpyo (dried gourd): Simmered in sweet soy sauce until tender. Traditional and naturally vegan.
Natto (fermented soybeans): An acquired taste but beloved by enthusiasts. Mix with a little soy sauce and scallions.
Vegan tuna: Mashed chickpeas mixed with vegan mayo, nori flakes, and soy sauce mimic tuna’s texture and flavor.
Filling Amount Guidelines
Use 1-2 teaspoons of filling per standard-sized onigiri. Too little and you miss the flavor contrast. Too much and the rice cannot seal around it. The filling should be completely enclosed with no gaps.
For wet fillings like tuna mayo or mentaiko, drain excess moisture before using. Wet fillings make rice soggy and prevent proper adhesion. Pat fillings with paper towel if needed.
How to Wrap Onigiri with Nori
Nori wrapping is functional and aesthetic. It provides a crisp texture contrast, makes onigiri easier to hold without sticky fingers, and adds a briny, umami flavor.
When to Wrap
Timing matters for texture. Nori absorbs moisture from rice quickly, turning from crisp to chewy within minutes of contact. For the best eating experience, wrap just before consuming.
For packed lunches, use one of these methods:
Separate wrapping: Place nori in a small baggie or plastic wrap. Pack shaped onigiri (no nori) in your container. Wrap just before eating.
Strategic placement: Wrap onigiri but position them so the nori-covered sides face outward, exposed to air rather than touching other foods or the container bottom.
Nori storage tip: Place a small silica gel packet (food-safe) in your nori container to extend crispness.
Wrapping Styles
Standard wrap: Nori covers the two flat sides of the triangle, leaving the points exposed. This is the classic convenience store style.
Full wrap: Use a larger sheet to encase the entire onigiri. Tear away as you eat to expose fresh nori with each bite.
Decorative wrap: Cut nori into shapes or strips. Wrap partially for visual appeal while keeping some rice exposed.
No wrap: Some onigiri styles skip nori entirely. Yaki onigiri (grilled rice balls) and furikake-mixed varieties often go bare.
Storage and Make-Ahead Tips
Onigiri is best fresh, but modern schedules demand make-ahead options. Here is how to store them properly.
Room Temperature Storage
Freshly made onigiri can sit at room temperature for 4-6 hours safely. The salt content and rice acidity create a hostile environment for bacteria in this timeframe. This makes onigiri ideal for picnics, hikes, and work lunches without refrigeration.
Beyond 6 hours, or in hot weather above 80°F (27°C), refrigerate for safety.
Refrigeration
Refrigeration changes rice texture. The starches retrograde (firm up), making refrigerated onigiri hard and unpleasant. However, you can mitigate this:
Wrap each onigiri individually in plastic wrap while still slightly warm. The trapped moisture keeps the interior tender. Before eating, remove from refrigerator and let sit 15-20 minutes at room temperature. Microwave 20-30 seconds if you want it warm.
Do not store nori-wrapped onigiri in the refrigerator. The nori turns rubbery and unpleasant. Store nori separately and wrap just before eating.
Refrigerated onigiri lasts 1-2 days maximum. After that, the rice deteriorates significantly even if technically safe.
Freezing
Yes, you can freeze onigiri. This is a game-changer for meal prep. Wrap unfilled or filled onigiri (no nori) individually in plastic wrap, then place in a freezer bag. Freeze up to one month.
To eat, remove from freezer and microwave 1-2 minutes until warmed through. The texture remains surprisingly good, though not quite fresh-quality. Frozen onigiri works best with wet fillings like tuna mayo that do not suffer from freezing.
Let frozen onigiri rest 1-2 minutes after microwaving before wrapping with nori. The residual steam softens the nori if wrapped immediately.
Meal Prep Strategies
For weekly meal prep, cook a large batch of rice and make multiple onigiri at once. Freeze individually wrapped portions. Each morning, grab one from the freezer, microwave, and pack with a separate nori sheet.
Alternatively, prep components separately. Cook rice and store in the refrigerator. Prep fillings and store in small containers. Each morning, warm the rice slightly, shape fresh onigiri, and pack. This takes 5 minutes and yields better texture than pre-made.
Troubleshooting: Why Your Onigiri Falls Apart
Every beginner struggles with onigiri at first. Here are the most common problems and their solutions based on questions I hear constantly in cooking forums and from bistro customers.
Problem: Rice Will Not Stick Together
Cause: Wrong rice type or insufficient starch activation.
Solution: You must use short-grain rice. Long-grain varieties like jasmine or basmati will never achieve the required stickiness. If using correct rice but still having issues, your rice may be too dry. Increase water slightly in your next batch, or work with rice while it is warmer. Warm rice is more pliable.
Problem: Onigiri Falls Apart When Picked Up
Cause: Insufficient compression or rice too cold.
Solution: Press more firmly during shaping. The rice needs compression to activate the surface starches that bind grains together. If rice has cooled completely, microwave 20-30 seconds to restore pliability, then reshape with more pressure.
Problem: Rice Sticks to Hands
Cause: Hands not wet enough or rice too warm.
Solution: Wet hands more thoroughly between every shaping. Keep a bowl of water nearby and actually dip, not just dampen. If rice is steaming hot, let it cool 5-10 minutes longer before starting.
Problem: Filling Leaks Out
Cause: Too much filling or gaps in the rice seal.
Solution: Use less filling. One teaspoon is plenty for standard-sized onigiri. When closing the rice around the filling, ensure no gaps exist. Press the edges together firmly before shaping the exterior.
Problem: Rice Becomes Hard After Refrigeration
Cause: Starch retrogradation in cold temperatures.
Solution: This is normal but manageable. Wrap onigiri while still warm to trap moisture. Before eating, let refrigerated onigiri sit at room temperature 20 minutes, then microwave briefly. The texture will never be exactly like fresh, but it becomes enjoyable again.
Problem: Cannot Make Triangle Shape
Cause: Rotational technique not mastered.
Solution: Do not try to sculpt a triangle all at once. Start with a rough ball, then press one side flat. Rotate 90 degrees. Press again. Rotate. Press. After 4-6 rotations with firm pressure, a natural triangle emerges. Practice with plastic wrap first to learn the motion without sticking frustration.
Onigiri Variations to Try
Once you master basic onigiri, explore these delicious variations.
Yaki Onigiri (Grilled Rice Balls)
Grill or pan-sear shaped onigiri until the exterior turns golden and crispy. Brush with soy sauce, miso glaze, or butter while grilling for extra flavor. The contrast between crispy exterior and tender interior is addictive.
Make yaki onigiri with plain salted rice or mixed with furikake. Do not use nori wrap, as it would burn. Serve hot off the grill for best texture.
Onigirazu (Rice Sandwich)
This modern variation skips the triangle entirely. Layer rice and fillings in a square, wrap tightly in plastic, then cut in half to reveal cross-sections. Easier than traditional shaping and visually striking for bento.
Use a sheet of nori as the outer layer, placing rice on top, then fillings, then more rice. Fold nori around the edges. Wrap in plastic and let sit 5 minutes to set before cutting.
Takikomi Gohan Onigiri
Instead of plain white rice, cook rice with mixed-in ingredients. Simmer mushrooms, chicken, vegetables, and seasonings with your rice. Once cooked, the flavored rice makes exceptional onigiri without additional filling.
Popular combinations include chicken and shiitake mushroom, or mixed vegetables with soy sauce and mirin.
Furikake Mixed Onigiri
Mix furikake seasoning throughout your rice before shaping. This eliminates the need for a center filling. The rice itself becomes flavorful. Try nori, salmon, or wasabi furikake varieties.
Because the seasoning is distributed, every bite has consistent flavor. This style works particularly well for picnics and travel where you want simple, no-mess eating.
Frequently Asked Questions
How to make onigiri so it doesn’t fall apart?
Use short-grain rice with proper water ratio (1:1.1), shape while rice is warm but not hot, wet and salt your hands before shaping, and compress the rice firmly using rotational pressure. Refrigerated onigiri should be wrapped while warm and microwaved briefly before eating.
What fillings work best in onigiri?
Traditional fillings include umeboshi (pickled plum), salted salmon (shake), seasoned bonito flakes (okaka), and mentaiko (cod roe). Modern favorites include tuna mayo, teriyaki chicken, and kimchi. Vegetarian options work well too: takana greens, shio kombu, or furikake seasoning mixed throughout.
Is onigiri hard to make?
Onigiri is not difficult but requires practice. Beginners should start with the plastic wrap method or an onigiri mold to learn the process without frustration. Hand-shaping takes 10-20 attempts to master the pressure and rotation technique. Even imperfect onigiri tastes delicious.
How to eat onigiri correctly?
Hold onigiri with the nori-wrapped sides and bite directly from the pointed end. If nori is separate, wrap it around the rice first. Eat at room temperature or slightly warm. No chopsticks needed. In Japan, onigiri is common picnic, hiking, and convenience store food meant for eating by hand.
Can I make onigiri with regular rice?
Regular long-grain rice like jasmine or basmati will not work. The rice ball will fall apart because long-grain rice lacks the starch content to bind. Use short-grain rice (koshihikari or calrose) or medium-grain calrose as a substitute. These varieties become sticky when cooked and hold their shape.
How long does onigiri last?
Fresh onigiri lasts 4-6 hours at room temperature. Wrapped and refrigerated, it lasts 1-2 days though texture degrades. Frozen onigiri lasts up to one month. For best quality, make onigiri the morning of or the night before at most. Always store nori separately until just before eating.
What is the difference between onigiri and sushi?
Onigiri uses plain steamed short-grain rice, often with a filling inside, and is eaten at room temperature. Sushi uses vinegared rice (sumeshi) with toppings on top, served fresh at specific temperatures. Onigiri is everyday portable food; sushi is more formal and typically eaten immediately with dipping sauce.
Do I need a rice cooker to make onigiri?
No. While rice cookers are convenient, you can cook short-grain rice on the stovetop. Use a heavy-bottomed pot with tight lid. Bring rice and water (1:1.1 ratio) to boil, cover, reduce to low, and cook 18 minutes. Rest 10 minutes before fluffing. The result is identical to rice cooker output.
Conclusion
You now know how to make onigiri from raw rice to finished, nori-wrapped rice ball. The process is straightforward: cook short-grain rice with the right water ratio, wet and salt your hands, compress the rice around your chosen filling, and shape into a triangle. Practice makes the technique automatic.
Start with the plastic wrap method if hand-shaping frustrates you. Move to traditional shaping once you understand the compression needed. Experiment with fillings. Umeboshi offers the classic experience. Tuna mayo pleases children. Grilled yaki onigiri makes an incredible snack.
Remember that even imperfect onigiri tastes good. The first batch might look lumpy or loose. Keep the rice warm, keep your hands wet, and press more firmly than you think necessary. Within a few attempts, you will produce rice balls that hold their shape and taste like they came from a Tokyo konbini.
Make a batch this weekend. Pack them for Monday’s lunch. Once you taste a homemade onigiri made with quality rice and your favorite filling, store-bought versions will never satisfy you again.