Learning how to cut fish for sushi changed everything for me. I spent months frustrated at home, ruining expensive salmon and watching my slices fall apart on the cutting board. Then a Japanese fishmonger showed me the proper technique, and suddenly those clean, restaurant-quality pieces started happening consistently.
Proper cutting technique matters more than most home cooks realize. The difference between a jagged, torn piece and a smooth, glossy slice comes down to knife angle, grain direction, and one fluid motion. When you cut fish correctly, you preserve its texture, enhance its appearance, and create pieces that sit perfectly on rice or look stunning on a sashimi platter.
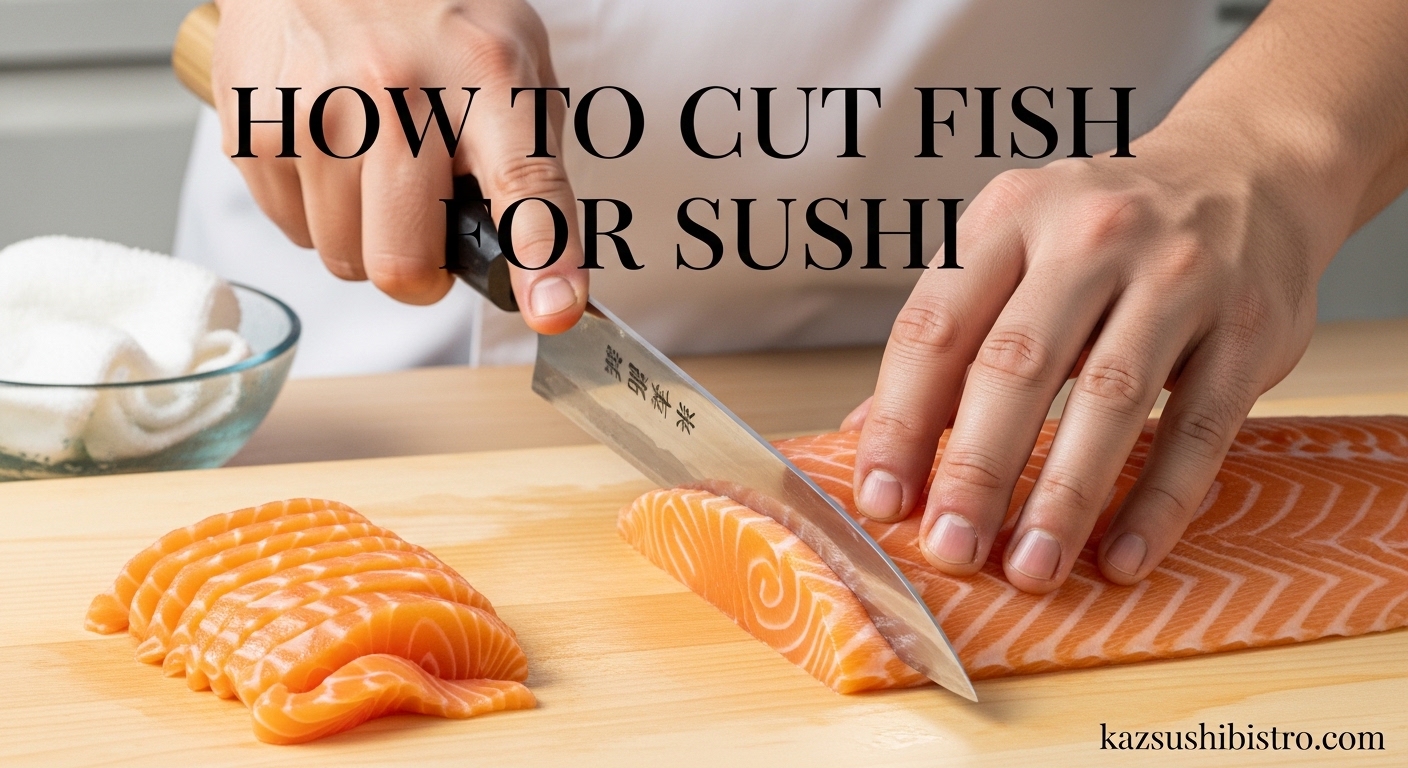
This guide covers everything you need to know about cutting fish for sushi at home. I will walk you through equipment selection, explain why cutting against the grain matters, demonstrate the proper pull-cut technique, and share troubleshooting tips I learned from months of trial and error. Whether you want perfect nigiri slices, elegant sashimi, or clean pieces for rolls, you will find the specific techniques here.
Table of Contents
Equipment You Need 2026
You do not need a professional kitchen to cut fish for sushi properly. A few key pieces of equipment will make the process easier and safer, but you can start with basic tools and upgrade as your skills improve.
The Right Knife
A sharp knife matters more than the specific type. Many beginners think they need an expensive yanagiba (the traditional single-bevel Japanese knife designed for sashimi), but a sharp santoku or chef’s knife works well for starting out.
The yanagiba has a single bevel and long blade that creates exceptionally clean cuts with minimal cell damage. The blade length typically ranges from 8 to 12 inches, allowing you to slice through fish in one continuous motion. However, these knives require skill to use properly and specific maintenance.
For beginners, I recommend starting with a sharp 8-inch chef’s knife or santoku. The key is sharpness. A dull knife tears the fish instead of slicing it, creating ragged edges and ruining texture. Test your knife on a piece of paper. If it cannot slice cleanly through paper without tearing, it needs sharpening before you touch any fish.
Cutting Surface
Use a proper cutting board, never glass or stone. A wooden or high-quality plastic cutting board provides the right surface that will not dull your blade or damage the fish. The board should be large enough to accommodate the full length of your fish piece with room to maneuver.
I prefer wooden boards made from hinoki (Japanese cypress) or maple. These woods have natural antimicrobial properties and are gentle on knife edges. Sanitize your board thoroughly before and after working with raw fish.
Fish Selection
Start with sushi-grade or sashimi-grade fish from a reputable source. These terms indicate the fish was frozen to specific temperatures to kill parasites and handled under strict food safety protocols. Common options include salmon, tuna, yellowtail, and hamachi.
Most home cooks buy saku blocks, which are pre-trimmed rectangular blocks of fish specifically prepared for sushi making. These blocks measure approximately 4 by 6 inches and range from 1 to 2 inches thick, giving you clean edges to work with. Saku blocks eliminate the need to butcher a whole fish, making them perfect for beginners.
Understanding Fish Anatomy and Grain Direction
Before you make your first cut, you must understand grain direction. Fish muscle consists of long fibers bundled together. The direction these fibers run determines how you cut, and getting this wrong ruins texture completely.
Finding the Grain
Look closely at your fish piece. You will see faint lines running through the flesh. These are the muscle fibers, and they typically run lengthwise along the fish. The grain direction is the path these fibers follow.
On a saku block, the grain usually runs the long way down the rectangular piece. If you imagine the fish swimming, the fibers run from head to tail. This means on most blocks you buy, the grain runs parallel to the longest edge.
Why Against the Grain Matters
Always cut against the grain, never with it. When you slice against the grain, you cut through the long muscle fibers, creating shorter pieces that feel tender and melt in your mouth. When you cut with the grain, you leave those long fibers intact, making each piece chewy and tough.
Think of it like slicing a steak. A properly sliced steak cuts across the visible grain lines. Fish works the same way, though the grain is often subtler. Take a moment to identify the grain direction before every cutting session.
The Chiai (Blood Line)
Many fish have a dark red line running through the center called the chiai or blood line. This area has stronger flavor and firmer texture. Some people remove it entirely for milder taste, while others keep it for character.
If you want to remove the chiai, use your knife to cut along each side of the dark line and lift it out. This creates two separate pieces that are easier to slice uniformly. For beginners, removing the chiai often produces more consistent results.
Basic Cutting Principles
Japanese sushi cutting relies on three core principles that separate amateur results from professional presentation. Master these fundamentals before attempting specific cuts.
The Pull Cut vs Push Cut
Traditional sushi cutting uses a pull cut motion, not a push cut. In Western cooking, we typically push the knife away from us through food. Japanese sushi technique pulls the knife toward you in one smooth draw.
The pull cut gives you better control and creates cleaner edges. Start with the knife heel at the far edge of the fish. Draw the knife toward you in one continuous motion, letting the blade glide through the flesh. The knife should move from heel to tip during the cut, using the entire cutting edge.
Never saw back and forth. Sawing motion tears the delicate fish cells, creating rough texture and poor appearance. One clean slice is always the goal.
The 45-Degree Angle
Most sushi cuts use approximately a 45-degree angle. This angle creates the right surface area for nigiri while producing elegant pieces for sashimi. Some cuts use slightly different angles, but 45 degrees serves as your baseline.
Visualize the angle by imagining a right triangle. The cutting board forms the base, your knife forms the hypotenuse, and an imaginary vertical line completes the triangle. When the base and vertical sides are roughly equal, you have 45 degrees.
One Smooth Motion
Each cut should happen in one fluid motion without stopping or adjusting. Hesitation creates visible marks and uneven thickness. Confidence matters here. Commit to the cut and follow through completely.
Your non-knife hand holds the fish steady using the claw grip. Tuck fingertips under, using knuckles to guide the knife. This positioning keeps fingers safe while providing stability to the fish piece.
Japanese Cutting Styles
Traditional Japanese sushi recognizes specific cutting styles with distinct purposes. Understanding these techniques adds authenticity to your sushi making and gives you options for different presentations.
Hira-Zukuri (Rectangular Slicing)
Hira-zukuri means “rectangular slice” and represents the most common cutting style. This technique produces rectangular pieces approximately 1 cm thick (about 1/4 inch), perfect for nigiri and basic sashimi presentation.
To execute hira-zukuri, hold your knife at a 45-degree angle to the cutting board. Position the blade at the top edge of your fish piece. Pull the knife toward you in one smooth motion, creating a rectangular slice with clean edges.
The resulting piece should have a glossy surface that reflects light. This shine indicates clean cell structure with minimal damage. Dull or rough surfaces mean your knife needs sharpening or your technique needs adjustment.
Sogi-Zukuri (Angled Slicing)
Sogi-zukuri creates thinner, wider pieces cut at a sharper angle. This style works beautifully for delicate white fish and creates elegant presentations. The technique requires starting the cut more vertically, around 30 degrees, then drawing the knife through.
The resulting pieces are wider than they are thick, creating a larger surface area for visual appeal. Sogi-zukuri works particularly well for tuna and salmon when you want thin, draping slices that look impressive on a plate.
When to Use Each Style
Use hira-zukuri for standard nigiri and sashimi where you want consistent thickness and traditional appearance. The thicker cut provides substance and works with most fish types.
Choose sogi-zukuri when presentation matters most, when working with very fresh delicate fish, or when you want that paper-thin elegance. This style impresses guests and showcases high-quality fish.
How to Cut Fish for Sushi
Now we put everything together into the complete cutting process. Follow these steps in order, and you will produce clean, professional-quality slices.
Step 1: Prepare Your Fish
Start with properly defrosted fish if using frozen saku blocks. The best method is overnight defrosting in the refrigerator on a paper towel-lined plate. The paper towel absorbs excess moisture, preventing watery fish that is difficult to cut.
Never defrost fish at room temperature or in warm water. These methods create uneven texture and food safety risks. Plan ahead and give your fish 8 to 12 hours in the refrigerator.
Before cutting, pat the fish completely dry with paper towels. Moisture causes the knife to slip and creates drag that tears the flesh. Some professionals place the fish in the freezer for 5 to 10 minutes before cutting to firm it up, making cleaner cuts easier.
Step 2: Position Everything Correctly
Place your cutting board on a stable, non-slip surface. A wet paper towel underneath prevents the board from shifting during cutting. Position the fish with the grain running away from you, so you will cut across it from left to right (or right to left for left-handed cooks).
Hold your knife correctly. Grip the handle with your dominant hand, placing your index finger on the spine for control. Your other hand holds the fish steady with fingertips tucked safely away from the blade path.
Step 3: Execute the Cut
Hold the knife at a 45-degree angle to the board. Place the heel of the blade at the far edge of the fish, where you want the cut to begin. The tip should extend past the near edge of the fish.
Begin drawing the knife toward you in one smooth motion. Do not press down hard. Let the sharp blade do the work. As you pull, the knife should naturally move from heel to tip, slicing through the entire width of the fish.
Complete the motion fully without stopping. The slice should separate cleanly from the main piece with no attached threads or tears.
Step 4: Assess and Adjust
Examine your first slice. The cut surface should appear smooth and slightly glossy. If you see rough texture, tears, or uneven thickness, adjust before continuing.
Common issues include: knife not sharp enough (causes tearing), angle too steep (creates thin, weak pieces), angle too shallow (creates thick, awkward chunks), or hesitation mid-cut (creates visible lines). Make small adjustments and cut another test piece.
Left-Handed Modifications
Most traditional sushi knives are ground for right-handed use. Left-handed cooks should either purchase left-handed yanagiba knives or adapt their technique with a standard chef’s knife.
When using a right-handed single-bevel knife as a left-handed cook, reverse the angle direction. Instead of pulling from right to left, pull from left to right across your body. This compensates for the blade geometry.
With a double-bevel knife like a santoku or chef’s knife, left-handed cutting works identically to right-handed. Simply reverse the hand positions and cut from the opposite side of the fish.
Specific Cuts for Different Sushi Types
Different sushi styles require different slice dimensions. Use these specifications as your target measurements.
Nigiri Dimensions
For standard nigiri, aim for pieces approximately 3 to 4 inches long, 1.5 inches wide, and 1/4 inch thick. These dimensions allow the fish to drape over a rice ball comfortably while providing enough substance for a satisfying bite.
Cut the fish at a 45-degree angle to achieve this width naturally from a standard saku block. The length should extend from your fingertip to second knuckle when laid across your fingers. This size covers the rice ball proportionally.
Many home cooks make nigiri pieces too thick. Remember that the fish layer plus rice creates a substantial mouthful. Thinner is often better for balance.
Sashimi Presentation
Sashimi pieces vary more depending on presentation style. Traditional hira-zukuri creates slices about 1 cm thick, similar to nigiri pieces but without the width constraint. You can cut these pieces longer and arrange them artfully on a plate.
For elegant presentation, try sogi-zukuri thin slices fanned across the plate. Or stack hira-zukuri pieces slightly offset to create height and visual interest. Garnish with shiso leaves, daikon radish (tsuma), and wasabi.
Japanese tradition favors odd numbers in presentation. Arrange 3, 5, or 7 pieces rather than even numbers. This follows the Sansui-mori principle that odd numbers create visual harmony.
Roll Fillings
For maki rolls, you need thin strips rather than wide slices. Cut your fish into strips approximately 1/2 inch wide and 1/4 inch thick, running the length of your nori sheet. These strips roll easily without tearing the seaweed or creating uneven rolls.
Spicy tuna rolls often use minced fish instead. Roughly chop trimmings and smaller pieces, then mix with mayonnaise and sriracha. This repurposes pieces that are too small for nigiri or sashimi.
| Sushi Type | Dimensions | Angle | Cutting Style |
|---|---|---|---|
| Nigiri | 3-4″ x 1.5″ x 1/4″ | 45 degrees | Hira-zukuri |
| Sashimi | 2-3″ x 1.5″ x 1 cm | 45 degrees | Hira-zukuri |
| Sashimi (thin) | 3-4″ x 2″ x 1/8″ | 30 degrees | Sogi-zukuri |
| Roll filling | Length of nori x 1/2″ x 1/4″ | Straight down | Strip cut |
Practice Techniques Without Wasting Fish
Learning how to cut fish for sushi takes practice, but you do not need to ruin expensive salmon to improve. Several methods let you develop skills before touching sushi-grade fish.
Vegetable Practice
Cucumbers make excellent practice material. They have a distinct grain direction and similar texture to firm fish. Practice cutting against the grain at 45-degree angles, aiming for consistent thickness. A cucumber costs less than a dollar and gives you dozens of practice slices.
Carrots and daikon radish work well too, though they are firmer than fish. These vegetables teach knife control and angle consistency without the pressure of expensive ingredients.
Cheap Fish Alternatives
Buy inexpensive frozen tilapia or tilapia fillets to practice with actual fish texture. While not sushi-grade (and not safe to eat raw), these let you practice the feel of cutting fish without spending much money.
Cook the practice pieces afterward to avoid waste. Pan-fried tilapia makes a fine dinner even if cut imperfectly for sushi.
Skill Progression
Start with straight cuts perpendicular to the grain. Once you can make consistent straight slices, add the 45-degree angle. Finally, work on the smooth, single-motion pull cut.
Spend at least one session on each skill before moving to the next. Rushing through the fundamentals creates bad habits that are hard to break later.
Troubleshooting Common Mistakes
Even experienced home cooks encounter problems. Here is how to fix the most common issues I have faced and seen others struggle with.
Fish Tearing Instead of Slicing
If your fish tears or shreds, your knife is not sharp enough. A dull blade crushes rather than cuts, rupturing cell walls and creating rough texture. Stop and sharpen your knife before continuing.
Test sharpness by slicing through a sheet of paper held vertically. A sharp knife cuts cleanly. If the paper tears or bunches, sharpen before touching fish.
Uneven Slice Thickness
Uneven thickness usually means inconsistent angle or pressure. Keep your wrist locked and move from the shoulder to maintain angle. Let the knife weight do the cutting rather than pressing harder or softer.
Another cause is moving the fish between cuts. Secure it firmly and do not reposition mid-slicing session.
Fish Too Wet or Watery
Watery fish results from improper defrosting or excess moisture in storage. Always defrost slowly in the refrigerator on paper towels. Before cutting, pat the surface completely dry with fresh paper towels.
If fish remains wet, a brief 5-minute chill in the freezer firms it up and makes cutting easier. The cold temperature hardens the flesh temporarily.
Difficulty Maintaining Angle
Practice the angle without cutting first. Hold the knife in position and move your arm through the motion without blade contact. Develop muscle memory for the 45-degree position.
Some beginners place a small piece of tape on the knife blade at the 45-degree reference point. This visual guide helps until the angle becomes natural.
Not Knowing When to Sharpen
Sharpen your knife before every sushi session. Fish is delicate and requires maximum sharpness. Even if your knife seems sharp enough for vegetables, it may struggle with fish.
Invest in a good whetstone set: 1000 grit for shaping and repairing, 5000 grit for polishing, and 8000 grit for finishing. Learning to sharpen properly takes practice but transforms your cutting experience.
Fish Slices Do Not Sit Properly on Rice
This usually means wrong dimensions. Nigiri fish should drape over the rice, not perch on top like a roof. If your pieces are too stiff or thick, cut thinner at a steeper angle. The fish should bend naturally around the rice ball shape.
Another cause is cutting too small. Pieces that barely cover the rice ball look awkward and fall off easily. Aim for that 3 to 4 inch length to provide proper coverage.
FAQs
What knife should I use to cut fish for sushi?
A sharp knife matters more than the specific type. While traditional yanagiba knives are ideal, beginners can start with a sharp 8-inch chef’s knife or santoku. The key requirement is sharpness. Test your knife on paper. If it slices cleanly without tearing, it is sharp enough for fish.
How thick should I cut fish for nigiri?
For nigiri, aim for pieces approximately 1/4 inch thick (about 1 cm), 1.5 inches wide, and 3 to 4 inches long. These dimensions allow the fish to drape naturally over the rice ball. Many beginners cut too thick. Remember that the fish plus rice together create a substantial bite.
Should I cut fish with or against the grain?
Always cut against the grain. Fish muscle consists of long fibers that run lengthwise. Cutting across these fibers creates tender pieces that melt in your mouth. Cutting with the grain leaves long fibers intact, making the fish chewy and tough. Take time to identify grain direction before cutting.
What angle should I cut sushi fish?
Most sushi cuts use a 45-degree angle. This angle creates the right surface area for nigiri and elegant presentation for sashimi. Some styles like sogi-zukuri use a steeper 30-degree angle for thinner, wider pieces. Practice maintaining consistent angles for uniform results.
Why is my fish tearing when I cut it?
Fish tears when your knife is not sharp enough. A dull blade crushes rather than slices, rupturing cell walls. Test sharpness on paper. If the paper tears or bunches, sharpen your knife. Also ensure you are using a pull cut motion in one smooth movement rather than sawing back and forth.
Conclusion
Learning how to cut fish for sushi takes patience and practice, but the results are worth the effort. Sharp knives, proper angle, and cutting against the grain transform your home sushi from amateur to impressive. Start with cucumbers, progress to inexpensive fish, then treat yourself to sushi-grade salmon or tuna when your skills feel solid.
The key fundamentals never change. Keep your knife razor sharp. Always cut against the grain. Use one smooth pull motion at a 45-degree angle. Master these three principles and every slice you make will look and taste professional.
Now it is time to practice. Grab a cucumber, set up your cutting board, and start slicing. Your first perfect piece of sashimi is closer than you think.