There is something magical about biting into a perfectly crafted spicy tuna roll. The cool, creamy tuna filling gives way to tender sushi rice, all wrapped in crisp nori with just the right amount of heat from the spicy mayo. I spent years thinking this was something only sushi chefs could create. Then I spent three months learning from a Japanese chef in Los Angeles, and everything changed.
This spicy tuna roll recipe brings authentic restaurant-quality results to your home kitchen. You do not need years of training or expensive equipment. What you need is fresh sashimi-grade tuna, the right ratio of sriracha to Kewpie mayonnaise, and a bamboo mat that costs less than your morning coffee.
By the end of this guide, you will know exactly how to make sushi rice that holds together without being mushy. You will mix spicy mayo that rivals your favorite sushi bar. You will roll tight, beautiful maki that slices cleanly into eight perfect pieces. Whether you are a complete beginner or looking to refine your technique, this recipe will get you there.
Table of Contents
Spicy Tuna Roll Recipe at a Glance 2026
Before we dive into the details, here is everything you need to know about timing and portions. This recipe makes three full rolls, yielding 24 pieces of sushi. That is enough for 3 to 4 people as an appetizer, or 2 people as a light main course.
| Detail | Value |
|---|---|
| Prep Time | 40 minutes |
| Cook Time | 20 minutes |
| Total Time | 1 hour |
| Servings | 3 rolls (24 pieces) |
| Difficulty | Medium (Beginner-friendly) |
The most time-consuming part is preparing the sushi rice properly. Do not rush this step. Warm, well-seasoned rice is the foundation of every great spicy tuna roll. The actual rolling takes about 15 minutes once your components are ready.
What You Will Need: Complete Ingredient List 2026
Quality ingredients make the difference between good sushi and great sushi. Here is everything you need, broken down by component. I have also included substitution options for hard-to-find items.
For the Sushi Rice
Sushi rice is short-grain Japanese rice that becomes sticky when cooked. This stickiness is essential for holding your rolls together. Do not substitute with long-grain or basmati rice. The texture will be completely wrong.
- 2 cups uncooked sushi rice (Japanese short-grain)
- 2 1/4 cups water
- 3 tablespoons seasoned rice vinegar (or unseasoned rice vinegar mixed with 1 tablespoon sugar and 1 teaspoon salt)
You can find sushi rice at Asian grocery stores, well-stocked supermarkets, or online. Look for brands like Nishiki, Kokuho Rose, or Calrose. These are widely available in North America and produce excellent results.
For the Spicy Tuna Filling
The filling is where the magic happens. Fresh sashimi-grade tuna is non-negotiable for the best results. You will combine it with spicy mayo, green onions, and a touch of sesame oil for depth.
- 6 ounces sashimi-grade tuna (yellowfin or ahi tuna work beautifully)
- 4 teaspoons sriracha sauce
- 4 teaspoons Kewpie mayonnaise (Japanese mayo)
- 1 green onion, finely chopped
- 1 teaspoon sesame oil
- 1/2 teaspoon togarashi (Japanese chili powder), optional
Kewpie mayonnaise is different from standard American mayo. It contains only egg yolks, not whole eggs, which gives it a richer, creamier texture. It also includes a hint of MSG that enhances umami flavor. You can find it at Asian markets or substitute with regular mayo mixed with a pinch of sugar and dash of rice vinegar.
For Assembly
These are the finishing touches that complete your rolls. Nori sheets should be crisp and smell like the ocean, not fishy or stale.
- 3 nori sheets (full-size, about 8×7 inches)
- 1 tablespoon white or black sesame seeds, toasted
- Soy sauce for serving
- Pickled ginger for serving
- Wasabi paste for serving
Equipment You Will Need
You do not need a professional sushi setup. These basic tools will get professional results:
- Bamboo sushi mat (makisu) – about $3 to $5 at Asian markets
- Sharp chef’s knife or sushi knife
- Rice cooker or medium pot with lid
- Large wooden or glass bowl for seasoning rice
- Small bowl of water for wetting hands
- Plastic wrap (optional, for inside-out rolls)
If you do not have a bamboo mat, I will show you an alternative rolling method in the tips section. It works in a pinch, though the mat makes things much easier.
How to Make Spicy Tuna Rolls: Step-by-Step Instructions
Now we get to the fun part. I have broken this down into clear steps so you can follow along without getting overwhelmed. Read through all the steps once before starting. Then tackle them one at a time.
Step 1: Prepare the Sushi Rice
Place your sushi rice in a large bowl and cover with cold water. Swirl gently with your hand, then pour off the cloudy water. Repeat this rinsing process 4 to 5 times until the water runs mostly clear. This removes excess starch that would make the rice gummy.
Drain the rinsed rice in a fine-mesh strainer for 30 minutes. This resting period allows the grains to absorb surface moisture, which helps them cook evenly.
Step 2: Cook the Rice
Transfer the drained rice to your rice cooker or a medium pot. Add 2 1/4 cups water. If using a rice cooker, simply select the sushi rice setting and let it work. If cooking on the stove, bring to a boil over high heat, then reduce to low, cover tightly, and simmer for 15 minutes.
After cooking, remove from heat and let the rice steam, covered, for another 10 minutes. Do not lift the lid during this time. The steam finishes the cooking process and gives the rice its characteristic texture.
Step 3: Season the Rice
Transfer the hot rice to a large wooden or glass bowl. Avoid metal, which can react with the vinegar. Pour the seasoned rice vinegar evenly over the rice.
Using a rice paddle or wooden spoon, fold the vinegar into the rice with a cutting motion. Do not stir or mash. You want to separate the grains while coating them evenly. Have someone fan the rice while you mix, or fan it yourself between folds. This cooling process gives sushi rice its signature glossy appearance.
Continue folding and fanning for about 5 minutes until the rice reaches room temperature. Cover with a damp kitchen towel until ready to use.
Step 4: Make the Spicy Mayo
In a small bowl, combine the Kewpie mayonnaise and sriracha. Stir until completely blended into a smooth, coral-colored sauce. This ratio gives you medium heat that lets the tuna flavor shine through.
Taste and adjust. Want more fire? Add sriracha a half-teaspoon at a time. Prefer milder? Reduce the sriracha to 2 teaspoons. Remember that the tuna will dilute the heat slightly, so make it a touch spicier than you think you want.
Step 5: Adjust Consistency
If your spicy mayo seems too thick to coat the tuna evenly, add water a few drops at a time until it reaches the consistency of thick salad dressing. It should flow off a spoon but still cling to the fish.
Set the spicy mayo aside while you prepare the tuna. This allows the flavors to meld slightly.
Step 6: Prepare the Tuna
Place your sashimi-grade tuna on a clean cutting board. Using a sharp knife, cut the tuna into 1/4-inch cubes. The key here is uniformity. Pieces that are roughly the same size will mix evenly with the spicy mayo and roll beautifully.
Some recipes call for minced tuna, but I prefer small cubes. They give you distinct texture and better mouthfeel. You want to taste the tuna, not just the sauce.
Step 7: Mix the Filling
Transfer the diced tuna to a medium bowl. Add the spicy mayo, chopped green onions, sesame oil, and togarashi if using. Gently fold everything together with a spoon or spatula.
You want every cube of tuna coated, but you do not want to break the fish down into mush. Use a light hand and stop as soon as everything looks evenly distributed. Cover and refrigerate until you are ready to roll.
Step 8: Taste and Adjust
Take a small taste of your filling. Is it spicy enough? Does it need more salt? The tuna itself should taste fresh and clean, with the spicy mayo adding heat and creaminess. Adjust seasoning now before you start rolling.
If the filling seems dry, add a touch more spicy mayo. If it seems too loose, you can add a tablespoon of panko breadcrumbs to absorb excess moisture.
Step 9: Set Up Your Rolling Station
Lay your bamboo mat on a clean, dry surface with the bamboo slats running horizontally. The mat should feel dry, not damp. Moisture will make the nori soggy.
Have your bowl of water nearby for wetting your hands. Keep a kitchen towel handy for drying your knife between cuts. Arrange your rice, nori sheets, tuna filling, and sesame seeds within arm’s reach.
Step 10: Position the Nori
Place one sheet of nori on the bamboo mat. The nori has two sides: one is rough and matte, the other is smoother and slightly shiny. Place it shiny side down. The rough side grips the rice better, while the shiny side becomes the attractive exterior of your roll.
Position the nori with the long edge parallel to the bamboo slats. Leave about an inch of bamboo mat exposed at the edge closest to you. This gives you room to start the roll.
Step 11: Spread the Rice
Wet your hands thoroughly in the water bowl. Shake off excess, but do not dry them completely. The water prevents rice from sticking to your fingers.
Take a handful of sushi rice, about the size of a tennis ball, and spread it evenly over the nori. Work from the center outward, creating a thin, uniform layer. Leave about 1 inch of nori uncovered at the top edge. This bare strip is essential for sealing the roll.
The rice layer should be about 1/4 inch thick. Any thinner and it will not hold together. Any thicker and you will have trouble rolling tightly. If you run out of rice before covering the nori, add small pinches to fill gaps.
Step 12: Add Sesame Seeds
Sprinkle toasted sesame seeds evenly across the rice surface. Use white sesame seeds for classic presentation, black for contrast, or a mix of both. The seeds add visual interest and a subtle nutty crunch.
Press the seeds gently into the rice so they adhere. You do not want them falling off when you roll.
Step 13: Add the Spicy Tuna Filling
Place about one-third of your tuna filling in a line along the bottom third of the rice-covered nori. The line should run the full width of the nori, about 1 inch from the bottom edge.
Do not overfill. A thick log of filling will burst through the rice when you roll. You want a modest line about the diameter of your thumb. It is better to have slightly less filling than too much.
Step 14: Roll the Sushi
Here is where technique matters. Lift the edge of the bamboo mat closest to you, using your fingers to hold the filling in place as you begin to roll over it. Roll the mat forward, tucking the nori and rice around the filling.
Continue rolling, pulling the mat away from you while shaping the roll into a cylinder. Apply gentle, even pressure. You want a tight roll without crushing the rice grains.
When you reach the bare strip of nori at the top, moisten it with a few drops of water using your finger. Complete the roll, pressing gently to seal the moistened nori to the roll exterior.
Step 15: Shape and Compress
With the roll complete inside the mat, give it a gentle squeeze along the length. Apply firm but not crushing pressure. This sets the shape and helps the components adhere.
You can use the mat to shape the roll into a more perfect cylinder. Square it off if you want clean edges, or leave it rounded for a softer look. Traditional maki is slightly rounded.
Step 16: Let the Roll Rest
Transfer the finished roll to a cutting board, seam side down. Let it rest for 2 minutes. This brief rest allows the moisture from the rice to soften the nori seal slightly, ensuring it stays closed when you cut.
Repeat steps 10 through 16 with the remaining nori sheets, rice, and filling. You should end up with three complete rolls.
Step 17: Cut the Rolls
Wet your knife blade thoroughly. A wet knife slides through the roll without sticking or dragging. Cut the roll in half first, wiping the blade clean between cuts.
Then cut each half into four equal pieces. You will get eight pieces per roll. Aim for clean, decisive cuts. Sawing motions will squash the roll and tear the nori.
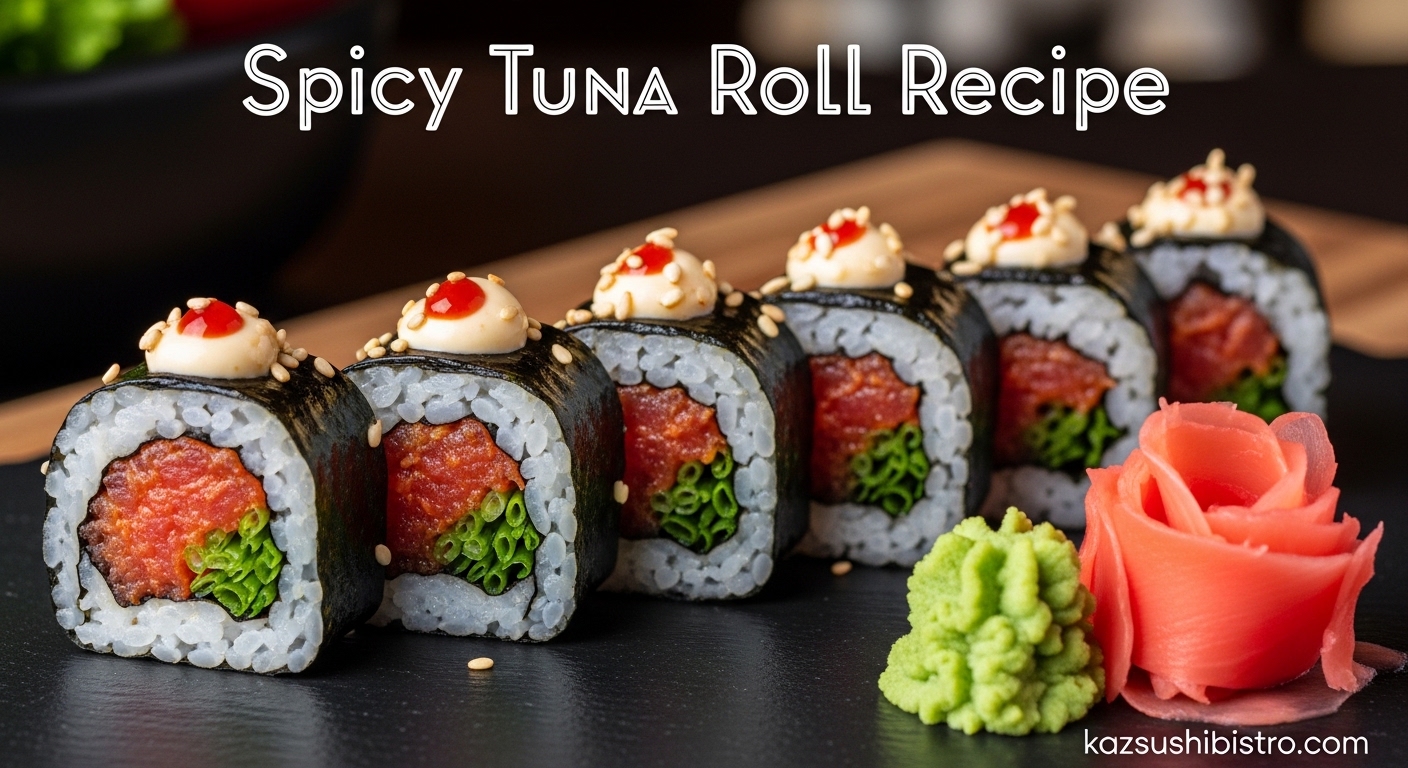
Arrange the pieces on a plate, standing them upright so the colorful filling faces up. This presentation shows off your work and makes the rolls easier to pick up.
Step 18: Serve and Enjoy
Present your spicy tuna rolls with small dishes of soy sauce, wasabi, and pickled ginger. The ginger serves as a palate cleanser between different types of sushi, but it is perfectly fine to eat with your spicy tuna rolls too.
Dip the fish side of the roll into soy sauce, not the rice side. Rice absorbs too much soy sauce and falls apart. Wasabi can be mixed into your soy sauce or applied directly to the roll.
Expert Tips for Perfect Spicy Tuna Rolls Every Time
After making hundreds of rolls, I have learned what separates good sushi from great sushi. These tips will save you from common mistakes and help you achieve restaurant-quality results at home.
Rice Is Everything
Do not rush the rice preparation. Properly seasoned sushi rice is the foundation of every great roll. If your rice is too hot when you add vinegar, it becomes mushy. If it is too cold, the vinegar does not absorb properly.
Rinse until the water runs clear. This cannot be overstated. Excess starch makes rice gummy and prevents that distinct, separate-grain texture you want.
When seasoning, use a cutting and folding motion. Never stir in circles. Circular stirring breaks the rice grains and releases more starch, creating a paste instead of fluffy, glossy sushi rice.
Keep Your Hands Wet
Sushi rice is sticky by design. Wet hands are your best defense. I keep a bowl of water next to my rolling station and re-wet my hands constantly. Shake off excess water, but do not dry your hands completely. The thin film of water is perfect.
Your knife needs the same treatment. Wipe and wet between every single cut. This gives you clean slices without dragging rice or tearing nori.
Temperature Matters
Serve spicy tuna rolls at room temperature or slightly chilled. Cold refrigerator temperatures dull the flavors of the tuna and make the rice hard. Let finished rolls sit at room temperature for 5 minutes before serving.
Keep your tuna filling refrigerated until the moment you start rolling. Raw fish should stay cold for food safety. Work efficiently once you begin assembly.
Sharp Knives Are Essential
A dull knife will destroy your beautiful rolls. It drags, tears, and compresses instead of slicing cleanly. Sharpen your knife before you start. If you do not have a sharpener, at least hone the blade with a steel rod.
Let the knife do the work. Apply gentle pressure and draw the blade through in one smooth motion. Do not saw back and forth. If you feel resistance, your knife needs sharpening or wetting.
Food Safety for Raw Fish
Handling raw tuna safely is non-negotiable. Always buy fish labeled sashimi-grade or sushi-grade from a reputable fishmonger. These terms mean the fish has been frozen to temperatures that kill parasites, making it safe to eat raw.
Keep the tuna refrigerated at 40 degrees Fahrenheit or below. Use it within 24 hours of purchase for best quality and safety. Do not leave raw fish at room temperature for more than 30 minutes.
Clean your cutting board and knife thoroughly with hot, soapy water after handling raw fish. Use a separate cutting board for fish if possible, or sanitize thoroughly between uses.
If you are pregnant, elderly, immunocompromised, or serving these groups, consider using the canned tuna variation instead. The risk of foodborne illness from raw fish, while low with proper sourcing, is not worth taking for vulnerable individuals.
No Mat? No Problem
If you do not have a bamboo mat, you can still make spicy tuna rolls. Lay a sheet of plastic wrap on your counter. Place the nori on the plastic wrap. Add rice and filling as normal.
Use the plastic wrap to lift and roll the sushi, just like you would use the bamboo mat. The plastic wrap helps shape the roll, though it is slightly trickier to control than a mat. Once rolled, you can use your hands to shape and compress.
Alternatively, you can use a clean kitchen towel wrapped in plastic wrap. The towel provides structure while the plastic prevents sticking. It is not perfect, but it works in a pinch.
Delicious Variations to Try
Once you master the basic spicy tuna roll, you can experiment with variations. These are some of my favorite ways to change things up.
Crunchy Spicy Tuna Roll
Add texture with tempura flakes, also called tenkasu. These are crispy bits of fried tempura batter. Mix 2 tablespoons of tempura flakes into your tuna filling just before rolling. The flakes add a satisfying crunch that contrasts beautifully with the soft tuna.
You can buy tempura flakes at Asian grocery stores, or make your own by dropping small bits of tempura batter into hot oil and frying until golden. Drain well on paper towels before using.
Spicy Tuna Roll with Avocado
Add creamy richness by including avocado in your roll. Cut half an avocado into thin slices. Lay 2 to 3 slices on top of the rice before adding the tuna filling. The cool, buttery avocado pairs wonderfully with the spicy fish.
Make sure your avocado is perfectly ripe. Too firm and it will be hard and flavorless. Too soft and it will turn to mush when you roll. You want it to yield gently to pressure.
Inside-Out Roll (Uramaki)
For an inside-out roll, you spread rice on the nori as usual, then flip the whole thing over so the rice is against the bamboo mat. Add your filling on the bare nori side, then roll. The rice ends up on the outside with nori visible only at the seam.
Cover your bamboo mat completely with plastic wrap before attempting this. Otherwise, rice will stick to the mat and create a mess. After rolling, you can coat the outside with sesame seeds or tobiko for decoration.
Canned Tuna Variation (Poor Man’s Spicy Tuna)
For a budget-friendly version, substitute canned tuna for fresh. Use high-quality canned tuna in water, not oil. Drain thoroughly and flake the tuna with a fork to break up any large chunks.
You will need slightly more spicy mayo since canned tuna is drier than fresh. Start with the basic recipe, then add mayo until the mixture is creamy and cohesive. A squeeze of lemon juice brightens the flavor of canned fish.
This variation is also great if you are nervous about handling raw fish or serving vulnerable individuals. While it lacks the luxurious texture of fresh sashimi-grade tuna, it is still delicious and much more affordable.
Spicy Mayo Variations
Experiment with your spicy mayo base. Add a teaspoon of yuzu juice for citrus brightness. Mix in a tablespoon of masago or tobiko for little pops of roe and extra umami. A dash of garlic powder adds depth without overpowering.
For extra heat beyond sriracha, add a few drops of chili oil or a pinch of cayenne. Shichimi togarashi, a Japanese seven-spice blend, adds complex heat with citrus and sesame notes.
Storage and Make-Ahead Guidelines
Sushi is best eaten fresh, but you can prepare components ahead of time for easier assembly.
Storing Completed Rolls
Store finished spicy tuna rolls in the refrigerator for up to 24 hours. Wrap tightly in plastic wrap to prevent the rice from drying out. The nori will lose its crispness and become chewy, but the rolls are still safe to eat.
Do not freeze sushi rolls. The rice becomes hard and unpleasant when thawed, and the raw tuna suffers texturally.
Make-Ahead Components
You can prepare the sushi rice up to 4 hours ahead. Keep it at room temperature covered with a damp towel. Do not refrigerate the rice. Cold rice becomes hard and loses its pleasant texture.
The spicy mayo can be made 2 days ahead and stored in the refrigerator. The tuna filling should be prepared as close to serving time as possible. If you must make it ahead, refrigerate for no more than 2 hours before assembling rolls.
Nori sheets should stay in their original packaging until use. Exposure to air makes them lose crispness and become rubbery. Once opened, reseal the package tightly or store in an airtight container with a desiccant packet.
Party Preparation Strategy
For parties, I recommend preparing all components and letting guests roll their own sushi. It is interactive and fun. Set out bowls of rice, tuna filling, nori, and toppings. Provide several bamboo mats so people can work simultaneously.
If you prefer to serve pre-made rolls, make them no more than 2 hours ahead. Arrange on platters and cover with plastic wrap. Store in the refrigerator until 10 minutes before serving, then let come to room temperature slightly.
Frequently Asked Questions
What do you put in a spicy tuna roll?
A classic spicy tuna roll contains these key ingredients: sashimi-grade tuna diced into small cubes, spicy mayo made from Kewpie mayonnaise and sriracha, green onions for freshness and color, and a touch of sesame oil for depth. Optional additions include togarashi (Japanese chili powder), tempura flakes for crunch, or thin slices of cucumber for extra texture. The filling is wrapped in sushi rice and nori seaweed to complete the roll.
What is the crunchy stuff in spicy tuna rolls?
The crunchy texture in some spicy tuna rolls comes from tempura flakes, also called tenkasu in Japanese. These are crispy bits of fried tempura batter that add a satisfying textural contrast to the soft tuna and rice. Some variations also use panko breadcrumbs or crushed fried onions for crunch. The tempura flakes are mixed directly into the tuna filling so you get crunch in every bite.
What is usually in a tuna roll?
A standard tuna roll (maguro maki) is simpler than a spicy tuna roll. It typically contains fresh raw tuna (sashimi-grade), possibly with a thin strip of cucumber for crunch. The tuna is not mixed with any sauce or seasonings inside the roll. It is served with soy sauce, wasabi, and pickled ginger on the side for dipping. The focus is entirely on the clean flavor and texture of high-quality fresh tuna.
Can I make spicy tuna with canned tuna?
Yes, absolutely. You can make a delicious budget-friendly spicy tuna using canned tuna. Use high-quality canned tuna packed in water, not oil. Drain it thoroughly and flake with a fork to break up chunks. Mix with Kewpie mayonnaise, sriracha, green onions, and a squeeze of lemon juice. This variation, sometimes called poor man’s spicy tuna, lacks the luxurious texture of fresh sashimi-grade tuna but still delivers great flavor at a fraction of the cost.
Is spicy tuna roll cooked?
Traditional spicy tuna rolls contain raw sashimi-grade tuna that is not cooked. The fish is safe to eat raw because it has been frozen to specific temperatures that kill parasites. However, if you prefer not to eat raw fish, you can substitute seared tuna or use the canned tuna variation. Some restaurants also offer fully cooked spicy tuna made with canned fish for customers who avoid raw seafood.
How many calories are in a spicy tuna roll?
A typical spicy tuna roll contains approximately 300 to 350 calories for a full roll of 8 pieces. The calories come primarily from the sushi rice (about 200 calories per cup) and the mayonnaise in the spicy sauce. Each piece contains roughly 35 to 45 calories. Adding avocado or tempura flakes will increase the calorie count. For a lighter version, reduce the rice portion and use less spicy mayo in the filling.
How do I find sushi-grade tuna?
Look for fish specifically labeled sashimi-grade or sushi-grade at Japanese grocery stores, high-end fish markets, or reputable seafood counters. These terms indicate the fish has been flash-frozen to temperatures that kill parasites, making it safe for raw consumption. Ask your fishmonger when the tuna arrived and whether it is suitable for eating raw. Buy from busy markets with high turnover to ensure freshness. Use the tuna within 24 hours of purchase.
Master the Spicy Tuna Roll and Impress Your Guests
Making spicy tuna rolls at home is one of the most rewarding cooking projects you can tackle. You start with simple ingredients: rice, fish, nori, and a few seasonings. You end with something that looks and tastes like it came from a skilled sushi chef.
The keys to success are patience with your rice, quality sashimi-grade tuna, and the confidence to roll tightly. Do not worry if your first few attempts look imperfect. Even lopsided rolls taste delicious. Within three or four tries, you will be producing rolls that rival your favorite sushi bar.
Serve your spicy tuna rolls with pickled ginger to cleanse the palate between bites. Offer soy sauce mixed with wasabi for dipping. A cold Japanese beer or crisp sake makes the perfect pairing.
This spicy tuna roll recipe is just the beginning. Once you master the basic technique, you can explore the world of maki rolls. Try salmon, yellowtail, or vegetarian options with cucumber and avocado. Each variation uses the same fundamental skills you learned here.
Now gather your ingredients, wet your hands, and start rolling. Your homemade sushi adventure begins with the very next roll you make.