Learning how to make mochi at home opens up a world of soft, chewy Japanese treats you can customize with your favorite flavors and fillings. I spent months testing different techniques after my first attempt turned into a sticky disaster that glued itself to my counter. What I discovered is that mochi-making is actually straightforward once you understand the science behind that signature elastic texture and learn a few handling tricks that prevent the dough from sticking to everything it touches.
This complete guide walks you through two foolproof methods for making authentic mochi in your own kitchen. You will learn which flour to choose, how to handle the notoriously sticky dough, and techniques for creating both plain mochi and filled varieties like traditional daifuku. By the end, you will have the confidence to make soft, stretchy mochi that stays fresh for days and impresses anyone who takes a bite.
Table of Contents
What Is Mochi?
Mochi is a traditional Japanese rice cake made from glutinous rice flour that has a unique soft, chewy, and elastic texture unlike any other dessert. The magic happens when the starch in glutinous rice flour gelatinizes during cooking, creating a translucent dough that stretches beautifully and bounces back when pressed.
Despite its name, glutinous rice contains no gluten. The term refers to the sticky, glue-like quality of the cooked rice. This makes mochi naturally gluten-free and suitable for people with celiac disease or gluten intolerance.
In Japan, mochi holds deep cultural significance. Families gather for mochitsuki, the traditional ceremony of pounding steamed glutinous rice with wooden mallets in a large mortar. This New Year tradition brings communities together and produces fresh mochi believed to bring good fortune. The modern home methods we cover here use flour instead of whole rice, making the process accessible without specialized equipment.
Fresh homemade mochi tastes noticeably better than store-bought versions. You control the sweetness, avoid preservatives, and can experiment with fillings that range from classic red bean paste to modern favorites like peanut butter or ice cream.
Ingredients You Need to Make Mochi 2026
Quality ingredients make the difference between good mochi and great mochi. Here is exactly what you need for a basic batch that yields about 12 small mochi pieces.
Core Ingredients:
- 1 cup (160g) glutinous rice flour (mochiko)
- 1/4 cup (50g) granulated sugar
- 1 cup (240ml) water
- 1/4 cup (30g) cornstarch or potato starch for dusting
Understanding Your Flour Options:
Mochiko is the most common flour for home mochi making. This Japanese sweet rice flour creates reliable results and is widely available at Asian grocery stores and online retailers. The texture is smooth and produces consistent, chewy mochi every time.
Shiratamako is a higher-end Japanese flour made from processed glutinous rice that has been washed, soaked, and then dried into coarse granules. When cooked, it creates an even more elastic, refined texture preferred by professionals. The drawback is that shiratamako requires soaking before use and costs significantly more than mochiko.
Thai glutinous rice flour works in a pinch but produces slightly different results. The texture tends to be denser and less stretchy than Japanese varieties. If this is your only option, expect a firmer mochi that still tastes delicious but lacks that characteristic bounce.
Important: Do not substitute regular rice flour or all-purpose flour. These lack the amylopectin starch content that creates mochi’s signature stretchy texture. Your result will be crumbly and hard rather than soft and chewy.
Essential Equipment and Substitutes
You do not need special Japanese equipment to make excellent mochi at home. Here is what actually matters and what you can use instead.
Must-Have Items:
- Microwave-safe bowl (for microwave method) OR heatproof bowl with steamer setup
- Silicone spatula or wooden spoon
- Parchment paper or plastic wrap
- Clean kitchen surface for shaping
Helpful But Optional:
- Disposable gloves (vinyl or nitrile work better than latex for grip)
- Pastry brush for dusting
- Small cookie scoop for portioning
- Piping bag for filling mochi
No Microwave Alternative: If you lack a microwave, the steam method detailed below works with any pot that has a tight-fitting lid and a heatproof bowl or plate. A bamboo steamer, metal steamer basket, or even a metal colander set over boiling water all work effectively.
Pro Tip: Keep a small bowl of water nearby while shaping. A wet spatula and damp hands prevent the sticky dough from adhering to surfaces and tools.
Two Methods for Making Mochi 2026
Choose your cooking method based on your priorities. The microwave method delivers fast results perfect for beginners, while steaming produces superior texture that mochi enthusiasts prefer.
| Method | Time | Texture Result | Best For |
|---|---|---|---|
| Microwave | 5 minutes | Soft, slightly tender | Beginners, quick cravings |
| Steam | 20 minutes | Chewy, bouncy, elastic | Authentic results, best mouthfeel |
Both methods use the same ingredient ratios. Once you master the basic recipe, experiment with both techniques to find your preference.
Method 1: Microwave Mochi (5 Minutes)
This is the fastest path to fresh mochi and the method I recommend for first-timers. The microwave evenly cooks the starch mixture without constant monitoring.
Step 1: Mix Your Ingredients
Combine 1 cup glutinous rice flour, 1/4 cup sugar, and 1 cup water in a large microwave-safe bowl. Whisk until completely smooth with no lumps. The batter should look like thin pancake mix.
Step 2: First Cook Cycle
Cover the bowl loosely with plastic wrap or a microwave-safe plate. Microwave on high for 2 minutes. The mixture will start to thicken and turn from opaque white to slightly translucent.
Step 3: Stir and Assess
Carefully remove the hot bowl using oven mitts. Stir vigorously with a silicone spatula, scraping the bottom and sides. The dough will be partially cooked with some raw patches remaining.
If your dough looks extremely wet and liquidy, microwave for an additional 30 seconds before stirring. Every microwave varies in power, so adjustments are normal.
Step 4: Second Cook Cycle
Return the bowl to the microwave and cook uncovered for another 2 minutes. The dough will puff up and become fully translucent when done. It should look glossy and stretchy when pulled with your spatula.
Step 5: Knead While Hot
Let the dough cool for 1 minute until you can handle it. Turn it out onto a surface dusted heavily with cornstarch. Knead 10-15 times by folding the dough over itself. This develops the stretchy texture and distributes heat evenly.
Warning: Do not skip the kneading step. Under-kneaded mochi turns out dense and lacks the characteristic bounce. The dough is hot but manageable with quick movements.
Step 6: Shape and Fill
Your mochi is now ready to portion and shape. Work quickly while the dough is warm for easiest handling. See the shaping section below for detailed techniques.
Method 2: Steam Mochi (20 Minutes)
Steaming produces the most authentic mochi texture with superior chewiness and elasticity. This method requires patience but rewards you with results that rival Japanese bakery quality.
Step 1: Prepare Your Steamer
Fill a large pot with 2 inches of water and bring to a boil. Set up your steamer basket, making sure the water level sits below the basket bottom. You want steam, not boiling water touching your bowl.
Step 2: Mix and Transfer
Whisk together 1 cup glutinous rice flour, 1/4 cup sugar, and 1 cup water until smooth. Pour into a heatproof bowl that fits inside your steamer. A shallow, wide bowl cooks more evenly than a deep one.
Cover the bowl tightly with foil or a heatproof plate to prevent condensation from dripping into your mochi. Water droplets create soggy spots.
Step 3: Steam Until Translucent
Place the bowl in the steamer, cover the pot with a tight-fitting lid, and steam for 20 minutes. Do not lift the lid during cooking. Escaping steam drops the temperature and extends cooking time.
The mochi is done when the entire surface looks glossy and uniformly translucent. There should be no opaque white patches remaining. If you see cloudy areas, steam for an additional 5 minutes.
Step 4: Knead for Elasticity
Remove the hot bowl carefully. Turn the mochi onto a cornstarch-dusted surface while still warm. Knead 15-20 times, stretching and folding the dough. Steamed mochi develops even better texture with thorough kneading.
The dough should feel smooth, silky, and very stretchy. It pulls without tearing and springs back when pressed.
How to Shape and Fill Your Mochi
Handling sticky mochi dough intimidates many beginners. These techniques make shaping manageable and even enjoyable.
Preparation: Dust your work surface generously with cornstarch or potato starch before starting. Keep a small bowl of water nearby for wetting your tools and hands as needed.
Basic Shaping Method:
Divide the warm dough into 12 equal portions using oiled scissors or a bench scraper. Oil prevents the blades from sticking. Roll each piece between cornstarch-dusted palms into a smooth ball.
Work quickly while the dough is warm. Cold mochi becomes much harder to shape and may crack at the edges.
Filled Mochi Technique (Daifuku):
For filled mochi, flatten a dough portion into a circle about 3 inches across. Use your fingers to create a thin center with slightly thicker edges. Place 1 teaspoon of filling in the center.
Bring the edges up around the filling and pinch to seal completely. Roll gently between your palms to smooth the seam. If any filling leaks out, patch with a small piece of extra dough.
Ice Cream Mochi Method:
Scoop small balls of ice cream onto a parchment-lined plate. Freeze until rock solid, at least 2 hours. Working quickly next to your freezer, wrap frozen ice cream with flattened mochi dough and immediately return to the freezer.
Wear disposable gloves dusted with cornstarch. The dough sticks less to gloves than bare hands, and the cornstarch creates a barrier that makes handling possible.
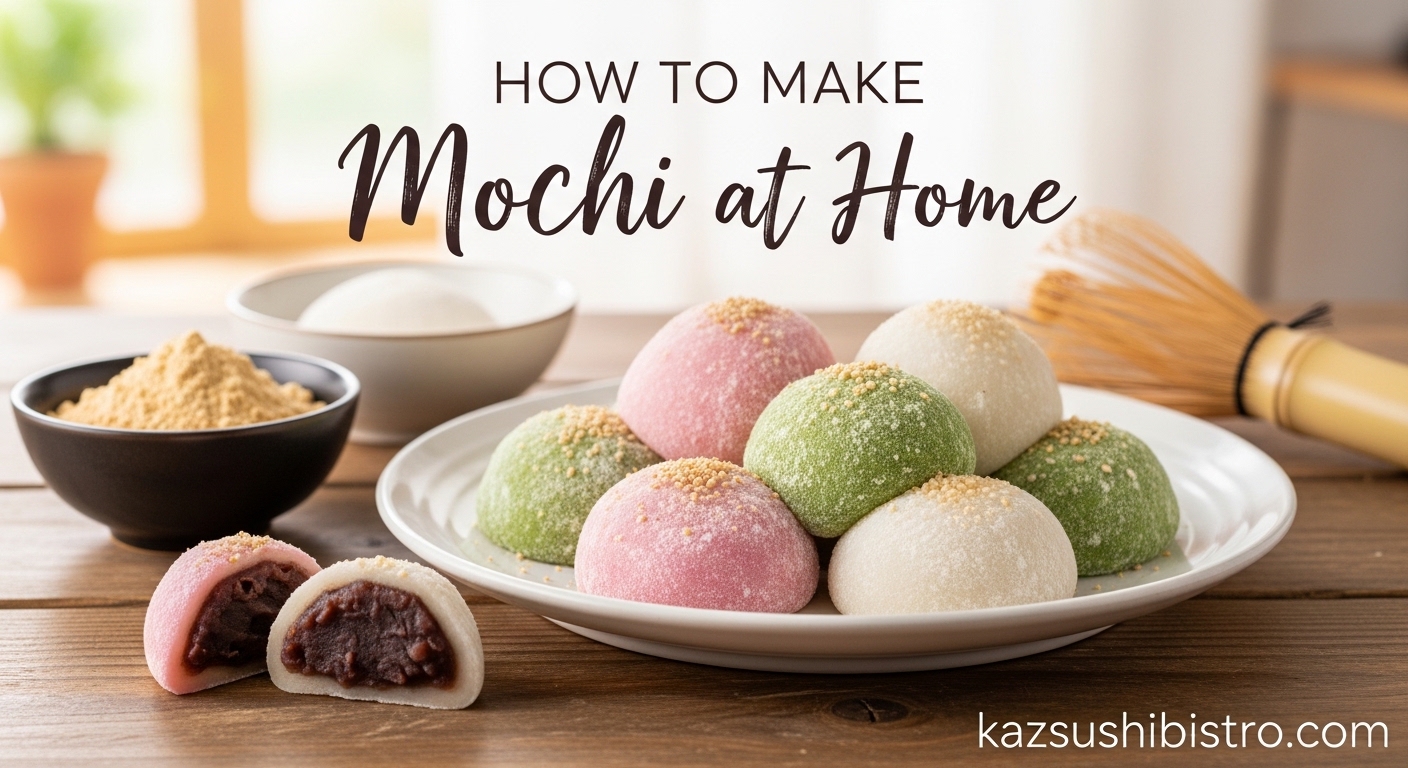
Coating Options: Roll finished mochi in kinako (roasted soybean powder), toasted black sesame seeds, shredded coconut, or matcha powder. These add flavor and prevent pieces from sticking together during storage.
Delicious Mochi Variations to Try
Once you master the basic recipe, explore these popular variations that showcase mochi’s versatility.
Matcha Mochi: Add 1 tablespoon matcha powder to your dry ingredients before mixing. The earthy green tea flavor pairs beautifully with sweet red bean filling or stands alone with a light dusting of powdered sugar.
Peanut Butter Filling: Mix 1/2 cup smooth peanut butter with 2 tablespoons powdered sugar for a creamy center. This American-Japanese fusion tastes like a sophisticated peanut butter cup.
Strawberry Daifuku (Ichigo Daifuku): Wrap a whole fresh strawberry with a thin layer of anko (red bean paste), then encase in mochi dough. The combination of tart fruit, sweet bean, and chewy rice creates an unforgettable bite.
Coconut Mochi: Substitute coconut milk for half the water in your recipe. Roll finished mochi in toasted coconut flakes for tropical flair.
Cocoa Mochi: Add 2 tablespoons unsweetened cocoa powder to create chocolate-flavored mochi perfect for pairing with vanilla ice cream filling.
Dairy-Free and Vegan Adaptation: Replace water with full-fat coconut milk for richer flavor. All basic mochi ingredients are naturally plant-based. Just verify that any fillings you choose are also vegan.
Troubleshooting Common Mochi Problems
Even experienced home cooks encounter mochi challenges. Here are solutions to the most common problems based on real kitchen testing.
Problem: Dough Is Too Sticky to Handle
Solution: Use more cornstarch for dusting than you think necessary. Work near your starch container and re-dust your surface, hands, and tools frequently. A wet spatula works better than a dry one for scraping and shaping. Try wearing disposable gloves dusted inside and out with cornstarch.
Problem: Mochi Has Lumpy or Uneven Texture
Solution: Lumps form when the batter is not fully smooth before cooking or when cooking is uneven. Whisk your raw batter thoroughly, scraping bowl sides and bottom. For microwave method, stir halfway through cooking to distribute heat. For steam method, ensure your water maintains a rolling boil throughout the full 20 minutes.
Problem: Mochi Turns Out Hard Instead of Soft
Solution: Hard mochi usually means overcooking or insufficient water. Reduce microwave time by 30-second increments until you find your ideal setting. Check that you measured water accurately using a liquid measuring cup at eye level. Old flour also produces tougher mochi, so check expiration dates on your glutinous rice flour.
Problem: Dough Is Too Wet and Won’t Hold Shape
Solution: Undercooked dough contains too much moisture. Return it to the microwave for 1-minute intervals, stirring between each, until the dough pulls away from the bowl sides and becomes translucent. For steamed mochi, extend cooking time by 5-10 minutes if the center looks cloudy rather than glossy.
Problem: Mochi Is Not Stretchy or Chewy
Solution: Insufficient kneading prevents proper texture development. Knead warm dough at least 15 times, folding and stretching vigorously. The dough should feel resistant and springy. Also verify you used true glutinous rice flour, not regular rice flour which creates crumbly results.
Problem: Mochi Tears When Wrapping Fillings
Solution: Tears indicate dough that is too thin or too cold. Keep your dough warm by working in small batches. Make the center of each wrapper thinner than the edges, which provides strength at the seam. Use less filling than you think you need, about 1 teaspoon per piece.
How to Store Homemade Mochi
Fresh mochi tastes best within 24 hours but stores well with proper technique.
Short-Term Storage (1-2 Days): Store mochi in an airtight container at room temperature. Do not refrigerate. Cold temperatures harden mochi and ruin the texture. Place parchment paper between layers to prevent sticking.
Freezing (Up to 1 Month): Freeze mochi on a parchment-lined plate until solid, about 2 hours. Transfer to a freezer bag, removing as much air as possible. Frozen mochi maintains excellent quality and can be eaten slightly frozen like ice cream or thawed.
Restoring Hardened Mochi: If your mochi has hardened from improper storage, microwave for 10-15 seconds to restore softness. Steaming for 2-3 minutes also revives texture. This works for both fresh and frozen mochi.
Homemade mochi without preservatives has a shorter shelf life than commercial versions. Trust your senses. If mochi smells sour or shows mold, discard immediately.
Frequently Asked Questions
What is the best way to make mochi at home?
The best way to make mochi at home depends on your equipment and priorities. The microwave method takes 5 minutes and works best for beginners wanting fast results. The steam method takes 20 minutes but produces superior chewy, elastic texture preferred by mochi enthusiasts. Both methods use the same glutinous rice flour, sugar, and water base. Choose microwave for convenience and steam for authenticity.
How do you make a simple mochi?
Simple mochi requires just three core ingredients: 1 cup glutinous rice flour, 1/4 cup sugar, and 1 cup water. Mix until smooth, microwave for 4 minutes total with stirring halfway through, then knead while warm and dust with cornstarch. Shape into balls and serve immediately or coat with kinako or sesame seeds.
How do you make 4 ingredient mochi?
Four ingredient mochi uses glutinous rice flour, sugar, water, and cornstarch for dusting. Combine 1 cup flour, 1/4 cup sugar, and 1 cup water. Cook using either microwave or steam method until translucent. Dust generously with cornstarch while shaping to prevent sticking. The cornstarch creates a barrier that makes the sticky dough manageable.
Is mochi good for cholesterol?
Mochi contains no cholesterol since it is made entirely from plant-based ingredients: glutinous rice flour, sugar, and water. It is naturally gluten-free and low in fat. However, fillings and coatings affect overall nutrition. Red bean paste, peanut butter, or ice cream fillings add calories and fat. Plain mochi is a relatively clean carbohydrate source.
Why is my mochi dough so sticky?
Mochi dough is naturally sticky due to the gelatinized starch in glutinous rice flour. This is normal and expected. Use generous cornstarch dusting on all surfaces, tools, and hands. Work with wet tools rather than dry ones. Wear disposable gloves dusted inside and out. Work quickly while dough is warm, as cold dough becomes even stickier.
Can you freeze homemade mochi?
Yes, homemade mochi freezes excellently for up to one month. Freeze pieces on a parchment-lined plate until solid, then transfer to an airtight freezer bag with air removed. Eat frozen mochi like ice cream, or microwave 10-15 seconds to restore fresh texture. Frozen mochi maintains quality better than refrigeration, which hardens the texture.
Start Your Mochi-Making Journey
You now have everything needed to make authentic, soft, chewy mochi at home. The microwave method gets you from ingredients to eating in under 10 minutes. The steam method rewards patience with professional-quality results. Both create delicious Japanese rice cakes you can customize endlessly.
Start with the basic recipe before exploring matcha, peanut butter, or strawberry daifuku variations. Remember that sticky dough is normal and manageable with enough cornstarch. If your first batch is not perfect, use the troubleshooting section to diagnose and fix issues.
Making mochi at home connects you to centuries of Japanese tradition while letting you create something uniquely your own. Gather your glutinous rice flour and start mixing. Your first batch of fresh, warm mochi awaits.