I remember the first time I held a properly sharpened Japanese knife. It glided through a ripe tomato without a whisper of resistance. That moment changed how I thought about kitchen tools forever.
Learning how to sharpen a Japanese knife with a whetstone is one of the most valuable skills any home cook can develop. The process takes practice, but the results are worth every minute invested. A sharp knife is safer, more efficient, and makes cooking genuinely enjoyable.
Our team has spent over three years refining our sharpening techniques, testing different whetstones, and consulting with professional sharpeners. This guide combines everything we have learned into a practical, step-by-step resource that works for beginners and intermediate sharpeners alike.
By the end of this article, you will understand exactly how to restore a razor-sharp edge to your Japanese knives. We will cover everything from stone selection to the subtle techniques that separate good edges from exceptional ones.
Table of Contents
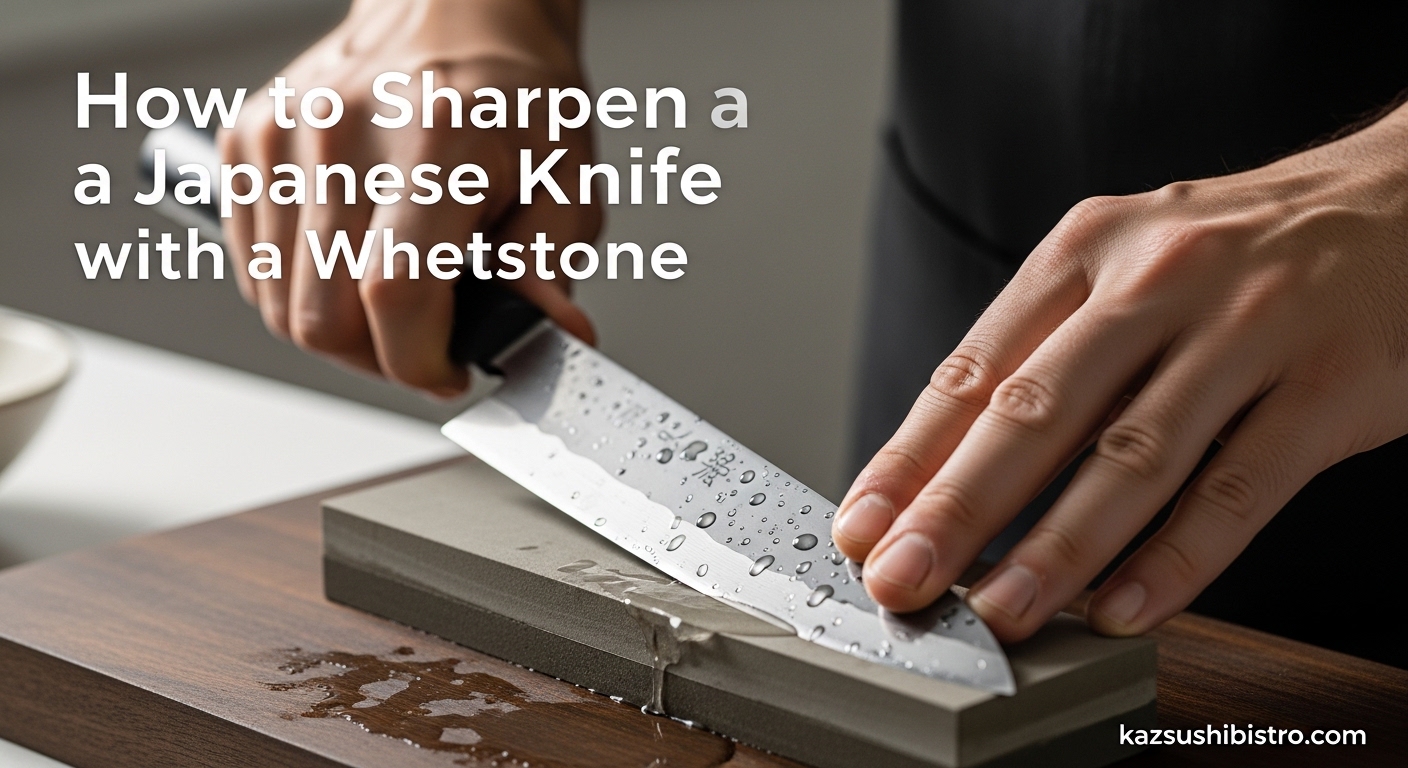
How to Sharpen a Japanese Knife with a Whetstone
Sharpening a Japanese knife with a whetstone involves soaking the stone, maintaining a consistent 10-15 degree angle, and stroking the blade across the abrasive surface until a burr forms along the edge. You then work the opposite side, progress through finer grit stones, and remove the final burr for a razor-sharp finish.
Here is the complete process at a glance:
- Soak your whetstone for the recommended time (10-15 minutes for medium grit, longer for coarse)
- Position the knife at 10-15 degrees against the stone
- Stroke the blade from heel to tip, maintaining consistent angle and pressure
- Continue until you feel a burr forming on the opposite edge
- Flip and repeat on the other side
- Progress through finer grit stones (1000, then 3000-6000)
- Remove the burr using newspaper or a finishing stone
- Test sharpness with paper or a tomato
Each step requires attention to detail. The sections below break down every phase of the process so you can follow along with confidence.
Why Japanese Knives Require Special Care
Japanese knives are fundamentally different from their Western counterparts. Understanding these differences explains why the sharpening approach matters so much.
Most Japanese kitchen knives use harder steel than Western knives. While a typical German knife registers 55-58 on the Rockwell Hardness Scale (HRC), Japanese blades often measure 60-65 HRC. This hardness allows for thinner, sharper edges that hold their apex longer.
The blade geometry also differs significantly. Japanese knives typically feature thinner profiles and more acute bevel angles. A Western chef knife might have a 20-degree inclusive edge angle, while a Japanese Gyuto sits at 15 degrees or less. This thinner geometry cuts better but requires more careful handling.
These characteristics make pull-through sharpeners and electric grinders particularly dangerous for Japanese knives. Those tools remove too much metal, generate excess heat, and cannot achieve the precise angles these blades need. A whetstone remains the only proper tool for maintaining Japanese knife geometry.
The whetstone method allows you to control exactly how much steel comes off and where. You maintain the original bevel geometry designed by the bladesmith. You also avoid the heat buildup that can ruin the temper of hard Japanese steels.
Understanding Whetstone Types and Grit Levels 2026
Before touching blade to stone, you need to understand what you are working with. Whetstones come in various grit levels, each serving a specific purpose in the sharpening progression.
Grit Levels Explained
Grit refers to the size of abrasive particles in the stone. Lower numbers mean coarser abrasives that remove more metal. Higher numbers mean finer abrasives that polish and refine.
Think of grit progression like sandpaper. You start coarse to shape and remove material, then work finer to smooth and polish. Skipping grit levels leaves scratches from previous stages visible in the final edge.
| Grit Range | Stone Type | Purpose | When to Use |
|---|---|---|---|
| 220-400 | Arato (Coarse) | Chip repair, reprofiling | When edge is damaged or very dull |
| 800-1200 | Nakato (Medium) | Primary sharpening | Regular maintenance sharpening |
| 3000-5000 | Shiageto (Fine) | Edge refinement | After medium grit, for polished edge |
| 6000-8000+ | Finishing | Mirror polish | Final pass for razor edge |
For most home cooks, a three-stone progression works perfectly: 1000 grit for sharpening, 3000-4000 for refinement, and 6000-8000 for finishing. You can achieve professional results with just two stones if budget is a concern.
Natural vs Synthetic Stones
Synthetic whetstones dominate the market today for good reason. They offer consistent quality, predictable performance, and reasonable prices. Brands like Shapton, King, and Naniwa produce excellent synthetic stones that serve beginners and professionals alike.
Natural stones from Japan offer unique characteristics that some sharpeners prefer. They create different slurry textures and can produce exceptional edges. However, natural stones require more knowledge to use effectively and cost significantly more.
We recommend beginners start with synthetic stones. Learn the fundamentals on predictable surfaces before exploring natural stone nuances.
Soaking vs Splash-and-Go
Traditional soaking stones need submersion in water before use. The water saturates the stone, preventing it from absorbing the liquid you add during sharpening. Most medium and coarse stones fall into this category.
Splash-and-go stones only need a splash of water before use. These modern formulations save time and store more conveniently. Many fine finishing stones use this formulation.
Always check manufacturer recommendations for your specific stones. Soaking a splash-and-go stone can damage it. Using a soaking stone dry ruins both the stone and potentially your knife.
Stone Maintenance Basics
Whetstones wear down with use, developing a hollow or dish shape in the center. This dishing makes maintaining consistent angles nearly impossible. Regular flattening keeps your stones performing correctly.
Use a flattening stone or diamond plate to keep the surface level. Mark the stone surface with pencil lines before flattening. When the lines disappear evenly across the surface, your stone is flat again.
Step-by-Step Sharpening Process
Now we arrive at the core technique. This process works for double-bevel Japanese knives, which represent the majority of home kitchen blades. We will address single-bevel knives separately later.
Step 1: Prepare Your Whetstone
Place your stone in a container of water and let it saturate. Coarse stones (220-400 grit) typically need 15-20 minutes. Medium stones (800-1200) need 10-15 minutes. Fine stones may only need a splash if they are splash-and-go variety.
The stone is ready when bubbles stop rising vigorously. You want complete saturation throughout the stone body. Place the stone on a non-slip base or damp towel to prevent movement during sharpening.
Keep a water container nearby. You will need to add water periodically as sharpening generates heat and consumes moisture.
Step 2: Establish Your Sharpening Angle
Angle consistency matters more than the exact angle you choose. Most double-bevel Japanese knives perform best at 10-15 degrees per side. This creates a total inclusive angle of 20-30 degrees.
To find 15 degrees, place the blade flat on the stone and lift the spine approximately one penny thickness (about 1.5mm) for a standard chef knife. For thinner blades, use less. For thicker blades, use slightly more.
Lock your wrist and move from your shoulder. Your arm should swing like a pendulum, maintaining that angle throughout the stroke. Practice the motion without pressure until it feels natural.
Step 3: Execute the Sharpening Stroke
Start with the knife heel at the stone’s back edge. Apply moderate pressure with two or three fingers on the blade near the edge. Push the blade forward while sliding it across the stone from heel to tip in one smooth arc.
The motion should feel like you are trying to slice a thin layer off the stone. Maintain consistent pressure and angle throughout. Lift the blade completely, return to the starting position, and repeat.
Speed matters less than consistency. Beginners should focus on smooth, controlled strokes rather than racing through repetitions. Twenty deliberate strokes beat fifty sloppy ones.
Step 4: Detect the Burr Formation
The burr is your signal that you have ground steel all the way to the edge apex. This thin wire of metal forms on the side opposite your sharpening stroke when you have successfully reached the edge.
Run your fingertip lightly across the blade, perpendicular to the edge. The burr feels like a rough, raised ridge. You can also catch it by gently dragging a fingernail across the edge surface.
Continue sharpening one side until you feel a consistent burr along the entire edge length. This typically takes 10-20 strokes for maintenance sharpening, longer if the knife is very dull.
Step 5: Work the Opposite Side
Once you have established the burr on one side, flip the knife and work the opposite bevel. Use the same angle and technique. Your goal is to create a matching burr on the original side.
You will feel the first burr diminish as you work the second side. This indicates you are successfully removing the wire edge and creating a new apex. Continue until the burr flips consistently to the first side.
At this point, your edge is established but rough. The following steps refine and polish it.
Step 6: Progress Through Grit Levels
Move to your next finer stone. Rinse the blade to remove coarse slurry. Wet the new stone appropriately.
Repeat the sharpening process on the finer stone. Use slightly lighter pressure than before. Your goal now is to remove scratches from the previous grit and refine the edge.
You will still form a burr, but it will be finer and harder to detect. Trust the process and maintain your technique. Complete both sides equally on each grit before progressing.
Continue through your finest stone. Each progression should require fewer strokes than the previous. The final stone should need only a handful of light passes per side.
Step 7: Remove the Final Burr (Kobadome)
The Kobadome technique removes the final microscopic burr without damaging your refined edge. Take a sheet of newspaper or phone book paper and lay it flat. Slice through the paper several times with your knife.
The paper’s gentle abrasion removes the burr without harsh treatment. Some sharpeners use a cork or rubber block instead. The principle remains the same: gentle removal rather than grinding.
Alternatively, strop the edge on leather or newspaper. Draw the blade backward across the surface, edge trailing. This aligns and polishes the final apex.
Step 8: Test for Sharpness
Your knife should now slice through paper smoothly, without catching or tearing. The cut should feel effortless. If the paper bunches or tears, return to your finest stone for a few more passes.
Clean the blade thoroughly and dry it immediately. Carbon steel knives need a light coat of mineral or Tsubaki oil to prevent rust.
Sharpening Angles for Different Japanese Knife Types
Different Japanese knife designs require different angle approaches. The blade geometry, intended use, and steel hardness all influence optimal sharpening angles.
| Knife Type | Bevel Type | Angle Per Side | Recommended Grit Progression |
|---|---|---|---|
| Gyuto (Chef Knife) | Double | 10-15 degrees | 1000 -> 3000 -> 6000 |
| Santoku | Double | 10-15 degrees | 1000 -> 3000 -> 6000 |
| Nakiri (Vegetable) | Double | 10-12 degrees | 1000 -> 4000 |
| Yanagiba (Sashimi) | Single | 10-12 degrees (front) | 1000 -> 3000 -> 6000-8000 |
| Deba (Fish) | Single | 12-15 degrees (front) | 800 -> 2000 |
| Usuba (Vegetable) | Single | 10-12 degrees (front) | 1000 -> 4000 -> 8000 |
These angles represent starting points. Individual knives and personal preferences may vary slightly. The key is consistency rather than exact measurement.
For double-bevel knives, work both sides equally. For single-bevel knives, the process differs significantly. Single-bevel sharpening requires understanding the shinogi line and urasuki concave back.
Single Bevel vs Double Bevel Sharpening Techniques
Most home cooks own double-bevel Japanese knives. However, traditional Japanese cutlery includes many single-bevel designs that require specialized technique.
Double Bevel Basics
Double-bevel knives have two symmetrical bevels meeting at the center. The sharpening process we described earlier applies directly. Work both sides equally, maintain consistent angles, and progress through grits normally.
Gyuto, Santoku, and Nakiri knives sold outside Japan are almost universally double-bevel. These knives offer versatility and easier maintenance for home cooks.
Single Bevel Complexity
Single-bevel knives feature one flat side (ura) and one beveled side (omote). The flat side often has a slight concave grind called the urasuki. This design creates extremely thin, precise cuts essential for traditional Japanese preparation.
Sharpening single-bevel knives requires maintaining the shinogi line. This ridge separates the blade road from the flat portion. You must preserve this geometry while sharpening.
The process involves flattening the back side completely, then working the bevel side at the correct angle. It requires significantly more skill than double-bevel sharpening.
We recommend beginners avoid practicing on expensive single-bevel knives. The technique takes months to master. Consider professional sharpening for valuable Yanagiba or Deba knives until you develop proficiency.
Understanding Burr Formation and Detection
The burr represents the most misunderstood yet critical element of sharpening. Learning to detect and manage burr separates successful sharpeners from frustrated beginners.
What Is a Burr?
A burr forms when grinding reaches the edge apex. As abrasive particles remove metal from the bevel, they eventually push a thin wire of steel over to the opposite side. This raised ridge indicates you have ground completely to the edge.
Think of it as a signal flag announcing you have successfully reached the cutting edge. Without burr formation, you have not sharpened the actual edge. You have only polished the bevel faces.
How to Detect Burr
The most reliable detection method uses your fingertips. Gently run a finger across the blade perpendicular to the edge, moving from spine toward edge. The burr feels like a rough, catch-like sensation distinct from the smooth blade surface.
Move your finger along the entire edge length. The burr should be consistent from heel to tip. If you feel it in some spots but not others, continue sharpening the areas lacking burr.
Visual inspection under bright light also works. Tilt the blade until the edge reflects light. The burr appears as a shiny line along the edge where smooth steel should exist.
Why Burr Matters
Many beginners stop sharpening before forming a proper burr. They wonder why their knife still cuts poorly despite time spent at the stone. The answer is almost always insufficient burr formation on both sides.
You must form burr on one side, then the other, then refine it away. This process ensures you have actually ground steel to the apex rather than just near it. The final edge comes from removing that burr cleanly, leaving two precisely meeting planes.
Honing vs Sharpening: Knowing the Difference
Understanding when to hone versus when to sharpen saves time and extends knife life. These processes serve different purposes and occur at different frequencies.
Sharpening Removes Metal
Sharpening creates a new edge by grinding away steel. The whetstone process described in this guide is sharpening. It reshapes the bevel and establishes a fresh apex.
Sharpening should occur every 1-3 months for home cooks, depending on usage. Professional chefs might sharpen weekly. Each session removes a small amount of material.
Honing Realigns Edge
Honing does not remove significant metal. Instead, it straightens the microscopic teeth along the existing edge. During use, these teeth bend and fold over. A honing rod (steel or ceramic) realigns them temporarily.
Hone your Japanese knives weekly or even before each use. The process takes seconds and restores cutting performance between sharpening sessions.
Proper Honing Technique
Use a ceramic rod for Japanese knives. Steel rods are too aggressive and can chip hard Japanese steels. Hold the rod vertically with the tip resting on a cutting board.
Place the knife against the rod at approximately 15 degrees. Draw the blade down and across the rod from heel to tip. Alternate sides with each stroke. Five strokes per side usually suffices.
Integrate honing into your routine. A quick hone before cooking maintains edge performance. Reserve sharpening for when honing no longer restores cutting ability.
How to Test Your Knife’s Sharpness
Knowing how to verify sharpness ensures your sharpening efforts succeed. These tests provide objective feedback on edge quality.
The Paper Test
Hold a sheet of printer paper by one corner. Attempt to slice through it starting at the paper’s edge. A truly sharp knife slices cleanly without tearing, bunching, or catching.
Try cutting curves and straight lines. The knife should follow your intended path without resistance. Any snagging indicates areas needing more refinement.
The Tomato Test
A sharp knife slices tomatoes without crushing the skin. Place a tomato on your board. Draw the knife across the surface with minimal pressure. It should pierce the skin immediately and slice smoothly.
Dull knives require sawing or significant downward force. They crush rather than cut. This test reveals edge sharpness in a practical cooking context.
The Hair Popping Test
Carefully draw the edge across arm hair. A razor-sharp knife catches and severs individual hairs with minimal contact. Exercise extreme caution with this test.
Many professionals consider this the ultimate sharpness standard. If your knife pops hair, it will handle any kitchen task effortlessly.
Common Mistakes to Avoid
Learning from others’ errors accelerates your sharpening journey. These mistakes frustrate beginners most frequently.
Inconsistent Angles
Changing your sharpening angle during the process creates a rounded, ineffective bevel rather than a crisp edge. Lock your wrist and move from the shoulder to maintain consistency.
Some variation is normal for beginners. Focus on reducing variation rather than achieving perfection immediately. Your consistency will improve with practice.
Excessive Pressure
Pressing too hard does not sharpen faster. It only creates deep scratches, wears stones prematurely, and risks chipping the edge. Use moderate pressure just sufficient to feel the blade bite into the stone.
As you progress to finer grits, reduce pressure further. The final polishing strokes should use almost no pressure at all.
Skipping Grit Levels
Jumping from 1000 grit directly to 8000 leaves deep scratches that the fine stone cannot remove. Each grit level must remove the scratches from the previous level.
Follow proper progression: coarse shapes, medium establishes, fine polishes. Skipping steps produces mediocre edges regardless of time spent.
Practicing on Valuable Knives
Start your sharpening practice on inexpensive knives. White #2 carbon steel or budget stainless blades work perfectly. Build your skills before touching expensive blades.
We ruined a beautiful $200 knife during our first sharpening attempt. That lesson cost more than a dozen practice knives would have. Learn from our mistake.
Neglecting Stone Maintenance
A dished stone makes consistent angles impossible. Flatten your stones regularly. The small time investment prevents major sharpening headaches.
After-Sharpening Care and Maintenance
Proper post-sharpening care protects your work and your knife. These steps ensure lasting performance.
Immediate Cleaning
Rinse the blade thoroughly to remove all stone slurry and metal particles. Dry immediately with a clean towel. Water left on the blade causes rust, especially on carbon steel.
Carbon Steel Protection
Carbon steel knives need oil after sharpening. Apply a thin coat of food-safe mineral oil or Tsubaki (camellia) oil. This prevents oxidation and maintains the blade’s appearance.
Store carbon steel knives dry. Consider a blade guard or saya (wooden sheath) to protect the edge and prevent moisture contact during storage.
When to Sharpen Again
Sharpen when honing no longer restores performance. If your knife struggles with tasks it previously handled easily, it needs sharpening. Waiting until the knife is completely dull makes the job harder.
Regular light sharpening maintains edges better than infrequent heavy sessions. Touch up your knives monthly rather than waiting for severe dullness.
Frequently Asked Questions
What is the best way to sharpen a Japanese knife?
The best way to sharpen a Japanese knife is using Japanese water stones (whetstones). Soak the stone for 10-15 minutes, maintain a consistent 10-15 degree angle, and stroke the blade across the stone until a burr forms. Progress through finer grit stones from 1000 to 3000 to 6000 grit for a razor-sharp edge. This method preserves the thin blade geometry that makes Japanese knives exceptional.
How to correctly sharpen a knife with a whetstone?
To correctly sharpen with a whetstone: 1) Soak the stone until bubbles stop rising, 2) Hold the knife at 10-15 degrees against the stone, 3) Stroke from heel to tip maintaining consistent angle and pressure, 4) Continue until you feel a burr on the opposite side, 5) Flip and repeat, 6) Progress through finer grit stones, 7) Remove the final burr with newspaper or a finishing stone. Consistency matters more than speed.
What not to do with Japanese knives?
Never use pull-through sharpeners, electric sharpeners, or serrated steel honing rods on Japanese knives. These tools remove too much metal, generate damaging heat, and cannot achieve the precise angles Japanese blades require. Avoid cutting through bones, frozen foods, or hard materials. Never put Japanese knives in the dishwasher. Do not store them loose in drawers where edges contact other metal.
Do Japanese knives need special sharpening?
Yes, Japanese knives require special sharpening techniques due to their harder steel (60-65 HRC) and thinner blade geometry. They need lower sharpening angles (10-15 degrees) compared to Western knives (20 degrees). Whetstone sharpening is the only recommended method. Pull-through and electric sharpeners damage Japanese knives. The process requires more care but produces superior edges.
How often should I sharpen my Japanese knife?
Home cooks should sharpen Japanese knives every 1-3 months depending on usage. Professional chefs may sharpen weekly. Hone your knife weekly or before each use to maintain alignment between sharpenings. Sharpen when honing no longer restores cutting performance. Regular light sharpening maintains edges better than waiting for severe dullness.
What grit whetstone for Japanese knives?
For Japanese knives, use a three-stone progression: 1000 grit for primary sharpening, 3000-4000 grit for refinement, and 6000-8000 grit for finishing. Beginners can start with just 1000 and 3000 grit stones. Use 220-400 grit only for chip repair or reprofiling damaged edges. Finer grits above 8000 are optional and mainly for aesthetic polish.
How do I know when I’ve formed a burr?
Detect a burr by lightly running your fingertip perpendicular across the edge, moving from spine toward edge. The burr feels like a rough, raised ridge that catches your skin. You can also see it as a shiny line reflecting light along the edge when tilted. The burr should be consistent from heel to tip. Continue sharpening until you feel this burr before switching sides.
Can I use a pull-through sharpener on Japanese knives?
Never use pull-through sharpeners on Japanese knives. These devices use preset angles too steep for Japanese blade geometry. They remove excessive metal, create heat that damages steel temper, and often leave uneven edges. The aggressive carbide teeth can chip hard Japanese steels. Whetstone sharpening is the only safe, effective method for Japanese knives.
Conclusion
Learning how to sharpen a Japanese knife with a whetstone transforms your cooking experience. A properly maintained edge glides through ingredients with precision and control. The skills you have learned in this guide will serve you for decades.
Remember that sharpening is a practice, not a destination. Your first attempts may feel awkward. Your angles may vary. That is completely normal. Every professional sharpener started exactly where you are now.
Start with an inexpensive practice knife. Focus on consistency over speed. Trust the burr as your guide. Progress through grits patiently. Before long, you will produce edges that rival professional sharpeners.
The satisfaction of maintaining your own tools adds meaning to your cooking. There is something meditative about the rhythmic stroke of blade across stone. Embrace the process. Your knives and your cooking will thank you.
Keep this guide bookmarked for reference. Return to it as you develop your skills. And most importantly, keep practicing. The journey to sharpening mastery is one of the most rewarding paths in the culinary world.