The first time I pulled a tray of glistening yakitori from my oven broiler, I couldn’t believe I had created those caramelized, sweet-savory skewers in my own kitchen. The smell of soy sauce and mirin caramelizing on tender chicken pieces transported me straight to a tiny izakaya in Tokyo’s Shinjuku district. Learning how to make yakitori at home changed my weeknight dinner game forever.
In this guide, I will walk you through everything you need to know about making authentic Japanese grilled chicken skewers. You will learn how to make yakitori sauce from scratch, master three different cooking methods, and pick up the technique tips that took me months of testing to perfect.
Whether you have a charcoal grill, an oven broiler, or just a stovetop pan, you can make restaurant-quality yakitori tonight. Let’s get started.
Table of Contents
What Is Yakitori?
Yakitori literally translates to “grilled bird” in Japanese. It refers to bite-size pieces of chicken threaded on bamboo skewers, then cooked over high heat and glazed with a sweet soy-based sauce called tare.
This dish originated in Japan during the Meiji era and has become a staple of izakaya culture. Izakayas are Japanese pubs where friends gather after work to share small plates and drinks. Yakitori stands dominate street corners during festivals, filling the air with irresistible smoky aromas.
Tare vs Shio: The Two Yakitori Styles
Traditional yakitori comes in two distinct flavor profiles. Tare style features the sweet-savory soy glaze that most people recognize. Shio style uses only salt as seasoning, letting the pure flavor of the grilled chicken shine through.
In this guide, I focus primarily on tare-style yakitori because it delivers that addictive caramelized coating everyone craves. Once you master the basics, trying shio style is as simple as skipping the sauce and sprinkling good sea salt instead.
Popular Yakitori Types
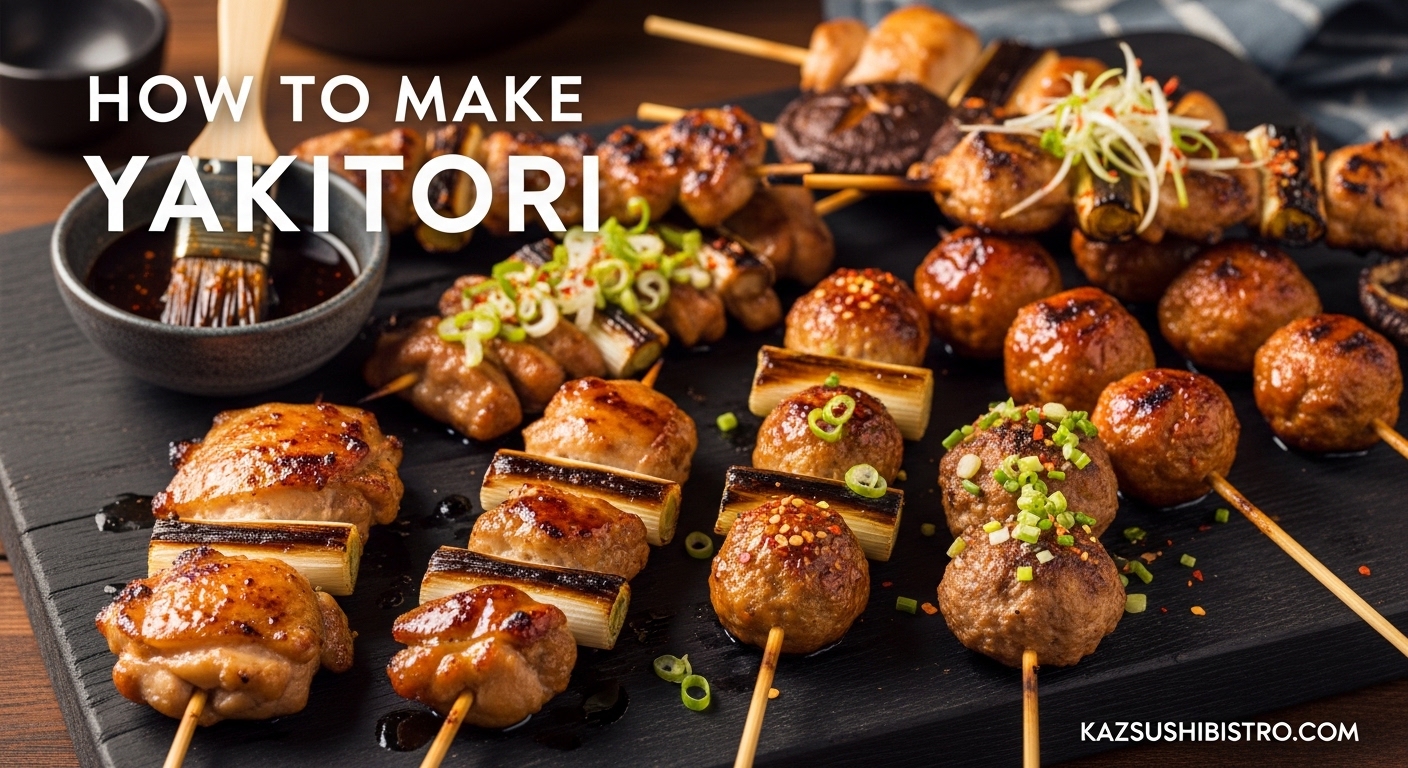
Japanese yakitori menus feature different cuts of chicken, each with its own name. Momo refers to chicken thigh meat, the most common and flavorful option. Negima combines chicken with Tokyo negi (long green onions) threaded alternately on skewers.
Other varieties include tsukune (chicken meatballs), tebasaki (chicken wings), kawa (crispy chicken skin), and bonjiri (tail meat). For beginners, I recommend starting with momo or negima because they are the most forgiving and deliver consistent results.
What You Need to Make Yakitori 2026
Gathering the right ingredients makes the difference between good yakitori and exceptional yakitori. Most items are available at regular grocery stores, though you may need to visit an Asian market for a few specialty items.
Chicken and Vegetables
Use boneless, skin-on chicken thighs for the best results. Thighs stay juicy and tender even when cooked over high heat. I prefer skin-on because the fat renders and helps create that signature caramelization. You will need about 1.5 pounds for 4 to 6 skewers.
Tokyo negi is the traditional long green onion used in negima yakitori. If you cannot find it, regular green onions or scallions work perfectly. Cut them into 1-inch lengths, using mostly the white and light green parts.
Yakitori Sauce Ingredients (Tare)
The sauce requires four basic pantry staples plus brown sugar. You will need half a cup of soy sauce, half a cup of mirin (Japanese sweet cooking wine), a quarter cup of sake (Japanese rice wine), and a quarter cup of water.
Add 2 teaspoons of brown sugar for depth and sweetness. Some cooks add a piece of kombu (dried kelp) or the green tops of green onions during simmering for extra umami. These are optional but recommended if you have them.
Equipment You’ll Need
Bamboo skewers are traditional and inexpensive. Soak them in water for 30 minutes before use to prevent burning. Metal skewers work too and eliminate the soaking step, though they can get very hot.
For cooking, you have three options. A charcoal grill with binchotan (Japanese white charcoal) delivers the most authentic flavor. An oven broiler produces excellent results with minimal equipment. A heavy cast-iron skillet on the stovetop works when outdoor grilling is not possible.
How to Make Yakitori Sauce (Tare)
The tare sauce is the soul of yakitori. This sweet-savory glaze transforms simple grilled chicken into something extraordinary. Making it from scratch takes just 15 minutes, and you can store leftovers for weeks.
Classic Tare Recipe
Step 1: Combine half a cup of soy sauce, half a cup of mirin, a quarter cup of sake, and a quarter cup of water in a small saucepan.
Step 2: Add 2 teaspoons of brown sugar. If using, add the green tops of one Tokyo negi or a 2-inch piece of kombu.
Step 3: Bring the mixture to a boil over medium heat, then reduce to a simmer.
Step 4: Let the sauce simmer for 10 to 12 minutes until it reduces by about one-third. The sauce should coat the back of a spoon lightly.
Step 5: Remove from heat and strain out the solids. Let the sauce cool completely before using.
Tare vs Teriyaki: What’s the Difference?
Many home cooks wonder if yakitori sauce is the same as teriyaki sauce. The answer is no, though they share similar DNA.
Tare sauce uses equal parts soy sauce and mirin with added sake, creating a thinner consistency perfect for repeated basting during grilling. Teriyaki sauce typically includes more sugar, garlic, and ginger, resulting in a thicker glaze applied near the end of cooking. Tare emphasizes the pure interplay of soy, mirin, and sake without additional aromatics.
Sauce Troubleshooting Tips
If your sauce is too thin after simmering, return it to the heat for 3 to 5 more minutes. If it becomes too thick, whisk in a tablespoon of water to loosen it.
The sauce should be pourable but slightly syrupy. Think maple syrup consistency rather than honey thickness. This texture allows it to coat the chicken without sliding off during cooking.
Preparing the Chicken and Skewers
Proper preparation sets you up for success. How you cut and thread the chicken determines how evenly it cooks and how tender the final result becomes.
Choosing and Cutting Chicken
Chicken thighs are non-negotiable for the best yakitori. Breast meat dries out too quickly under high heat, while thighs remain succulent even if you cook them a minute too long.
Cut the chicken into 1-inch bite-size pieces. Go slightly larger rather than smaller because the pieces shrink during cooking. Cut against the grain of the meat for maximum tenderness. Each thigh typically yields 6 to 8 pieces depending on size.
Skewering Technique
For negima-style yakitori, thread one piece of chicken onto the skewer, followed by a 1-inch piece of green onion. Continue alternating until you have 4 to 5 pieces of chicken per skewer with onions between each.
Do not overcrowd the skewers. Leave small gaps between pieces to allow heat circulation. Pieces packed too tightly will steam rather than caramelize, resulting in pale, soggy yakitori.
For pure momo yakitori without vegetables, thread 5 to 6 pieces of chicken per skewer with slight gaps between each.
Preventing Burnt Skewers
Soak bamboo skewers in water for at least 30 minutes before grilling. This prevents them from igniting over high heat. You can also fold a strip of aluminum foil and place it over the exposed skewer ends near the edge of your grill or broiler pan.
How to Make Yakitori: Three Cooking Methods
I have tested yakitori using every method available to home cooks. All three techniques below produce delicious results. Choose based on your equipment and weather conditions.
Method 1: Charcoal Grill (Traditional)
This method delivers the most authentic flavor with a subtle smokiness that defines great yakitori. If you have access to a grill, this is my top recommendation.
Prepare your charcoal for high direct heat. If using binchotan, wait until the coals are covered with white ash. For regular charcoal, spread the coals in an even layer and let them preheat for 15 minutes.
Place the skewers directly over the hottest part of the grill. Cook for 3 minutes, then flip and brush with tare sauce. Continue cooking for 3 more minutes, flipping and basting every minute. The total cooking time is 6 to 7 minutes.
Look for caramelized edges and slight charring. The sauce should bubble and darken in spots. Transfer to a platter immediately and brush with one final coat of fresh tare.
Method 2: Oven Broiler (Home Friendly)
This is the method I use most often. It requires no special equipment and produces restaurant-quality results. Many yakitori restaurants in Japan actually use broilers rather than grills for consistency.
Position your oven rack 6 to 8 inches below the broiler element. Line a baking sheet with foil for easy cleanup. Place a wire rack on top of the baking sheet to allow air circulation.
Arrange skewers on the wire rack without touching. Broil on high for 4 minutes. Remove from oven, flip the skewers, and brush generously with tare. Return to broiler for 4 more minutes.
Flip and baste again, then broil for 2 final minutes. The total cooking time is 10 minutes. Watch closely during the final 2 minutes to prevent burning. The yakitori is done when the sauce bubbles vigorously and forms dark caramelized spots.
Method 3: Stovetop Pan-Fry
When grilling outdoors is not an option and you want yakitori now, a cast-iron skillet delivers excellent results. The key is managing the heat to achieve caramelization without burning.
Heat a large cast-iron skillet over medium-high heat until smoking. Add 1 tablespoon of neutral oil like vegetable or canola oil.
Place skewers in the pan with space between them. Cook for 3 minutes until the bottom is browned. Flip and immediately brush with tare. Cook for 2 minutes, flip again, and baste. Continue flipping and basting every minute for a total of 7 to 8 minutes.
The pan method produces less char than grilling but develops excellent caramelization. The fond left in the pan adds extra flavor to the finished dish.
Pro Tips for Perfect Yakitori Every Time
After making hundreds of skewers, I have identified the key techniques that separate good yakitori from great yakitori. These tips address the most common problems home cooks face.
Do Not Over-Marinate
Unlike many grilled meats, yakitori does not benefit from long marination. Thirty minutes is the maximum time chicken should sit in the sauce before cooking. Longer marination causes the soy sauce to cure the surface, creating a tough outer layer.
If you need to prep ahead, cut and skewer the chicken up to 24 hours in advance. Store covered in the refrigerator. Brush with tare only when you are ready to cook.
Sauce Adherence Troubleshooting
The most common complaint I see in forums is sauce that slides off instead of coating the chicken. The solution is proper sauce consistency and application timing.
Apply tare only after the chicken has partially cooked and the surface has firmed up. On a grill or broiler, wait until the first flip before basting. The sauce needs a cooked surface to grip. Apply thin coats repeatedly rather than one thick layer.
Achieving Restaurant-Quality Char
That perfect balance of char and glaze comes from high heat and repeated basting. Do not be afraid of dark spots. The slight bitterness of caramelized sauce contrasts beautifully with the sweet glaze.
If your yakitori looks pale, your heat is too low or you are basting too early. Wait for the surface to sear before adding sauce.
Resting After Cooking
Let finished skewers rest for 2 minutes before serving. This allows the juices to redistribute and the sauce to set. The wait is difficult when the aroma fills your kitchen, but it makes a noticeable difference in texture.
Delicious Variations to Try
Once you master basic negima and momo yakitori, expand your repertoire with these popular variations found at Japanese izakayas.
Tsukune (Chicken Meatballs)
Ground chicken mixed with minced green onion, ginger, and panko breadcrumbs forms meatballs that are skewered and grilled. The texture is tender and bouncy, perfect for absorbing extra sauce.
Tebasaki (Chicken Wings)
Small wing sections with the bone in are skewered and grilled until crispy. The skin renders beautifully and the bone adds flavor. These take longer to cook, about 12 to 15 minutes total.
Vegetable Additions
Beyond green onions, try threading cherry tomatoes, shishito peppers, or small mushrooms between chicken pieces. Bacon-wrapped asparagus is another izakaya favorite that cooks beautifully using the same technique.
Shio Style (Salt-Only)
For a lighter option, skip the tare entirely. Grill the skewers as directed, then sprinkle with flaky sea salt and shichimi togarashi (Japanese seven-spice blend) just before serving. The pure chicken flavor shines through.
What to Serve with Yakitori
Yakitori works as an appetizer, main course, or party food. The traditional accompaniments elevate the experience from simple grilled chicken to a complete Japanese meal.
Drink Pairings
Cold Japanese beer is the classic choice. Asahi, Sapporo, or Kirin lagers cut through the richness of the glazed chicken. For something stronger, try a Japanese highball (whiskey and soda) or chilled sake.
Side Dishes
Steamed short-grain rice is essential for soaking up extra sauce. Simple salted edamame provides a fresh counterpoint. Pickled vegetables like takuan (yellow daikon) or kyuri asazuke (cucumber pickles) cleanse the palate between bites.
A small bowl of miso soup and a simple cabbage salad with sesame dressing complete the izakaya experience at home.
Storage, Reheating, and Make-Ahead Tips
Yakitori keeps surprisingly well, making it excellent for meal prep or entertaining. The components can be prepared ahead, and leftovers reheat beautifully with the right technique.
Make-Ahead Strategy
Prepare the tare sauce up to 2 weeks in advance and store in the refrigerator. Cut and skewer chicken up to 24 hours ahead. Store uncovered in the refrigerator to allow air circulation and prevent moisture buildup.
Wait to brush with sauce until just before cooking.
Storing Cooked Yakitori
Refrigerate leftover yakitori in an airtight container for up to 3 days. The sauce actually improves as it melds with the chicken overnight.
You can freeze cooked yakitori for up to 1 month. Wrap individual skewers in plastic wrap, then place in a freezer bag. Thaw overnight in the refrigerator before reheating.
Reheating Methods
The broiler is the best reheating method. Place cold yakitori on a foil-lined baking sheet and broil for 3 to 4 minutes, flipping once. The sauce will bubble and re-caramelize.
Avoid microwaving if possible as it makes the chicken rubbery. If you must use a microwave, wrap skewers in a damp paper towel and heat in 30-second intervals.
Frequently Asked Questions
Is yakitori sauce the same as teriyaki sauce?
No, they are different. Yakitori sauce (tare) uses equal parts soy sauce and mirin with sake, creating a thinner consistency perfect for basting during grilling. Teriyaki sauce is thicker, sweeter, and typically includes garlic and ginger. Tare emphasizes pure soy and mirin flavors without additional aromatics.
How to make yakitori sauce?
Combine 1/2 cup soy sauce, 1/2 cup mirin, 1/4 cup sake, 1/4 cup water, and 2 teaspoons brown sugar in a saucepan. Add green onion tops or kombu if desired. Bring to a boil, then simmer for 10-12 minutes until reduced by one-third. Strain and cool before using.
What do you need for yakitori?
You need boneless skin-on chicken thighs, bamboo or metal skewers, Tokyo negi (or green onions), and tare sauce ingredients (soy sauce, mirin, sake, brown sugar). Optional items include shichimi togarashi for seasoning and kombu for extra umami in the sauce.
How long to marinate yakitori?
Do not marinate yakitori for more than 30 minutes. Unlike other grilled meats, yakitori benefits from minimal marination. Longer exposure to soy sauce can cure the chicken surface and create a tough texture. If prepping ahead, skewer the chicken without sauce and refrigerate up to 24 hours.
Can yakitori be made without a grill?
Yes. An oven broiler produces excellent results and is the method many restaurants use. A cast-iron skillet on the stovetop also works well. Both methods deliver caramelized, flavorful yakitori without outdoor grilling equipment.
Can I use chicken breasts instead of thighs?
You can, but thighs are strongly recommended. Thighs contain more fat and connective tissue that keeps them juicy under high heat. Breast meat dries out quickly and is less forgiving if overcooked. If using breast, reduce cooking time by 2 minutes and watch carefully.
Conclusion
Learning how to make yakitori at home opens up a world of Japanese flavor that is more accessible than most people realize. With just a few ingredients and basic equipment, you can create the caramelized, sweet-savory skewers that define izakaya dining.
The key is using chicken thighs, making a proper tare sauce, and cooking with high heat while basting repeatedly. Whether you use a charcoal grill, oven broiler, or stovetop pan, the results will transport you to a Tokyo street corner with every bite.
Start with the classic negima style, then experiment with variations as your confidence grows. The recipe is forgiving, and practice truly makes perfect. Your first batch might not look exactly like the photos, but it will taste incredible. By your third attempt, you will be making yakitori that rivals your favorite Japanese restaurant.
Grab some chicken thighs, mix up a batch of tare, and fire up your broiler. Your yakitori journey starts now.