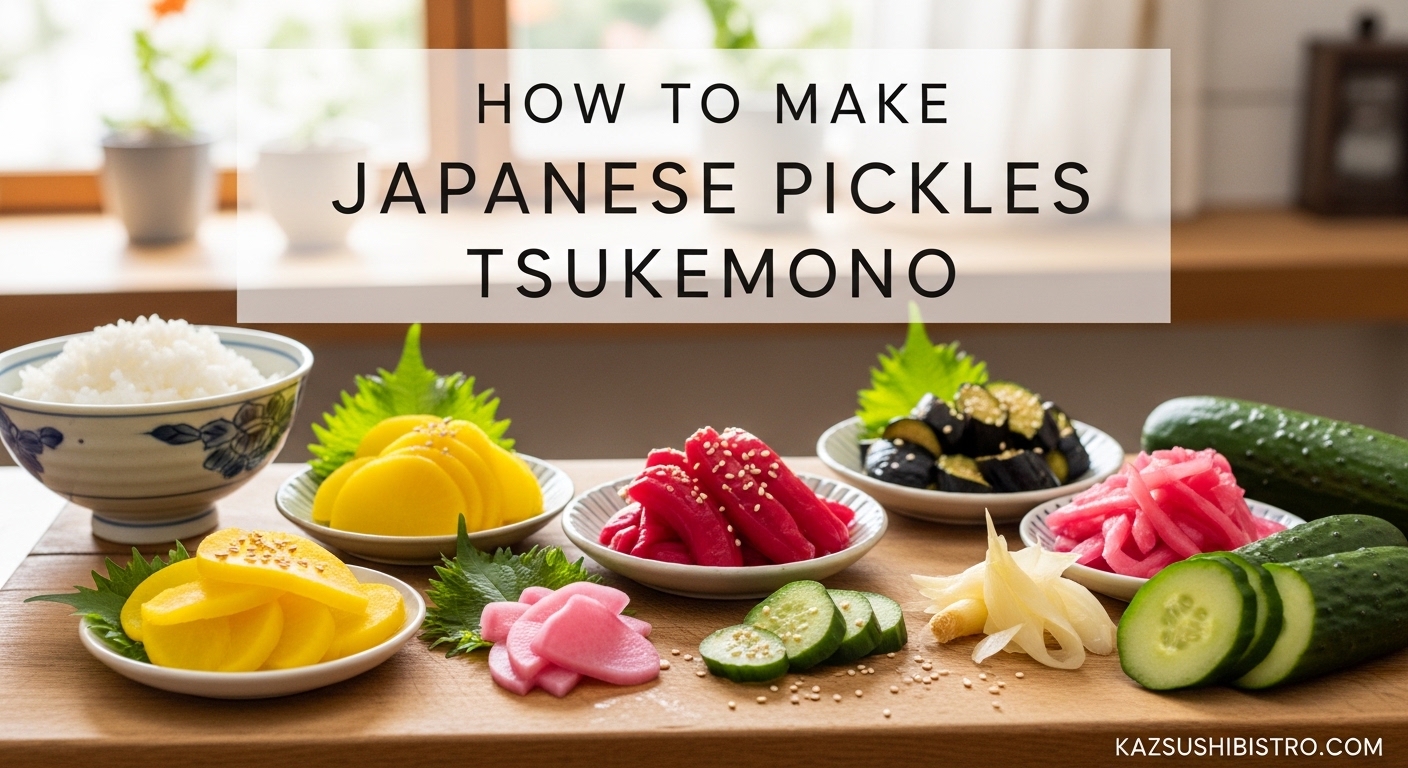
Learning how to make Japanese pickles tsukemono at home opens up a world of crisp, refreshing flavors that transform ordinary meals into authentic Japanese dining experiences. I have been making these quick pickles for over five years, and I am still amazed at how a simple combination of fresh vegetables, salt, and kombu can create something so satisfying.
Tsukemono requires just 10 minutes of active preparation time and 2 to 3 hours of waiting. You do not need special equipment or hard-to-find ingredients. By the end of this guide, you will have a batch of crunchy, umami-rich pickles ready to serve alongside rice, sushi, or any Japanese-inspired meal.
Table of Contents
What is Tsukemono?
Tsukemono translates to “pickled things” in Japanese. These preserved vegetables have been a staple of Japanese cuisine for centuries, serving multiple purposes at the dining table. They add vibrant color to otherwise neutral-toned meals, provide a refreshing crunch between bites of richer foods, and deliver beneficial enzymes that aid digestion.
Unlike Western pickles that often rely on vinegar for long-term preservation, most tsukemono use salt-based methods that create quick pickles meant for consumption within days rather than months. The Japanese categorize tsukemono based on their pickling medium. Shiozuke uses salt brine, amazuzuke combines sweet vinegar with sugar, shoyuzuke employs soy sauce, and nukazuke ferments vegetables in rice bran paste.
In a traditional washoku meal, tsukemono occupies its own position within the standard framework. You will find it served alongside the main dish, rice, soup, and other accompaniments. Restaurants often offer tsukemono as a palate cleanser between courses of sushi, allowing diners to reset their taste buds before the next piece of fish.
Three Main Pickling Methods 2026
Before diving into the recipe, understanding the three primary tsukemono techniques helps you choose the right approach for your ingredients and taste preferences. Each method produces distinct flavors and textures.
Shiozuke (Salt Pickles)
Shiozuke represents the most accessible entry point for beginners. This salt-brined method draws moisture from vegetables through osmosis, creating a concentrated, savory flavor while maintaining crunch. The asazuke variation, which means “shallow pickling,” takes just 2 to 3 hours and produces the fresh, crisp pickles most commonly served in Japanese homes and restaurants.
The key to successful shiozuke lies in the salt ratio. The standard rule calls for 2 percent salt by weight of the vegetables. For 500 grams of cabbage, you need 10 grams of salt. This proportion ensures proper flavor without overwhelming the vegetable’s natural taste.
Amazuzuke (Sweet Vinegar Pickles)
Amazuzuke combines rice vinegar with sugar to create a tangy-sweet brine that brightens vegetables. This method works beautifully with crisp produce like cucumbers, daikon radish, and celery. The acidity provides immediate flavor without the fermentation time required by other techniques.
Many home cooks appreciate amazuzuke for its forgiving nature. The balance of vinegar and sugar can be adjusted to personal preference, and the pickles develop full flavor within hours rather than days. Popular variations include adding ginger, mustard seeds, or chili for extra dimension.
Shoyuzuke (Soy Sauce Pickles)
Shoyuzuke uses soy sauce as its primary seasoning, creating deeply savory pickles with rich color. This method often incorporates additional aromatics like garlic, ginger, or sesame oil. Vegetables with sturdy structures, such as eggplant, cucumber, and root vegetables, hold up best to the soy sauce brine.
The soy sauce penetrates vegetables more slowly than salt, so shoyuzuke typically requires longer marination times ranging from several hours to overnight. The result delivers intense umami that pairs exceptionally well with steamed rice.
Ingredients and Equipment You’ll Need
Gathering the right ingredients before starting ensures smooth preparation. The beauty of tsukemono lies in its simplicity, requiring only a handful of quality components.
For the vegetables, cabbage serves as the most common starting point for beginners. Its cellular structure responds beautifully to salting, creating that signature crisp-yet-tender texture. Other excellent choices include Japanese cucumber, daikon radish, napa cabbage, and sugar snap peas. I have even used baby bok choy with excellent results.
Kombu deserves special attention. These dried kelp strips add profound umami depth to your pickles through natural glutamates. Here is a critical tip I learned after ruining my first batch. Wipe the kombu with a damp cloth to remove surface dust, but never rinse it under running water. The white powdery coating contains concentrated flavor compounds that washing away diminishes.
For salt, choose a clean-tasting variety without additives. Diamond Crystal kosher salt dissolves quickly and offers the clean flavor preferred by Japanese cooks. Avoid table salt with anti-caking agents, which can leave unpleasant aftertastes.
Equipment needs remain minimal. A large non-reactive bowl, a plate or flat object that fits inside as a weight, and clean kitchen towels constitute the essentials. Some cooks use specialized tsukemono presses, but these represent optional convenience rather than necessity.
How to Make Japanese Pickles Tsukemono
This recipe yields approximately 4 servings of crisp, flavorful pickled cabbage ready in under 3 hours. The technique applies to most vegetables, making it a versatile foundation for your tsukemono practice.
Prep Time: 10 minutes | Waiting Time: 2-3 hours | Total Time: 3 hours 10 minutes | Servings: 4
Step 1: Prepare the Vegetables
Cut half a head of green cabbage into rough 2-inch pieces. You want bite-sized chunks that will pickle evenly. Wash thoroughly and shake off excess water. The vegetables do not need to be completely dry, but pools of water dilute the salt concentration.
Step 2: Salt and Massage
Place the cabbage in a large bowl and sprinkle with salt following the 2 percent ratio. For 500 grams of cabbage, use 10 grams of salt. Massage the salt into the leaves firmly but gently for about 2 minutes. You will feel the cabbage beginning to soften as cell walls break down and moisture releases. Stop when the leaves look slightly wilted and you see liquid pooling at the bottom of the bowl.
Step 3: Add Kombu and Seasonings
Tear a 4-inch piece of kombu into bite-sized strips after wiping it clean with a damp cloth. Remember, do not rinse under water. Add the kombu to the salted cabbage along with optional seasonings like chili flakes, sesame seeds, or thinly sliced ginger. Toss everything together so the kombu pieces distribute evenly throughout the mixture.
Step 4: Weight and Wait
Cover the bowl with a clean kitchen towel or plate. Place a weight on top, such as a heavy pot or water-filled jar. The pressure accelerates moisture release and creates better texture. Set aside at room temperature for 2 to 3 hours. You can refrigerate for longer pickling up to overnight, but the flavor becomes more intense and the texture softer.
Step 5: Squeeze and Serve
Uncover the bowl and squeeze handfuls of the cabbage firmly to remove excess liquid. This step determines your final texture. For restaurant-style dry pickles, squeeze aggressively until no more liquid emerges. For juicier pickles, apply gentler pressure. Taste and adjust saltiness if needed. Some cooks rinse briefly if the result tastes too salty, though this removes some flavor compounds. Serve immediately or refrigerate for up to one week.
Vegetable Variations and Pro Tips
Once you master the basic cabbage technique, expanding your tsukemono repertoire opens endless possibilities. Different vegetables respond uniquely to salting, creating varied textures and flavors.
Japanese cucumbers make exceptional tsukemono due to their thin skins and minimal seeds. Slice them thinly and salt for just 30 minutes for a quick side dish. Daikon radish requires longer salting, typically 4 to 6 hours, to tame its peppery bite and develop sweetness.
Sugar snap peas with kombu create an elegant variation I serve at dinner parties. Blanch the peas for 30 seconds first, then pickle for 1 hour. The bright green color and sweet crunch impress guests every time.
If you cannot find kombu, several substitutions work adequately. A small piece of dried shiitake mushroom adds umami, though the flavor profile differs. Dried wakame provides some oceanic depth, though use sparingly as it expands significantly when hydrated. Even a splash of soy sauce in the final squeeze step compensates for missing kombu complexity.
Troubleshooting Common Issues
Even simple techniques occasionally produce unexpected results. Here are solutions to problems I have encountered or heard from fellow home picklers.
Slimy kombu usually indicates over-soaking. The kombu releases mucilaginous compounds when left in liquid too long. To prevent this, keep pickling times under 4 hours unless refrigerating, and always squeeze out excess liquid thoroughly. If your kombu becomes slimy, discard it and use fresh kombu for your next batch.
Overly salty pickles typically result from using too much salt or pickling too long. Rinse the vegetables briefly under cold water and squeeze again. Future batches should use the 2 percent rule precisely measured by weight rather than volume.
Limp or mushy texture indicates insufficient squeezing or overly long pickling time. For crisp results, never exceed 4 hours at room temperature, and apply firm pressure when squeezing out liquid.
Storage and Serving Suggestions
Properly squeezed tsukemono stores well in the refrigerator for 5 to 7 days. Keep it in a clean, airtight container with minimal air exposure. The salt content acts as a natural preservative, though flavor and texture degrade after the first week.
I do not recommend freezing tsukemono. The cellular structure of pickled vegetables breaks down during freezing and thawing, resulting in unappealing mushiness. Make small batches frequently rather than large batches for long-term storage.
Serving tsukemono requires no special preparation. A small mound alongside steamed rice constitutes the classic presentation. For sushi meals, serve a few pieces between different fish varieties to reset the palate. In bento boxes, tsukemono adds color and nutritional balance. Some Japanese home cooks enjoy tsukemono as a simple snack with green tea.
Frequently Asked Questions
What is the difference between shiozuke and amazuzuke?
Shiozuke uses salt as the primary pickling agent, creating savory, crisp pickles through osmosis. Amazuzuke combines rice vinegar with sugar for a tangy-sweet flavor profile. Shiozuke typically takes 2 to 3 hours, while amazuzuke can be ready in as little as 30 minutes.
How long does it take to make tsukemono?
Asazuke quick pickles take 2 to 3 hours at room temperature. Some lighter vegetables like cucumber can pickle in 30 minutes. For more developed flavor, refrigerate overnight. Traditional fermented tsukemono like nukazuke requires days or weeks.
What vegetables can be used for tsukemono?
Cabbage, Japanese cucumber, daikon radish, napa cabbage, eggplant, turnip, and sugar snap peas work excellently. Any vegetable with high water content and crisp texture responds well to salt pickling. Avoid overly soft vegetables that become mushy.
Is kombu edible in tsukemono?
Yes, kombu becomes tender and edible after pickling. Some people discard it, while others enjoy eating the umami-rich strips alongside the vegetables. If the texture bothers you, remove the kombu before serving.
Why is my kombu slimy?
Slimy kombu results from over-soaking in liquid. Kombu releases natural mucilaginous compounds when hydrated too long. Prevent this by limiting room-temperature pickling to 3 hours maximum and squeezing out all excess liquid before serving.
Start Your Tsukemono Journey
Now you understand how to make Japanese pickles tsukemono from simple ingredients using time-tested techniques. This foundational skill connects you to centuries of Japanese culinary tradition while providing an immediate, delicious reward for minimal effort.
Start with cabbage and the basic shiozuke method. Once comfortable, experiment with different vegetables and the amazuzuke or shoyuzuke techniques. Each batch teaches something new about timing, salt ratios, and personal taste preferences.
The first time you serve homemade tsukemono alongside a bowl of steamed rice, you will understand why Japanese households never let their pickle jars go empty. The refreshing crunch and deep umami satisfy in a way that only fermented or pickled foods can achieve.